Early Fall Gardening Tips from The English Lady—’Take Time to Sit and Watch the Leaves Change’

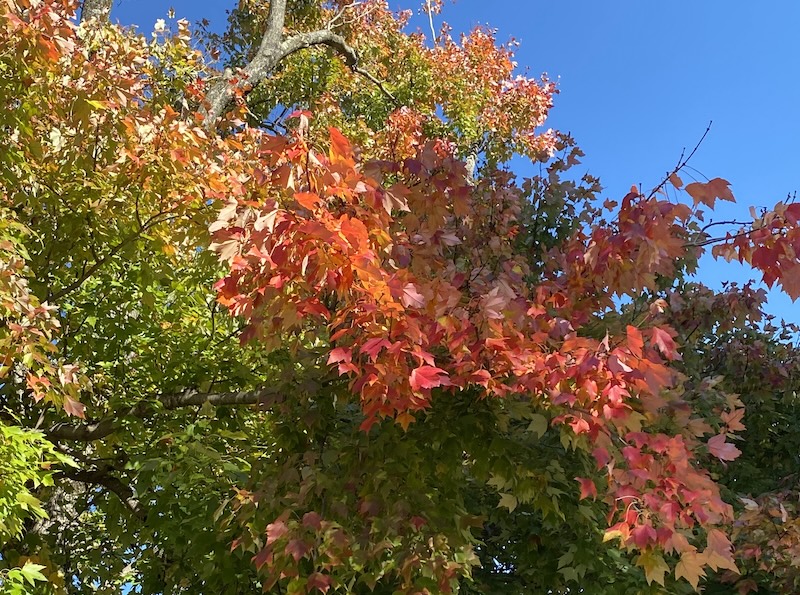
The colors of fall never cease to delight. LymeLine file photo.

Birches, Larches, Gingko, Oaks, Magnolia, and all flowering fruit and flowering trees as well as the Eastern Red Cedar.  These trees have fleshy roots, and their feeder roots are not large when young and therefore take time to establish and are susceptible to frost heave. 

Perennials that do not like to be planted in fall are Artemisia, Lambs Ears, Foxglove, Penstemon, Anemone, Campanula, Kniphofia, Lupines, Scabiosa, Ferns and Grasses.  

Plant garlic this fall – garlic is the antibiotic of the garden. Plant garlic under fruit trees to avoid scab and root disease. Also, plant garlic near to ponds or standing water to control mosquito larvae or pour garlic water into ponds, bird baths and fountains to deter adult mosquitoes.  

At this point I want to reiterate what Franklin D Roosevelt said in 1937; ‘the nation that destroys its soil destroys itself’. America has not heeded that warning. Precious soils in this country and around the world are being destroyed by dangerous practices in industrialized agriculture and poisonous chemicals, which completely disrupt our eco system and poison all living things. 

THE HUMUS COMPONENT

To begin the process of humus, add composted manure like that pictured above, three times through the year. LymeLine file photo.

Good news for organic gardeners – in your own garden you can build and retain a rich growing environment by building the Humus component. We are all carbon-based creatures as is all life on earth. Not only humans but also our soil microbes need carbon to flourish.  To attract carbon from the atmosphere is needed to build the humus component.  

To begin the process of humus – add composted manure three times through the year – early May, July and now in October. Manure builds soil structure and provides a rich planting environment for the following season by encouraging the millions of soil animals down below to manufacture nutrients for the roots of the plants.  

Plus add mulch in the form of natural brown fine bark mulch or wood chips that you produce from your garden – aged wood chips with a combo of leaves, twigs and branches.  

With manure and fine bark mulch, you are building the humus component.  The manure and mulch attract carbon from the air, which builds the richest organic planting environment – the humus component.  

Mulching the garden, and particularly any plants planted, divided or transplanted this fall with two inches of fine bark mulch, when the ground to cools in late October, the mulch will keep warmth and moisture in the soil and protect the roots of your plants through the winter. 

You are probably asking what are the benefits of humus? 

Humus acts like a sponge and holds 90% of its weight in water. 

Because of its negative charge – plant nutrients stick to humus with nitrogen, calcium, phosphorus and other elements, which prevents these from washing away, and acts as nature’s slow- release fertilizer. 

Humus improves soil structure, making it loose and friable, which helps plant roots move through the soil which makes for better access to nutrients, water and oxygen. 

Humus also helps filter’ toxic chemicals from the soil, much like carbon-based water filtration systems that filter toxins from your water.  

We cannot control industrialized agricultural practices – but in your own garden you can make a difference.   Grow the soil organically and the soil will grow the plants.  

Mulch and peat provide acidity, which is particularly important for any newly planted broadleaf evergreens installed in September. As previously mentioned, evergreens are shallow rooted and can heave above ground in hard frost.  I suggest that you store a few bags of topsoil and mulch in the shed or garage.  When you see exposed roots after frost heave, cover them with the soil and mulch until the plant can be resettled next spring.        

THE VEGETABLE GARDEN

This splendid vegetable garden was featured on an Old Lyme Garden Tour several years ago. LymeLine file photo.

Now let’s look at what should be done right now in the vegetable, first focusing on cover crops.  Last week I cut down the finished crops in the vegetable garden and incorporated them lightly into the soil.  

This year, my choice for a cover crop in one area of my vegetable garden is Alfalfa, which has 3.4% nitrogen content. On the opposite side of the garden, I will plant Buckwheat, which has 1.4% nitrogen content which provides nectar for beneficial insects. Then I cover the seeds with organic composted manure.  

There are many cover crops to choose from; I use white clover and rye grass in alternate years.  In spring when the earth is workable that is, not too wet or cold, the cover crop is turned into the earth as ‘green manure’.   

There is nothing better than your own homegrown organic vegetables – good for you and for the environment.  

The less hectic pace of fall provides an opportunity to rethink your gardens. The garden’s pre-winter grooming can wait for a few weeks.  You may feel that you would like a professional design, having thrown good money after bad and nothing looks right.  

If that is so then contact someone that you trust to work with you to create a plan in the fall and winter, which can be phased in next spring.  Engage someone who will listen to your wants and will stay within your budget.  My son, Ian of Landscapes by Ian.com, always says ‘it is not what you do in the garden, but how it makes you feel’.  

SPRING BULBS  

Early November is the time to plant spring bulbs. When purchasing Daffodils, choose early, mid- season and late blooming Daffodils, by doing so you will have a succession of bloom.  Be adventurous this year and go for masses of a single color for the greatest impact. No matter how small your planting area, it is the intensity that counts, with two or three dozen red Tulips or a hundred Daffodils planted on your woodland edge.  

Buying daffodils in large numbers is less expensive, it’s true the bulbs are usually smaller but that is not a problem because daffodil bulbs grow larger each year they are in the ground. Even though many say that the bulbs should be spaced six inches apart, there is no reason they cannot touch one another.  

Apply some composted manure or bulb food on the soil where bulbs are planted.  Wear gloves when you plant bulbs as they contain a skin irritant, which may cause a rash.  

The general rule is to plant bulbs about three times as deep as the bulb is tall and with the pointed end up.  This method is appropriate for most bulbs although tulips should be planted about twelve inches down if you want to produce bloom for a second year. 

Daffodils should be planted no less than nine inches down, which is below the frost line.  I suggest that you do not plant the bulbs singly for the most colorful impact, but plant in groups of odd numbers, 5,7 or 9 bulbs as odd numbers are harmonious in nature.  

Think Spring! Plant bulbs now to enjoy a display like this one next year. LymeLine file photo.

Small bulbs like crocus can be tossed gently into a shallow trench with composted manure on the bottom of the trench, about three inches deep and plant them where they land, pointed side up. For larger bulbs like tulips and daffodils dig a trench about nine inches deep and three or four feet long with  composted manure as the base and scatter these larger bulbs in the trench, also so that the pointed end of the bulb faces up!  

Personally, I treat Tulips as annuals because their first year’s bloom is the best, after that first year the bloom is never as full and vibrant; the only exception to this is the parrot tulip, which I find, flourishes for years.   

 A word of caution -Tulips are the ‘caviar’ of the bulb family. The best method to prevent them from becoming tasty items on the rodent’s menu is to soak them in an organic deer repellent, which also repels rodents. Allow the tulip bulbs to dry before planting.  

If you are unable to plant your bulbs immediately when purchased, keep them in a cool, dry place in paper bags.  The best time to plant spring bulbs in the Northeast is in mid- November. 

Observe Mother Nature; plants in nature do not grow in straight lines but in gentle curves that connect harmoniously with the earth.   

TREE WORK

Ghoose a licensed arborist. This work is much less expensive to have done in the fall after the foliage has fallen, then the arborist is able to see more clearly what needs to be done and the work goes faster – meaning less labor time and therefore is less expensive.  

If you have deep shade and want more sunlight in an area, ask the arborist to thin out the tree’s canopy and prune lower branches to make for a sunnier area, this will give you more choice of plants, that grow in dappled rather than deep shade.   

If you have a badly damaged tree, meaning over 50% damaged or diseased, then have it removed, which may allow for a sun garden or perhaps the vegetable garden you have always wanted.   

PERENNIALS

I do not cut my spent perennials to the ground in fall but leave them up so that I am able to enjoy the browns, grays, yellows and faded greens, which blend gently with winter’s muted landscape. The seed heads of the perennials are also wonderful snacks for the birds and in the dead of winter, what better sight than a red cardinal on the Winterberry bush in the snow.   

Also wait until next April to cut down ornamental grasses; their graceful foliage is lovely to enjoy with the icicles on them shining in the pale winter sun.  

However, on perennials, any spent perennials that show disease should be cut down but if the plant is more than one third diseased it should be dug up and discarded. Then throw the diseased material in the garbage not in the compost. Clean up any fallen plant debris from the soil and ONLY if it is disease and weed free, can it be added to the compost pile. 
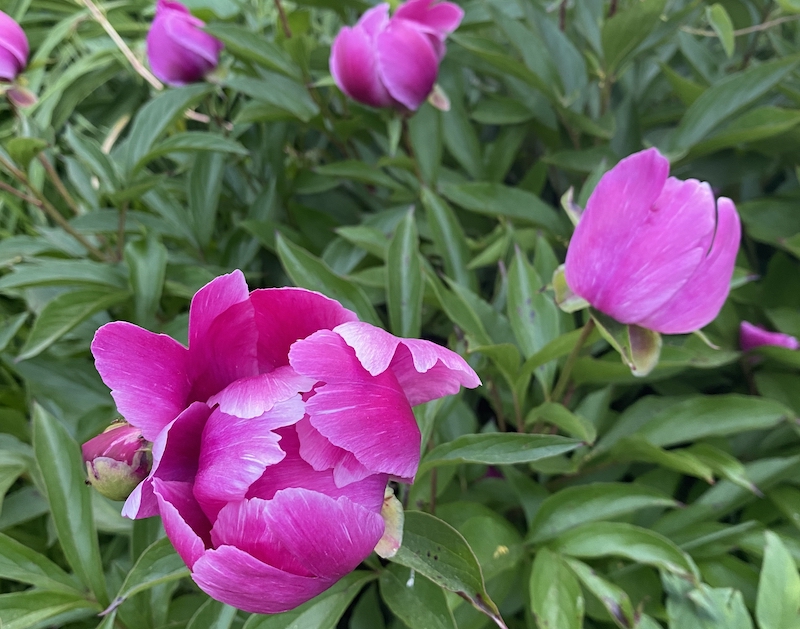
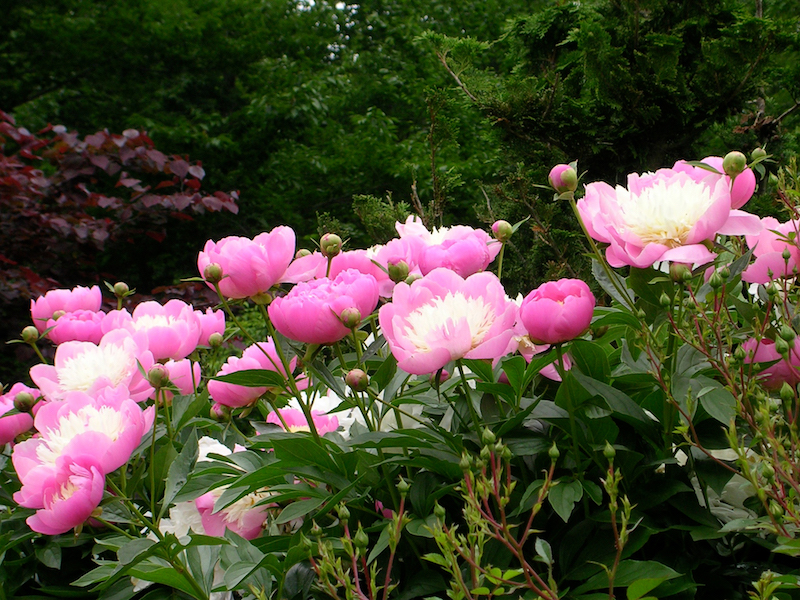
Prune peonies in November to enjoy blooms like these next May. LymeLine file photo.

Peonies – In November after the first hard frost, cut down peonies to within six inches from the ground and add some composted manure around the base of the plant. 

SIGNS OF FROST

You can foretell a hard frost when you notice the afternoon temperature falling fast under a clear sky.  Assess the wind by taking a long strip of plastic, like a shopping bag from the supermarket, and hanging it from a tree branch. If the bag flutters about a foot in either direction, you do not have to worry about frost, but if it blows vigorously then frost is on the way.  If you still have plants in the garden that are of concern, cover them with salt hay, newspapers or lightweight old quilts and put a brown paper bag from the grocery store over smaller plants like herbs, anchored down with rocks.       

Your houseplants should be indoors now. After their summer sojourn outdoors, wash the pots thoroughly and add fresh potting soil.  Then replant the plant at the same depth it was at originally and into the sink or shower and allow water to wash the foliage and water the plant well.  If the plant has outgrown its pot, transplant it to the next size clean pot, only one and a half inches larger. 

Enjoy the pleasant Fall weather and if you have any gardening questions, feel free to email me at MaureenHaseleyJones@gmail.com and I will see you in your garden in November. 

About the author: Maureen Haseley-Jones is a member of a family of renowned horticultural artisans, whose landscaping heritage dates back to the 17th century. She is one of the founders, together with her son Ian, of The English Lady Landscape and Home Company. Maureen and Ian are landscape designers and garden experts who believe that everyone deserves to live in an eco-conscious environment and enjoy the pleasure that it brings. Maureen learned her design skills from both her mother and grandmother, and honed her horticultural and construction skills while working in the family nursery and landscape business in the U.K. Her formal horticultural training was undertaken at the Royal Botanic Gardens at Kew in Surrey.
‘When it Gets Crisp in the Fall’: Gardening Tips for September from ‘The English Lady’

“Life starts all over again when it gets crisp in the fall.” – F. Scott Fitzgerald, The Great Gatsby
The colors of fall will soon be all around us. LymeLine photo.

Rain through August has been rather sparse. That said, our gardens need rain.  

In the meantime, if you are planting evergreens this month; September is the best time to plant evergreens in our zone. Evergreens planted now can begin to establish strong roots before winter and it is important to give the new evergreens a good amount of water. I suggest you make a hole in the soil with an iron stake or other piercing instrument, then feed the hose into the hole and allow water to reach the roots slowly for at least a half hour and continue with this method a few times a week until the ground freezes in November. 

Cover the earth around the plants with a light layer of composted manure and mulch. Do not apply mulch right up to the trunks of the plants as this encourages rodents to  gnaw on the bark of the plants.

Hydrangeas

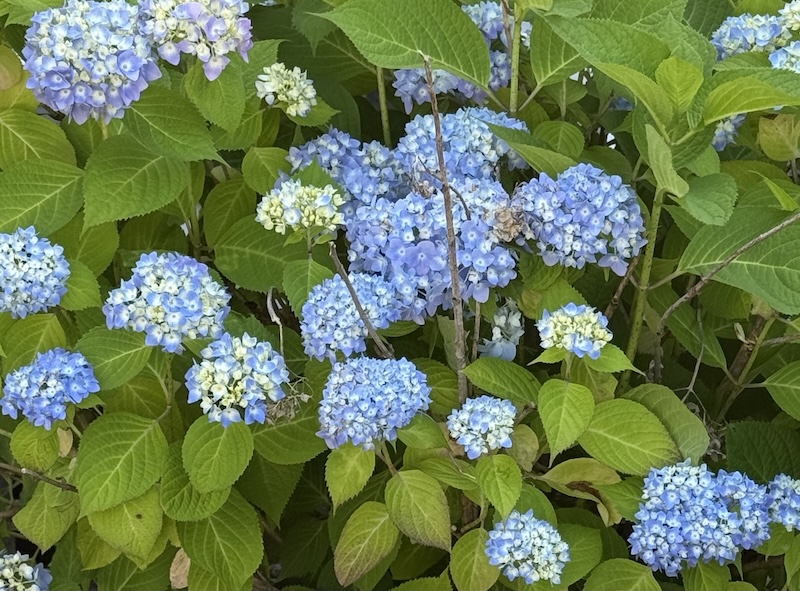
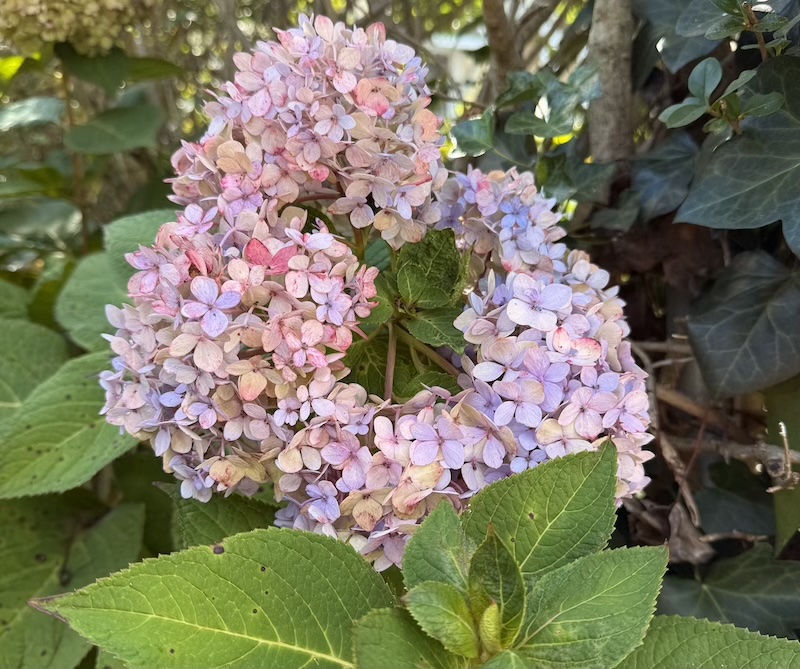
Hydrangeas do not appreciate being transplanted. LymeLine photo.

I am often asked questions regarding the pruning of hydrangeas, with fellow gardeners asking, “Maureen, why did my Hydrangeas not bloom this year”? The reason that hydrangeas do not bloom is that gardeners prune them at the wrong time. If you feel that your Hydrangea macrophylla has become too large and require pruning, prune them by mid-September.

The reason is that hydrangeas set their buds for next season by late September; pruning any later will cut off those buds, which will negate any chance of bloom for next season or even the following season. 

How to accomplish pruning successfully:
This month, prune any old woody stems that have not bloomed well and any weak new shoots. After pruning, apply a few inches of composted manure, and some peat, followed by a top dressing of natural brown bark mulch. Peat aids acidity in the soil, which is necessary as Hydrangeas may become chlorotic if the soil is too alkaline. Chlorotic means abnormal reduction or loss of normal green coloration of the leaves of the plants.

Another important note on this plant is that hydrangeas do not like to be transplanted; transplanting them can result in little to no bloom for many seasons. For that reason, I suggest when planting new hydrangeas, make sure they are at least five feet apart, so they have room to grow, receive adequate ventilation and will therefore never need to be transplanted. 

Take a Break to Contemplate

This fall, as you contemplate your landscape, think about  the past season and what worked for you in your garden and what you will never try again. 

One thing I will never forget is that mint took over the border beneath my Franklinia tree. Many years ago, my friend Roz, was kindly lending a hand in the garden and planted mint in the garden instead of a large container that I placed for that very purpose.

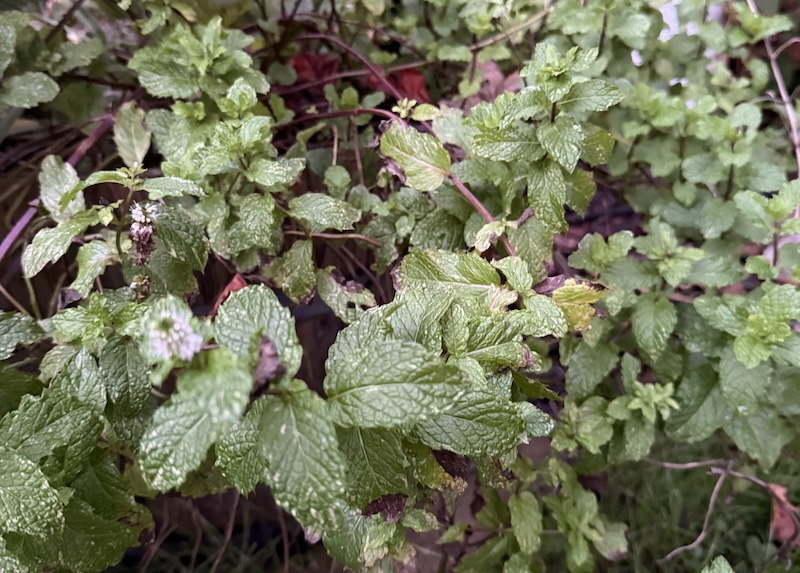
Mint grows vigorously wherever it is planted. It is always best to control its growth by planting it in a container. LymeLine photo.

I was busy with other garden chores, so by the time I noticed the error six months later, the mint was running rampant among the blue myrtle edging the borders. So, folks please take note that mint is extremely invasive and should only be planted in containers where its wayward habits can be controlled.

‘It is said that ‘a gardener’s work is never done’, but now with the season’s hard labor behind you, take a break. Sit outside and inhale the late garden fragrances and allow Mother Nature to anchor and relax you. 

In the early morning, I enjoy sitting on my patio near the herb garden, inhaling the fragrance of the sage, which I will  snip later to take indoors for drying and use in my recipes. I will also gather extra sage and lavender, which I will tie with string into small bunches to hang in my closets, which is a natural moth repellent. Some of the Lavender bunches I tuck into my drawers to keep moths from devouring my woolen garments, this works well as insects do not like fragrance. 

In the less hectic pace of fall, early autumn is the time to re-think your gardens. The garden’s pre-winter grooming will wait for a few weeks. You may feel that you would like to have professional design as you have noticed that your borders are not up to your expectations. 

If that is so, then contact someone that you trust to create a plan in the fall and winter, which can be phased in beginning next spring. Engage someone who will listen to your thoughts and stay within your budget. That being said, I respectfully offer a suggestion for a plantsman, whose company and website is LandscapesByIan.com. In the interests of full transparency, he is my son and I am confident you would enjoy speaking with him.

In your vegetable garden, sow spinach for spring harvest and sow a cover crop like winter rye, which can be dug in next spring together with composted manure as green manure. Green manure produces a rich growing environment for next year’s vegetables. 

Now is the time to get your fall compost pile cooking with the last of the grass clippings, spent perennials, leaves and small woody twigs. 

Perennials

Peonies need careful attention to create a stunning display like this. September is the month to plant and transplant them.

Also in September, dig up, divide and replant overgrown perennials. Follow this method every three to four years to ensure vibrant bloom from these plants. Never plant or transplant any division or transplant any deeper in the soil than it is now or any deeper than the plant sits in the pot.

September is the month to plant and transplant peonies. Do not plant them deeply or they will not bloom, that means having just enough soil to hold them erect with the ‘pink eyes’ on the roots barely covered. Plant them with a light application of composted manure around the plant. Then in November, following the first hard frost cut down the peony foliage to about four inches from the ground. 

Fall’s brilliant autumn finery is the last hurrah, before winter sets in. LymeLine photo.

In a few weeks, the bright vibrancy of autumn color will appear on the maples. Fall’s brilliant autumn finery is the last hurrah, before winter sets in. Climbing up the red milk shed near the barn, the buds on the autumn clematis are beginning to unfurl and in the herb garden, autumn crocus, asters and sedum will take their curtain calls. 

For your soil to remain healthy, add a light layer of composted manure to all the borders now or in early October, together with a two-inch layer of fine bark mulch around to all newly planted and transplanted perennials and shrubs. With the application of the manure and mulch you are continuing to build the humus component, which will ensure a rich growing environment for spring and protect the plants from winter’s harsh conditions. 

I do not cut down my spent perennials but leave them up for the birds; the ripened seed heads are a delicious treat for them to peck at. Following the vibrancy of summer bloom, I enjoy the softer subtle colors of gray, brown and yellow of spent perennials and ornamental grasses blending naturally with the muted winter landscape, which to me offers a resting of the senses. 

Early to mid October is a great time to be planting. The benefits of fall planting for trees, shrubs and perennials gives them a head start with root development over those planted in the spring. This is especially so when we experience late spring when planting cannot begin until late April. In New England’s fall, the cooler temperatures and still warm soil encourage the plants to direct their energy into producing strong roots.  

The following trees are not good candidates for fall planting: birches, larches, gingko, oaks, magnolia, and all flowering fruit and flowering trees as well as the Eastern red cedar. These trees have fleshy roots, and their feeder roots are not large when young and take time to establish and are susceptible to frost heave.

Some perennials that do not like to be planted in fall are Artemisia, Lambs Ears, Foxglove, Penstemon, Anemone, Campanula, Kniphofia, Lupines, Scabiosa, ferns and grasses. 

Plant garlic this month for harvest next June. Garlic is the antibiotic of the garden. Plant it under fruit trees to avoid scab and root disease, near to ponds or standing water to control mosquito larvae or pour garlic water into ponds, bird baths and fountains to deter adult mosquitoes. 

End-of-Season Bargains

This is a good time to pick up end of season plant bargains. Most nurseries and garden centers have lowered their prices, so they do not have to winter plants over in the nursery. If you do purchase a few plants, keep your eyes open for the following problems:

Potbound pots

Check the bottom of the pot to see if the roots are growing through the holes. If not, gently tap the plant out of the container to see if it has a network of overlapping roots that wrap around the root ball. It is possible to salvage a root-bound plant, which is suffering from water and nutrient deficiencies over the summer, but it will be slow to root.

Before you plant this one in your garden, cut the encircling roots – the roots will now be shorter but will take root easier. 

Diseased Plants

Plants that have been in containers all summer and have been fed high nitrogen fertilizers are easy targets for pests and diseases. Check for spots on the foliage, wilted or curling leaves and discolored roots. As well as visible signs of pest damage and infestation such as webbing or sticky residue on foliage. Not only would these plants do poorly in the garden but could infect your other plants and the soil. Soil-borne diseases are the most difficult to deal with.

Badly shaped plants

Badly shaped plants are the Charlie Brown Christmas trees of the plant world, the unwanted orphans that have been passed over year after year; these are the runts of the litter! Do not set yourself up for disappointment looking at an ugly tree or shrub just to save a few dollars.

Mislabeled plants

At the end of the season many plant tags have been lost or mixed up, which means you are likely to get a perennial with flowers that are not the color you expected. Or you may buy a deciduous tree or shrub when you are looking for an evergreen variety. Stick to the plants that are part of large displays of identically labeled plants or with labels so firmly attached that look like they have been there for a while.

With all the above-mentioned plants – always add composted manure around the plant and do not plant any deeper than it is in its pot or burlap wrapping. Always wear gloves when working with manure; there is bacteria in the manure – great for the soil but not healthy for you. 

Please note that the bargain you get is often not worth the discount price. 

New Lawn or Patch Seeding

September is an excellent time to plant new grass so the young grass plants will have the advantage over weeds. Do not buy cheap seed, you reap what you sow! 

Gently de-thatch the areas that you wish to overseed or patch. Do not use the large thatching machines, which can damage existing grass. Add some composted manure to the area, broadcast the seed and cover the newly seeded grass area with salt hay (free from weed seed). Do not allow the soil surface to dry out; keep it moist. Water gently, and do not saturate the area or the seed will wash away. 

When the grass appears, stay off it. Do not mow and leave the salt hay to rot. Next spring, a healthy lawn will emerge and if there are a few bare patches in April, you can fill in the bare spots. 

In terms of bulb planning, The English Lady recommends, “Go for masses of a single color for the greatest impact.”

I hope your spring bulb orders are in by now. Be adventurous this year and go for masses of a single color for the greatest impact. No matter how small your planting area, it is the intensity that counts, with two or three dozen red tulips or a hundred daffodils planted on your woodland edge. 

Buying daffodils in large numbers is less expensive. The bulbs are usually smaller, but this is not a problem as daffodil bulbs grow larger each year. Even though many say the spacing between these larger bulbs should be six inches, there is no reason they cannot touch. 

Put some composted manure or bulb food on the soil where the bulbs are planted. Make sure you plant the daffodils eight inches below the frost line, with the pointed end up. Wear gloves when you plant bulbs as they have a skin irritant, which may cause a rash.

If you cannot plant your bulbs when you receive them, store them in a cool, dry place in paper bags. The best time to plant spring bulbs in the Northeast is the end of October to the middle of November.

Lily of the Valley can be transplanted this month but wear gloves because there is toxicity in this plant. 

Dig up your gladioli corms, calla bulbs, elephant ear bulbs and dahlia tubers when the foliage turns yellow. Lay them in the sun to “cure” and store them in a cool, dry dark place. When you dig the dahlia tubers, do not pull them, as pulling can break the tubers. 

In September after their summer sojourn outdoors, take your houseplants indoors and wash the foliage gently and repot with new potting soil into a clean container. Repot those plants that have outgrown their pots to a clean container that is only one size larger. 

Fall and early winter is a great time to do stonework – dry laid paths, walls and patios. As well as repairing fences, arbors and pergolas and building decks. Paint wooden outdoor furniture with eco conscious paint before putting them undercover for winter.   

September is a gardener’s paradise; the air is cooler, the soil easy to work and you will not overheat with the effort. Stay awhile in your garden; enjoy the comforting fragrance of fall.      

I’ll see you in your garden next time.

Email me with gardening questions at MaureenHaseleyJones@gmail.com.

Maureen Haseley-Jones

About the author: Maureen Haseley-Jones is a member of a family of renowned horticultural artisans, whose landscaping heritage dates back to the 17th century. She is one of the founders, together with her son Ian, of The English Lady Landscape and Home Company. Maureen and Ian are landscape designers and garden experts who believe that everyone deserves to live in an eco-conscious environment and enjoy the pleasure that it brings. Maureen learned her design skills from both her mother and grandmother, and honed her horticultural and construction skills while working in the family nursery and landscape business in the U.K. Her formal horticultural training was undertaken at the Royal Botanic Gardens at Kew in Surrey.
Late Summer Gardening Tips from The English Lady—“August is Like the Sunday of Summer.”

Summer flowers can offer contrasting colors. All photos by LymeLine.

Watering is so important during the heat of summer. If you planted trees or shrubs this spring, particularly evergreens, these plants require extra moisture to establish a strong root system. We have had an abundant amount of rain this spring and into the summer, however it is important to keep an eye on the weather.  

Here in New England, plants require at least an inch of water per week.  If you are using a regular hose, you lose 40% of moisture to evaporation. However, a hose is necessary for thorough watering when a plant goes into the ground and daily watering for containers.

Soaker hoses in your borders are the best method of watering, attached to a house spigot with a timer. By using this method of irrigation, moisture goes to the roots of plants where it is needed and not on the foliage, which can cause diseases such as black spot and powdery mildew. Soaker hoses attached to a timer can be used efficiently not only in the borders of the garden but also in the vegetable garden, where annual vegetables require a lot of water to produce a good crop. 

In addition, composted manure when added to the containers together with copious amounts to the vegetable garden, helps to retain a good amount of moisture. Manure, used as mulch for the vegetable garden, adds more nutrition and manure used as mulch does not cap or form a hard crust, so water goes directly to the roots where it is needed. 

LAWNS

Water the lawn only when the green glow begins to fade.  An established lawn will bounce back following dry hot spells. 

SOIL

I want to emphasize the importance of soil and soil health, which has been severely neglected and abused with poisonous chemicals for years. Soil is the most important element of plant growth; it is not an inert medium that merely holds the plants erect, it is a living organism that needs to be replenished with nutrients.

The nutrient is composted manure; manure builds soil structure and together with its bacteria joins the millions of microbes below the surface to produce nutrients for the roots of the plants. If you have not already done so, I strongly suggest that you carefully discard all chemical fertilizers, herbicides and pesticides.

The addition of composted manure to your soil in spring, early summer and in early fall, together with natural brown bark mulch, builds the carbon compound or humus component in the soil.  We are all carbon-based creatures, as is every living element; carbon is our lifeblood and the lifeblood of the soil in our gardens.

As we build the humus component by adding composted manure and fine-bark mulch, we are producing the healthiest possible growing environment and the strongest disease resistant plants. 

As we add the composted manure and natural fine bark mulch season after season, the humus component continues to build in the soil, continuously extracting carbon from the atmosphere into the soil. 

ROSES

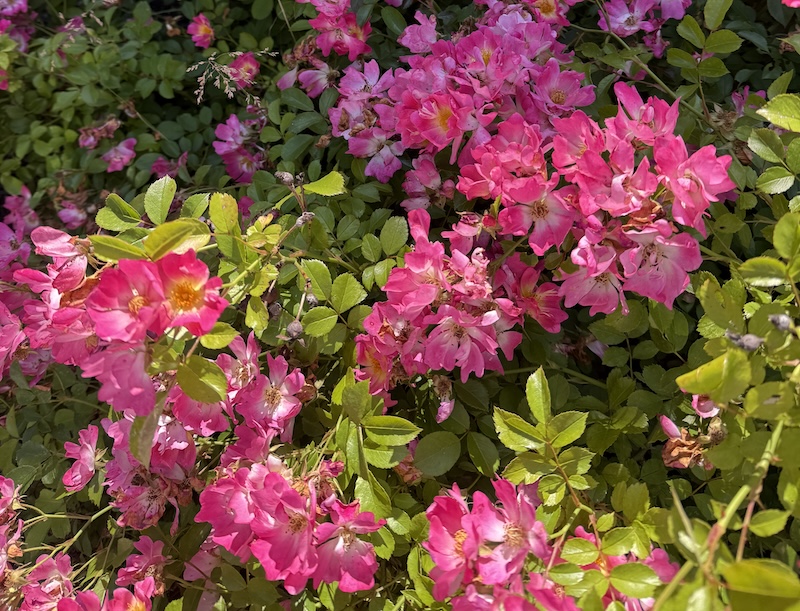
Roses bloom throughout the summer.

Roses flourish beautifully with the addition of composted manure and mulch, which should be applied on the soil about two feet away from the base of the plant. Roses also require deep watering once a week. Now, in July add another light layer of composted manure around the roses. Manure is food for the roots of the roses and no other products are necessary for growth and bloom. 

Stop adding manure to the roses in mid-August, so that they can gradually move into a slow dormancy through late summer and early fall, this is a natural part of their growth cycle.    

If you are a first-time rose grower or adding to your rose collection, David Austin English roses are my personal preference.  The David Austin nursery is only twenty-one miles from my hometown in Shropshire in England. Visiting the Rose nursery in June was a fragrant and exhilarating pleasure that overwhelmed my senses. 

 David Austin roses are more trouble-free than many other roses and with the fact that they are repeat bloomers, with beautiful colors and fragrances extends our enjoyment of this lovely shrub throughout the summer months.    

Some of my favorite David Austin roses are:

  • A Shropshire Lad, a peachy pink
  • Abraham Darby, soft shades of apricot and yellow
  • Evelyn (my favorite) produces giant apricot hued flowers
  • Fair Bianca, a pure white
  • Heritage, a soft blush pink
  • Carding Mill Valley begins as a peachy orange double flower, changing to an apricot-pink

A lovely combination is climbing roses and clematis planted together; both enjoy the same planting environment with their heads in the sun and their feet (roots) cool, with the added nutrition of manure and mulch. This combination looks great, climbing over a fence, wall or arbor. The combination I enjoyed,  was a purple clematis and a pink climbing rose,  which I planted on a trellis on the old stone chimney breast of my farmhouse.  

It is of the utmost importance to stop feeding roses right now, in August. The reason for this is that roses require at least nine weeks to gently move into slow healthy dormancy before the first frost arrives. 

In my September tips I will give you suggestions on partially pruning roses in early fall, followed by a second pruning the following April. This double pruning method produces the strongest and most prolific bloom. 

MULCH

Please do not use artificially colored red mulch, rubber mulch or cocoa mulch; use only natural brown bark mulch.  Do not mulch right up to the base of the plants, as this invites rodents to nest and gnaw on the stems or trunks of the plants.

Note of why NOT to use Cocoa mulch: Cocoa mulch, produced by Hershey,  has a Thorazine compound and other poisons which are hazardous to pets who are attracted by the chocolate odor. Ingestion of this chocolate mulch can cause seizures and death within hours.  

HYDRANGEAS

Hydrangeas need plenty of water to sustain their flowers.

Plant Hydrangeas in a sunny area, if you live near the coast that allows them to enjoy gentle seas breezes. Away from the coast, plant Hydrangeas in part sun on the west or east aspect of the garden in organically rich soil with composted manure and add extra composted manure this month around the base. 

If you have the blue macrophylla Hydrangea add some peat or aged oak bark around the base, the acidity in the peat or oak bark encourages a deeper blue color.  Hydrangeas are a wetland plant and require plenty of water throughout the summer. We had a late spring and with all the spring and early summer rain and good sunshine, the foliage and bloom of the hydrangeas are performing well. 

Watch out for powdery mildew and spray with the following powdery mildew recipe you can mix yourself:

Recipe for powdery mildew -Two tablespoons baking soda, one dessert spoon of vegetable oil, a squirt of dish soap with a gallon of water in a sprayer.  For any recipe spray you make at home, spray only in the morning when there is no wind and when the temperature and humidity added together do not go above 180. 

Pruning Hydrangeas – Prune Hydrangeas immediately after they finish blooming in late August or early September but no later, as Hydrangeas set their buds for the next season by mid September. If you prune after September, you will lose next season’s bloom.   When you prune, cut out some of the old wood and the weakest of the new shoots.  In October put more composted manure and brown mulch around the base to nourish and protect the roots through the winter. 

GARLIC

Did you know that garlic is the antibiotic of the garden. I love using garlic in my recipes. Garlic is an important anti-fungal element to protect your plants, and I suggest planting more garlic in early fall. 

To avoid fungal diseases, plant garlic around strawberries, tomatoes and raspberries to avoid fungal diseases. 

Plant garlic in these places:

  • around mildew-prone plants to prevent mildew on such plants as summer phlox and bee balm.
  • under fruit trees to avoid scab and root disease.
  • next to ponds or standing water to control mosquito larvae or pour garlic water into the water to deter adult mosquitoes. 

(The following recipes are from a garden book I am writing.) Where you notice marauders have been munching, like insects or animals make a garlic spray to apply on the plants including vegetables. 

Garlic spray recipe

4 large, crushed garlic cloves, unpeeled
2 teaspoons of vegetable oil
1 squirt of mild dish detergent

Put all ingredients in 2 cups of hot water in the blender, blend, then leave overnight, in the morning then put these ingredients in a gallon sprayer with cold water and spray in the early morning when there is no wind, observing the rule of 180.  Observing the rule of 180 is when the temperature and humidity when added together do not go above 180.

Hot pepper spray recipe

To deter squirrels and chipmunks, try a hot pepper spray using either 4 hot chilies or one cup of cayenne pepper in 2 cups of hot water, in the blender, blend and leave overnight then put in a gallon sprayer with cold water and spray the problem areas in the early morning.

 This pepper spray works well to deter squirrels, chipmunks, deer as well as dogs and cats that may be leaving their deposits in the garden. 

HANDS:

Gardener’s hands are your their tools when working in the garden so it’s important to take care of them. My hands remain healthy by indulging in a hot cream treatment once a week before bed. 

Hot Cream Recipe:

Combine Calendula cream with honey and essential oil of lavender heated in the microwave, apply generously and put on white cotton gloves for sleep. When I wake up my hands are soft and smooth as a baby’s bottom. 

Also please wear gloves, when working in soil that contains manure or when spreading manure. Manure is an organic product that contains bacteria; bacteria is great for the soil but like many bacteria not healthy for you. The garden gloves I prefer are the soft leather farmer’s gloves that are washable.  

FLAVORED OILS

Many herbs are at their peak right now and are ideal for using in flavored oils. 

The oil I use as a base is organic olive oil. I harvest basil, parsley, sage, tarragon and oregano in the morning, rinse them well, pat them dry with a paper towel and then make the recipe. Then choose an herb that you want to use that day, and add to two cups of organic oil.  

For thyme and lavender, I use only the flowers with one cup of oil to a handful of blossoms.  

Combine the herb mixture in a blender, then store covered in a wide mouthed jar for three days, shake at least three times a day for the first two days and on the third day let the mixture settle to the bottom, then strain it through a paper coffee filter or cheese cloth into a clean jar.  You will now have a tinted but clear mixture.  

Refrigerate each mixture and use within two to three weeks.  The herb oils I choose to make are rosemary, lavender, lemon, garlic, shallots and basil with olive oil as the base for each These are my favorites and are great brushed on vegetables and meats for grilling.  

The Lavender oil is great for desserts; one I enjoy is this oil on vanilla ice cream.

Rosemary and lemon oil taste excellent on salads. 

MOLES:

I know I have given you a few mole remedies in the past; but I have not given you the exlax method for a while. I can attest to the fact that I have used this method as have many of my fellow gardeners for years, as it works so well.  Buy Exlax, from the Drug store, the main ingredient of Elax is Senna, which is a natural herb. Insert Exlax into the mole holes, the moles and voles eat it then die of dehydration.  

If you have dogs and cats, do not use chocolate Exlax only the plain Exlax as chocolate is dangerous to pets.  

In early April of next year, apply organic grub control, which means less grubs for the moles to feed on, and without their supply of grubs, the moles will go elsewhere for food. In addition, the white grubs of Japanese beetles are largely diminished with the grub control.  

Japanese beetles love our plants and here is a method to deal with them naturally. In the early morning, the Japanese beetles are drowsy and can be captured.  Lay a drop cloth under the plant or plants where you see them and gently shake the plant; the drowsy beetles will drop onto the cloth, which should be gathered up and then drop them in a garbage bag and discard.   

Many of us now garden organically no longer using poisonous herbicides or insecticides, organic gardens have encouraged the earthworm population to once again increase; earthworms are a great boon to the garden soil as their castings add 50% nutrition to the soil together with eleven trace minerals.  

SUMMER PHLOX

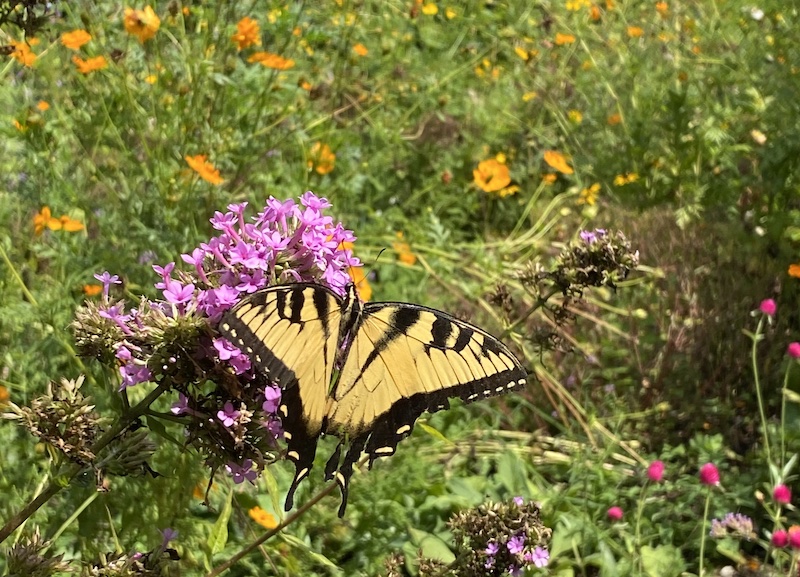
A swallowtail butterfly lands on late summer flowers.

I just love my summer phlox and to keep the mildew problems at bay I use the natural baking soda mix I mentioned above. 

I have found that white Phlox Miss Lingard or white Phlox David are more resistant to mildew than other summer phlox.  

Monarda, commonly known, as Bee Balm and Hydrangeas are also prone to the problem of powdery mildew, and this is where the baking soda recipe can be used to excellent effect.  

For a second bloom on the Summer Phlox, prune off ten to twenty inches of the flower stems after the first bloom has gone by and within a few weeks you will experience a new bloom. 

KEEP YOUR GARDEN CLEAN

A healthy garden is a clean garden. Do not put any diseased items into your compost. 

Deadhead all annuals and perennials to encourage the second bloom and clean up all spend blossoms.  

When Coreopsis and Spirea have bloomed, use garden shears to shear off dead flowers and they too will rebloom.

August has given plentiful spring and early summer rain and has resulted in bountiful fragrance, bloom and foliage.  

We have a relatively short growing season here in New England, and being able to enjoy a healthy colorful border is so uplifting. That being said, by mid-August, when early perennials have gone by, we are able to give ourselves more enjoyment by filling in gaps with annuals or later blooming perennials  

I constantly remind myself that gardens are a constantly changing scene of beauty in motion and plantings which looked good last year, but by this year they may have outgrown their space and need division or transplanting to another area of the border or even to another border which may be a little sparse. 

When the weather is cooler in September, transplanting can be tackled on some of these overgrown specimens, so that every plant has its own space with good air circulation and can be able to perform their very best. 

Divide those plants that have been in the soil for four years or more. You may have noticed that these plants have not been blooming as profusely as they did when first planted. When you divide and set aside the divisions, there are always fellow gardeners who will gratefully receive the transplants. 

Now in August, continue the deadheading; by doing so your garden will always appear fresh and perky. After the hot, dry days we have had of late, watering is of major importance. In this regard, make sure the garden receives at least one inch of water a week and containers receive a daily dose of water, in the early morning and early evening. 

Soaker hoses in the borders are a much more efficient method of watering; by using this method, the water goes straight to the roots where it is needed. By using soaker hoses you won’t lose 40% of moisture to evaporation and are also preventing water from landing on plant foliage, which in many instances results in disease and mildew.

When you cut back tired looking annuals, a new flush of bloom will appear in a few short weeks.   As you walk around the borders right now, you will see their original vibrancy  has gone by and a boost of new specimens to perk things up is required.  These specimens can be found right now because many garden centers are offering late season bargains. 

When the perennial Coreopsis and Spirea have finished blooming; cut off the dead bloom with the garden shears and enjoy the appearance of new bright bloom shortly.  

CONTAINERS

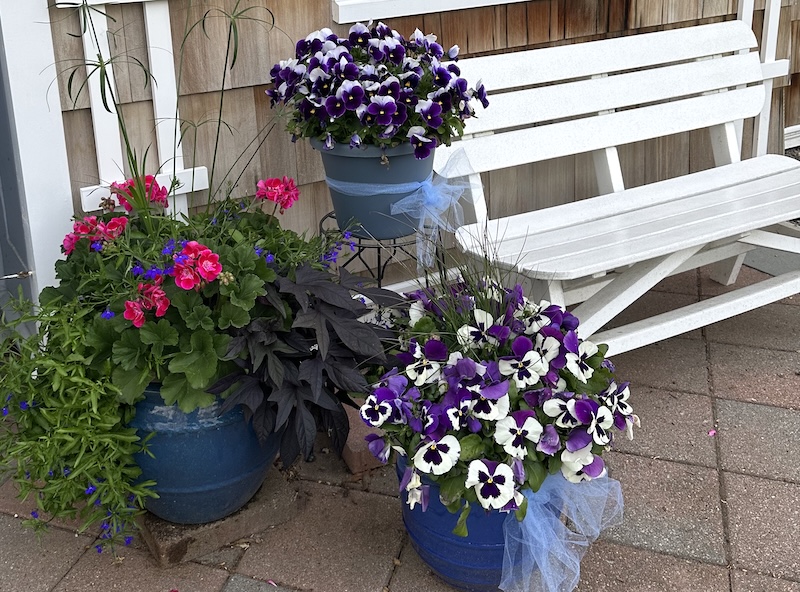
When carefully tended, container gardens always bring color to your patio or paths. We spotted these outside the Lyme Art Association.

Make sure you have composted manure and fine bark mulch applied on top of the soil in your containers and water them daily. In hot weather the containers will need to be watered twice daily, morning and evening watering is the best. If you do not have time in the morning before you leave for work or errands, empty your ice cube trays on the containers; this provides slow -release watering until you can get to them later.  

Every couple of weeks apply a little extra composted manure to containers when watering; this will keep these miniature gardens bright and cheerful into early fall. Apply the manure on top of the natural brown mulch as the combination of manure and mulch will help retain moisture and continue to retard weeds.

In the morning if you do not have time to water the containers before you go to work or run errands, simply empty your ice trays into the containers, this provides slow -release watering until you are able to add more moisture when you return home.   

With the high heat and humidity that has been occurring recently, powdery mildew may be happening on certain species like Summer Phlox, Monarda and Hydrangeas.  If you notice this problem, spray my mildew remedy of one gallon of water in a spray container, adding one tablespoon of baking soda and a dash of vegetable oil.  Always spray in the morning before the temperature and humidity numbers combined equal 160.  

Continue adding more composted manure to vegetables each month, as vegetables, particularly annual vegetables are heavy feeders. To prevent animals from munching on your precious bounty, place an old sneaker or a piece of carpet that your dog had lain on among the vegetables; these odors help keep furry marauders away. 

PEONIES

Perfectly pink peonies always brighten a yard.

Place your orders for Peonies now so they can be delivered for September planting. September is the month to transplant, divide Peonies.

Following the first hard frost in November cut any existing Peonies down to within six inches of the ground and add a little natural brown mulch around them to protect the pink-eyed roots, which are close to the soil surface. When planting Peonies or transplanting make sure that the ‘pink eyes’ on the roots are barely covered with soil, if the Peonies are planted any deeper, it is likely that you may not have bloom next year.  

Begin compiling your list of spring bulbs now for the best choice of bulbs to be available for you.

Please feel free to email me with any gardening questions to MaureenHaseleyJones@gmail.com. I look forward to seeing you in your garden in September, in the meantime enjoy being outdoors and remember to stretch, hydrate and take time to smell the bloom.

If you would like a garden consult or conversation with my son Ian, of LlandscapesbyIan.com, feel free to get in touch with him.  As the saying goes ‘ the apple does not fall far from the tree’ and in my estimation Ian has outpaced me with regard to creativity and production.

Maureen Haseley-Jones

About the author: Maureen Haseley-Jones is a member of a family of renowned horticultural artisans, whose landscaping heritage dates back to the 17th century. She is one of the founders, together with her son Ian, of The English Lady Landscape and Home Company. Maureen and Ian are landscape designers and garden experts who believe that everyone deserves to live in an eco-conscious environment and enjoy the pleasure that it brings. Maureen learned her design skills from both her mother and grandmother, and honed her horticultural and construction skills while working in the family nursery and landscape business in the U.K. Her formal horticultural training was undertaken at the Royal Botanic Gardens at Kew in Surrey.

Gardening Tips for Early Spring from ‘The English Lady’

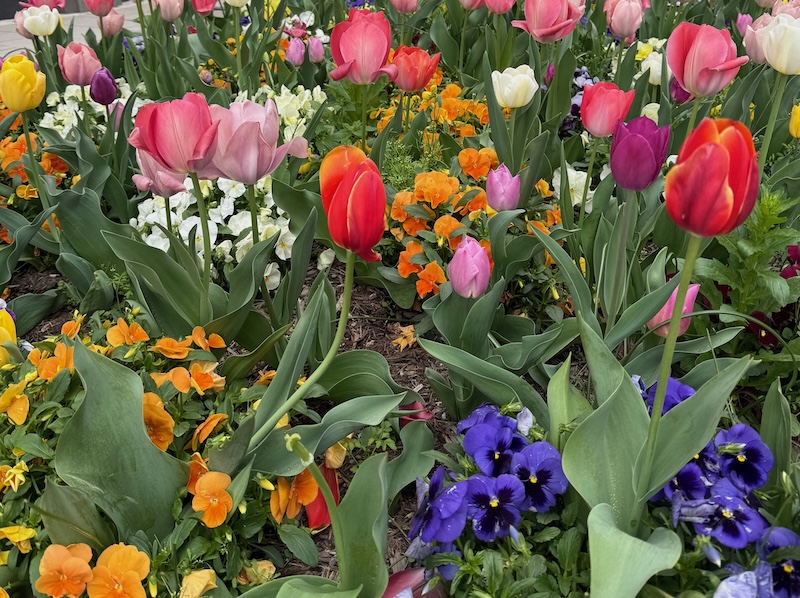
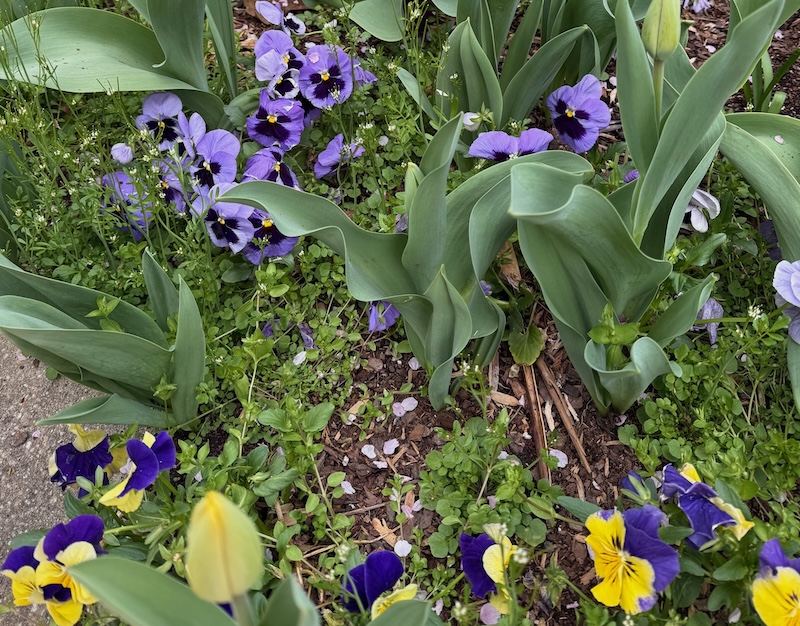
Tulips and pansies make a colorful spring display.

“Those March winds shall blow, and we shall have snow and what will the Robin do then poor thing?
He’ll hide in the barn and keep himself warm and hide his head under his wing.”   

Maureen Haseley-Jones

March was a month of “wait and see” as we anticipated walking around our gardens. This morning, I walked outside, into a westerly breeze and a gentle sun. I took a deep breath and as I did, I caught the rich fragrance of the soil beginning to awaken.

All of us are itching to get into the garden and I believe that foray will be earlier than last year since frost did not penetrate deep into the ground. 

Please wait until April to clear the winter debris from your borders, as beneficial insects like the bees are hibernating there. Bees are our life blood; they pollinate 70% of the world’s food and we are losing them in the millions, due to climate, pollution, poisonous herbicides and insecticides and just human carelessness.

The sodden soil will dry out in the next few weeks, so tread gently on our precious commodity.  I also am asking that you do not till the soil, as tilling damages soil structure and can break friable root systems. 

Please be patient right now! I know you are chafing at the bit to get your hands into the soil, but, at this moment, continue planning for the upcoming season. Planning means organizing, which helps to prevent costly gardening mistakes during the growing season.  

When you go outdoors to take a walk around the garden, check the trees and decide which ones might need pruning. For example, decide which limbs might need to be removed or the canopy lifted to allow more sunshine into a shady area of the garden. Having made some of those decisions, I suggest that you call in an arborist for tree work in March and April before foliage emerges. With a blank canvas, the work will be accomplished faster and is therefore less expensive.

You can use this time to check on broken or dead limbs and which branches require cabling. And if a tree appears to be 50% dead, then it should be removed. 

A medium shade area can be changed to a dappled shade area, allowing more sunlight in by thinning out the upper tree branches or tree canopy.

Perhaps you would like a tree removed to transform a shady area to a sunny spot, giving you a larger choice of plants. 

I always hesitate to remove a healthy tree, but sometimes a tree has been planted too close to the house which often results in the roots undermining the home’s foundation and the shading over the roof has resulted in mold and mildew. 

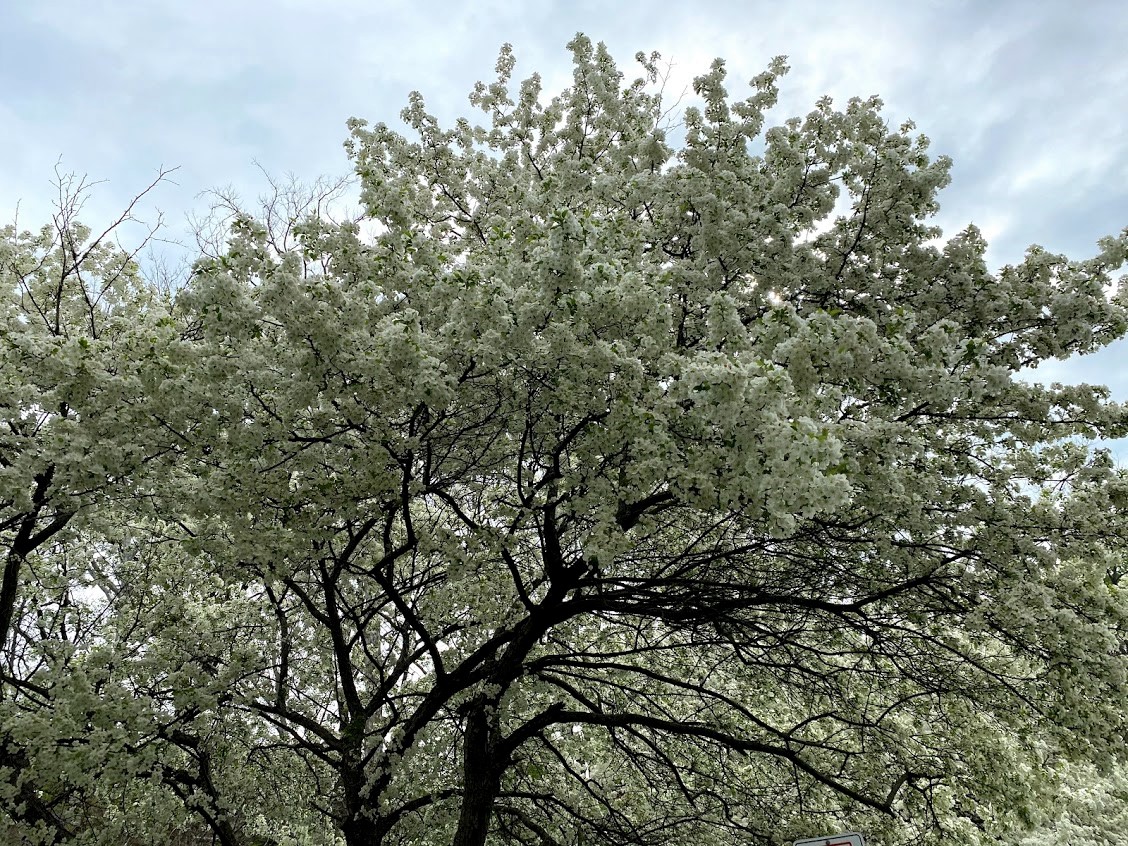
Careful pruning allows trees to bloom freely.

At this juncture, I must point out that there is an art to tree work in knowing how, when and why to cut. Work on the trees should be carried out by a professional so that at the completion of the work, the effect is both practical and aesthetically pleasing. An experienced arborist will also take into consideration the health of the trees. Also by employing an arborist, you can avoid injury to yourself, from falling from ladders or avoiding tree branches or trees falling on you.

Pruning

Pruning is one task that you may feel you are able to accomplish yourself. Some tips include:

  • Hedges can be sheared for shape, so that any stubby ends will be concealed by new spring growth. 
  • Please keep to the natural shape of the shrub – no round balls. 
  • Prune Spirea to six inches from the ground.
  • In April, prune lavender down to three inches.
  • In late March, prune sweet pepper bush (Clethra), cutting out the oldest branches.
  • Lilac – Prune back all old branches to various lengths before leaf growth begins, from two to five feet, keeping to a natural shape. Sprinkle lime around the base of the lilac and add manure in May. Lilacs enjoy alkaline soil and  benefit from a small amount of lime sprinkled about a foot away from the base of the lilac.  
  • Prune butterfly bushes to two feet from the ground now and in May apply composted manure around the base. 
  • Prune forsythia after it has bloomed, pruning out sparse flowering old wood.
  • Prune roses when the forsythia blooms. If the roses have only been in the ground for one year, do not prune, wait until October.

Do not remove the protective mulch from around the base of the roses. Wait until mid-May, and then apply a dressing of manure and fine bark mulch, about a foot away from the base of the rose.  

You may be asking, “Why wait until May to apply manure?” The answer is that the soil needs to warm up to 55 degrees, otherwise the nutrient benefits of the manure bacteria that work with plant roots and soil organisms are not activated. I suggest you invest in an inexpensive soil thermometer to check the soil temperature. When the soil temperature reaches 55 degrees, apply a 3- to 4-inch layer of composted manure. 

Tread carefully 

When you have cleared away the debris in April, treading carefully on the soil, make a clean edge to the borders with a sharp spade; this makes such a difference to the look of your garden. 

The best tool to use for this task is a sharpened lawn edger. The blade is a half-circle 9 inches wide and 4.5 inches deep with a flat top that creates a deep edge. Face the bed and thrust the edger down to its full depth and push the cut soil into the bed. Continue along the soil edge and then remove the spade and surplus clumps of soil and grass. 

Edging was one of the first lessons I was taught at our family nursery in England; my great grandfather was a strict taskmaster standing over me, until I got the edge done to his particularly proper standard.  

If you are contemplating locating a new planting bed or expanding an existing one, here are some tips:

  • Think about where you spend your leisure time outdoors, and where you may choose to sit, near to the new bed, enjoying the bloom, fragrance and structure of your plantings. 
  • From indoors are you able to view and enjoy the new border?
  • Is it an area where there will not be drainage problems, erosion concerns or water pooling?
  • Is it convenient to tend and enjoy where you place a bench or chair?
  • Will you be able to water it with relative ease?

For an informal garden I prefer a curved bed – a curved line gives grace and fluidity. Lay out a garden hose in the desired shape and size of bed, adjusting the hose until you are satisfied with the gentle curves. 

Manure

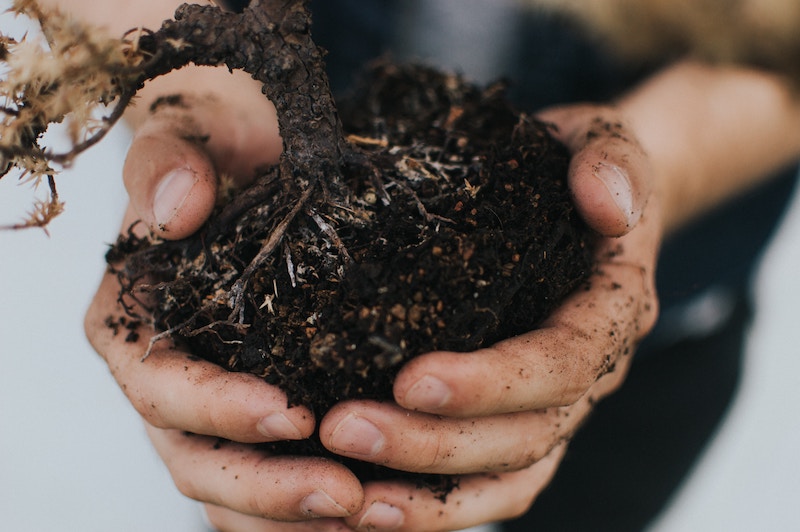
Rich manure works wonders for many plants and vegetables. Photo by Kyle Ellefson on Unsplash

When it comes to manure, many of you, who have been my radio listeners and lecture audiences, know how I feel about that wonderful natural product. Manure is not a fertilizer – it builds soil structure, aids in drainage and its bacteria encourage the millions of soil animals below the surface to come alive and work with the manure bacteria to produce nutrients for the roots of the plants.

Types of manure: 

Poultry manure – I know the odor can be rather objectionable; however, this manure contains about 2% nitrogen, one of the highest levels in any manure. If you have access to poultry manure, allow it to age for two months and by that time, the odor will have dissipated and then add it to the garden.

Horse manure is about 0.5% nitrogen. If you obtain horse manure from a stable, which has sawdust on its floors – it should be pretty weed free. What I have done in the past is obtain horse and cow manure from stables and farms in April.  When you get it home, spread manure out in a flat area (not in a planting bed) then cover it with a tarp for a month.  Using this method, the tarp will suffocate the weed seeds and the sun on the tarp encourages the manures to continue to decompose. A week before using the horse and cow manure remove the tarp to allow the sun to further decompose it. 

Cow manure is 0.25 % nitrogen and is the most available manure.  If you get horse and cow manure from the farm, ask the farmer to give you manure from the bottom of the pile so that it is already partially decomposed. 

Compost pile – If you do not have a compost pile, maybe it could go on your list for this season. Vegetable waste from the kitchen, plus grass clippings, and wood pruning can be added to the pile. The high temperature in the compost kills the weed seed and cooks all those other necessary ingredients.  The ratio of compost and manure for your garden is 1 part compost to 3 parts manure – but if you do not have compost – manure will do the trick. 

**DO NOT apply fresh manure to the garden, as it will burn the plants.  If you do not have a source of manure from a farm, purchase composted manure in bags from the garden center.

In order to produce the best-planting environment, resulting in a soil that is ‘black gold’, apply three inches of composted manure to all planted areas in May, July and October.    

Natural fine bark Mulch can be added later in May, the benefits of this mulch is that it helps to retain the beneficial moisture in the soil and aids to retard weeds. Regarding weeds, I also use a natural product, Bradfield Organics, which is a corn gluten weed pre-emergent, which keeps weeds sprouting  for a few weeks.  

Please do not use cocoa mulch, which is poisonous to dogs and cats, also do not use the chemically colored red mulch.  

The Humus Component

I know I have written about the importance of the humus component for the soil but I feel I must continue to stress this fact.

In your own garden you can build and retain a rich growing environment by building the humus component as outlined last month. We are all carbon-based creatures as is all life on earth. Not only humans but also our soil microbes need carbon to flourish. To attract carbon from the atmosphere into your soil you need to build the humus component when the soil has reached a temperature of 55 degrees.  If the soil has not reached that temperature, the soil organisms are not able to work with the bacteria in the manure to produce nutrients for the roots of the plants.  

This year, as we have not experienced deep frost, the soil temperature may therefore reach 55 degrees by the end of April or early May.  

Once again, I’m getting a little ahead of myself. So back to a cloudy day right now, when you may gradually begin to remove protective covering from shrubs and small trees. In exposed garden areas, where wind is a problem, leave the covering on until mid April. Cold wind is more damaging and drying to plants than extreme cold and frost.   

Frost Heave

If some perennials, trees and shrubs have heaved out of the ground, cover the roots with fresh topsoil or mulch until mid May when they can be settled back in place.   

I just walked around the corner of my house to check on my trellis on the chimney where I have roses and clematis planted together. Roses and clematis are a delightful combination in a companion planting. This planting method means that the rose and the clematis planted together have the same growing requirements, “feet in the shade and heads in the sun.” Beginning in May, add manure and mulch around the base of both. Discontinue feeding roses and clematis in mid-August; this enables both plants to go into a necessary slow dormancy. 

Raking and Aerating

When the lawn has dried out in April, rake lightly to remove excess debris such as leaves and dead twigs. Raking gently raises the mat of the lawn, which enables the emerging grass to breathe. Aerating machines are useful to develop a healthy lawn.  Puncture holes with the aerator which pulls out plugs of soil every four to six inches; following this treatment, root development takes off and thatch is reduced.  Do not use  large thatching machines, as these machines damage the grass.  

Grass

In April, apply organic fertilizer, lime and organic grub control before the grass begins to grow. Reseed bare or sparse spots after gently loosening the soil, liming and fertilizing, then cover the seed with salt hay to keep the seed warm and to prevent wind from blowing the seed away.  Water the seed for the first three weeks. Do not blast the area with water, which scatters the seeds. As with lilacs, grass enjoys alkaline soil which is why we use lime together with fertilizer and grub control.  

Moles

To keep the mole population to a minimum in your garden; apply organic grub control once a month from March for two months which results in less food for the moles. When you see signs of moles, find the mole holes and insert Exlax, which contains senna, an organic herb. The moles eat the Exlax and become dehydrated from defecation and die.  

Apply organic pre-emergent crabgrass killers in March and April.  

Voles 

Spread castor oil around the base of plants and keep mulch away from the base of the plants so that voles, which are canny creatures, are not able to hide there and gnaw on plants and roots. 

Deadhead

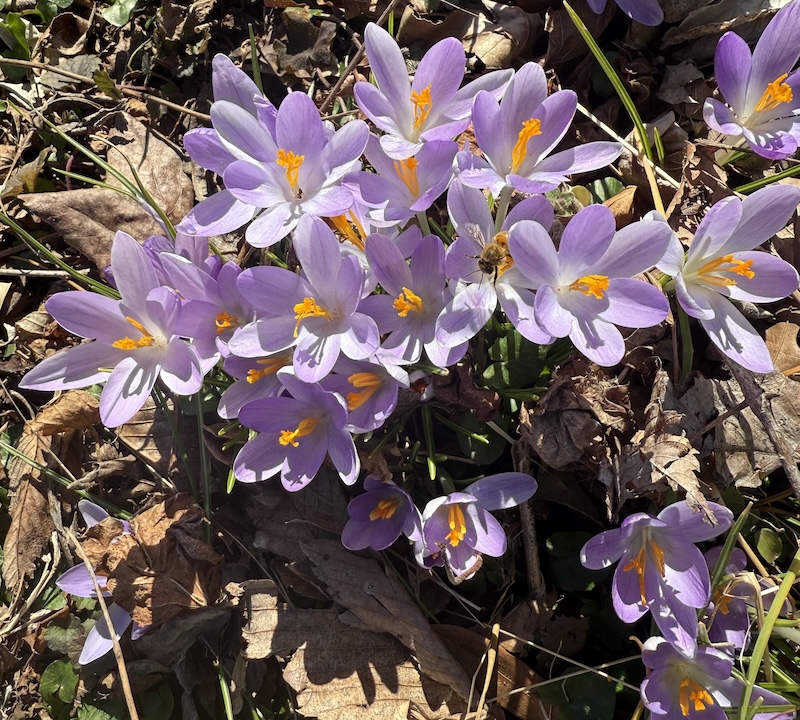
Do not cut off the leaves of the crocus as they bloom; the leaves make food for the bulbs for next season’s bloom.

Daffodils

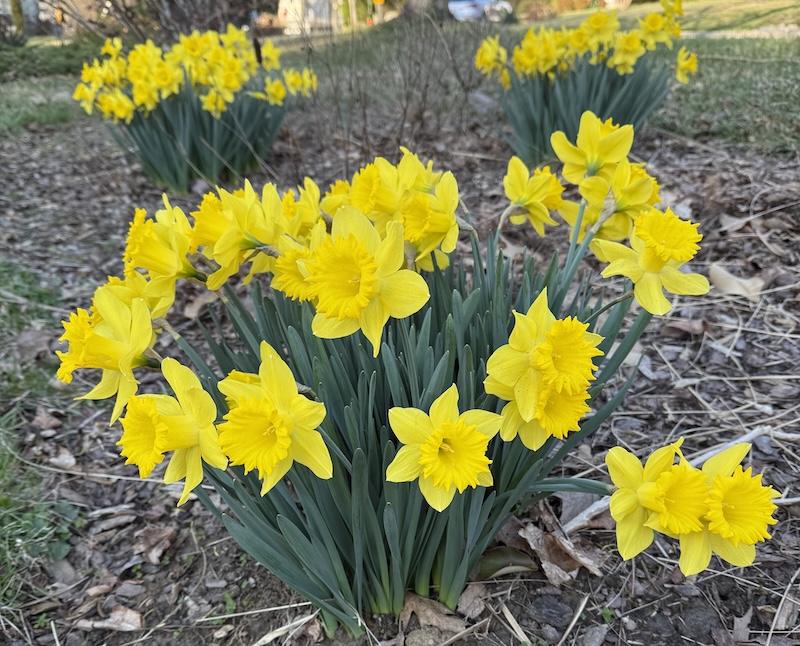
One of the joys of Spring—”A host of golden daffodils.”

When the green shoots emerge, spread composted manure around the plants.    

For daffodil displays indoors, cut the stems at an angle before adding daffodils to an arrangement, and leave them in a vase half filled with lukewarm water for a couple of hours. This is because the stems release a sap like “goop” that harms other flowers. Discard that water and add the daffodils to the other flowers.  If you recut the stems you will need to repeat the process. Change the water in the vase often.  

Perennials

In May when perennials are about four inches above soil level and when the soil is 55 degrees, apply composted manure around them to encourage healthy growth.    

Dividing Plants

At the end of April or beginning of May, you can divide late blooming perennials that have been in the ground for four years or more; these new divisions encourage stronger bloom.

Discard the older inner parts of the clumps and plant the new outside portions.  Do not plant the new divisions any deeper than they were originally in the ground. 

When dividing irises, barely cover the root system so they do not fall over. If irises are planted too deep in the soil, they will not bloom.   

It is best to pick the flowers of pansies regularly to encourage more bloom.

March or early April are the time to plant the following seeds indoors: gaillardia, salvia, marigold, zinnia, petunia, snapdragon, stock and verbena. Before planting these seeds, soak them in warm water and plant them in sphagnum moss or coir. Coir is the outer shell or fiber of the Coconut, either of these two mediums prevents a disease called “damping off”, which can cause seeds to rot before germination.

Cover pots and seed trays loosely with plastic wrap, which creates a mini greenhouse, providing moisture which seeds require to germinate.  

NOTE: Remove the plastic once the seeds have germinated, as the soil needs to drain and needs air circulation around the emerging stems.  

If you are going away on business or on vacation, reapply the plastic wrap over the pots and trays and prop some sticks or skewers in the corners. While you are away the seedlings will stay moist, and the sticks or skewers ensure that the seedlings do not encounter the plastic. 

Dormant Spring Spraying

Spraying of fruit trees, flowering cherry, crabapples, hawthorn, mountain ash and lilac can be done before the leaf buds open. Call a professional company and request that they use only organic products.  

Houseplants

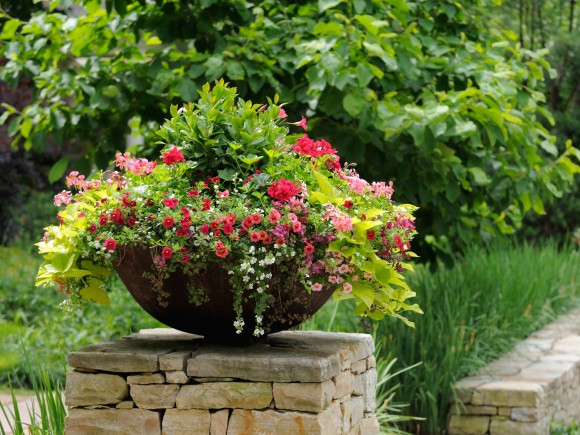
Prepare your geraniums that have spent the winter indoors for the move outside perhaps to add color to a pot like this.

Repot them if they need repotting in April.    

If you brought geraniums indoors at the end of last season, check them for new side shoots, then cut them back to four inches and repot them in clean pots about an inch and a half larger with fresh potting soil.   

Well, fellow gardeners, I know you are getting excited to be in your gardens this season and I hope that these tips have given you plenty to think about to keep you busy for a while. Enjoy photos of lovely gardens that my son Ian has designed. If you wish, contact him for a consultation at landscapesbyian.com.

Enjoy being outdoors in spring sunshine and I look forward to seeing you in your garden in April.     

About the author: Maureen Haseley-Jones is a member of a family of renowned horticultural artisans, whose landscaping heritage dates back to the 17th century. She is one of the founders, together with her son Ian, of, The English Lady Landscape and Home Company. Maureen and Ian are landscape designers and garden experts, who believe that everyone deserves to live in an eco-conscious environment and enjoy the pleasure that it brings. Maureen learned her design skills from both her mother and grandmother, and honed her horticultural and construction skills while working in the family nursery and landscape business in the U.K. Her formal horticultural training was undertaken at the Royal Botanic Gardens at Kew in Surrey.