Gardening Tips for Early Spring from ‘The English Lady’

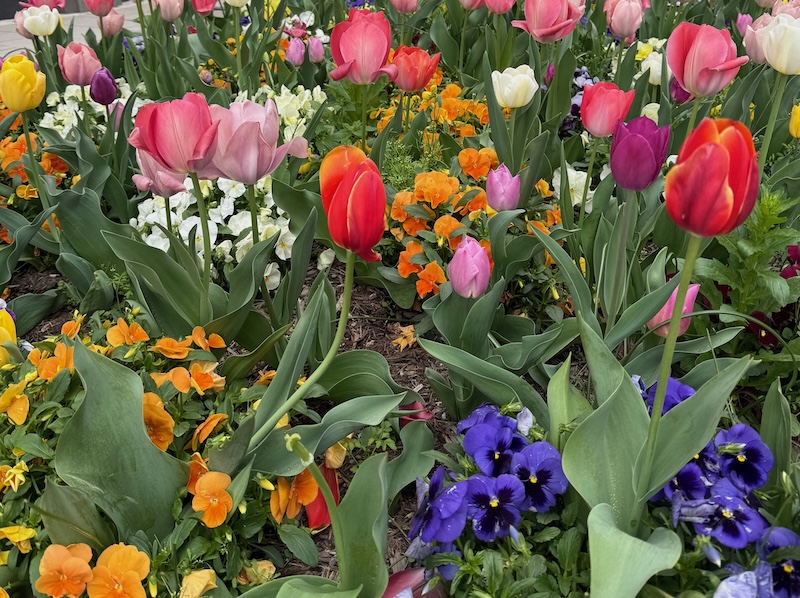
Tulips and pansies make a colorful spring display.

“Those March winds shall blow, and we shall have snow and what will the Robin do then poor thing?
He’ll hide in the barn and keep himself warm and hide his head under his wing.”   

Maureen Haseley-Jones

March was a month of “wait and see” as we anticipated walking around our gardens. This morning, I walked outside, into a westerly breeze and a gentle sun. I took a deep breath and as I did, I caught the rich fragrance of the soil beginning to awaken.

All of us are itching to get into the garden and I believe that foray will be earlier than last year since frost did not penetrate deep into the ground. 

Please wait until April to clear the winter debris from your borders, as beneficial insects like the bees are hibernating there. Bees are our life blood; they pollinate 70% of the world’s food and we are losing them in the millions, due to climate, pollution, poisonous herbicides and insecticides and just human carelessness.

The sodden soil will dry out in the next few weeks, so tread gently on our precious commodity.  I also am asking that you do not till the soil, as tilling damages soil structure and can break friable root systems. 

Please be patient right now! I know you are chafing at the bit to get your hands into the soil, but, at this moment, continue planning for the upcoming season. Planning means organizing, which helps to prevent costly gardening mistakes during the growing season.  

When you go outdoors to take a walk around the garden, check the trees and decide which ones might need pruning. For example, decide which limbs might need to be removed or the canopy lifted to allow more sunshine into a shady area of the garden. Having made some of those decisions, I suggest that you call in an arborist for tree work in March and April before foliage emerges. With a blank canvas, the work will be accomplished faster and is therefore less expensive.

You can use this time to check on broken or dead limbs and which branches require cabling. And if a tree appears to be 50% dead, then it should be removed. 

A medium shade area can be changed to a dappled shade area, allowing more sunlight in by thinning out the upper tree branches or tree canopy.

Perhaps you would like a tree removed to transform a shady area to a sunny spot, giving you a larger choice of plants. 

I always hesitate to remove a healthy tree, but sometimes a tree has been planted too close to the house which often results in the roots undermining the home’s foundation and the shading over the roof has resulted in mold and mildew. 
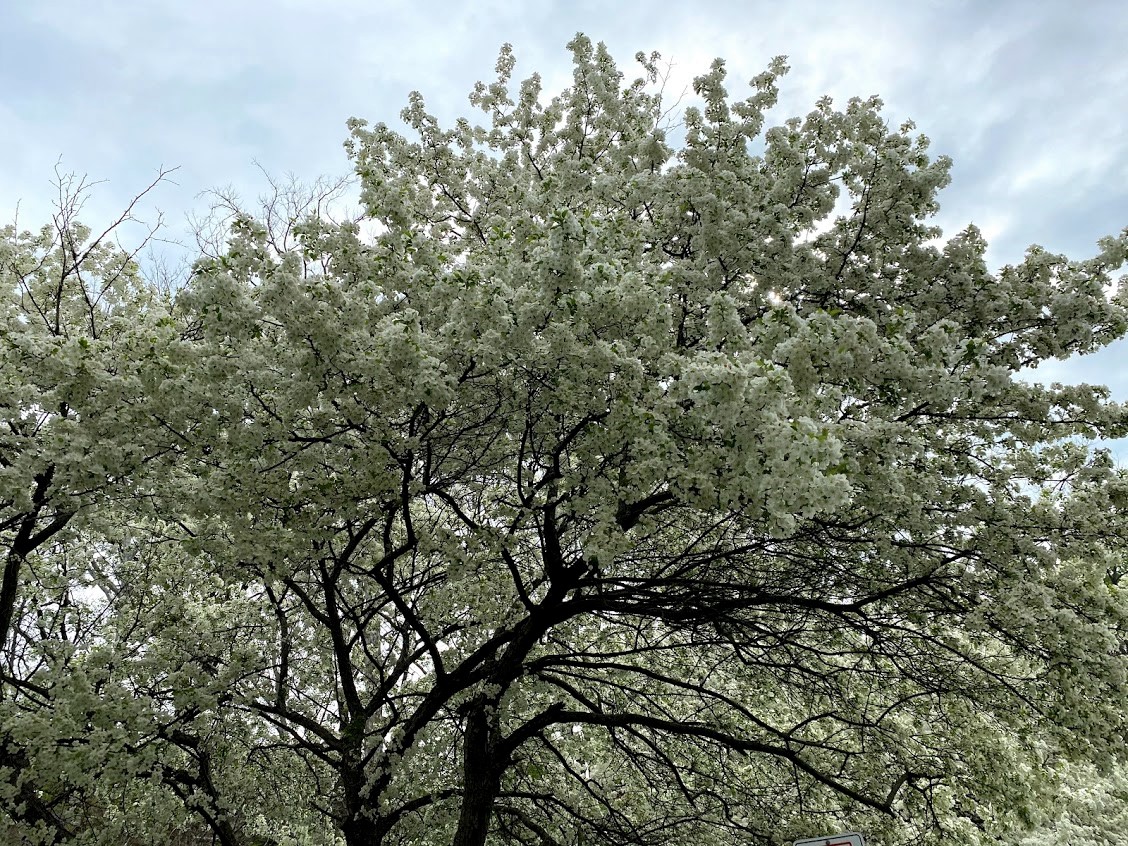
Careful pruning allows trees to bloom freely.

At this juncture, I must point out that there is an art to tree work in knowing how, when and why to cut. Work on the trees should be carried out by a professional so that at the completion of the work, the effect is both practical and aesthetically pleasing. An experienced arborist will also take into consideration the health of the trees. Also by employing an arborist, you can avoid injury to yourself, from falling from ladders or avoiding tree branches or trees falling on you.

Pruning

Pruning is one task that you may feel you are able to accomplish yourself. Some tips include:

  • Hedges can be sheared for shape, so that any stubby ends will be concealed by new spring growth. 
  • Please keep to the natural shape of the shrub – no round balls. 
  • Prune Spirea to six inches from the ground.
  • In April, prune lavender down to three inches.
  • In late March, prune sweet pepper bush (Clethra), cutting out the oldest branches.
  • Lilac – Prune back all old branches to various lengths before leaf growth begins, from two to five feet, keeping to a natural shape. Sprinkle lime around the base of the lilac and add manure in May. Lilacs enjoy alkaline soil and  benefit from a small amount of lime sprinkled about a foot away from the base of the lilac.  
  • Prune butterfly bushes to two feet from the ground now and in May apply composted manure around the base. 
  • Prune forsythia after it has bloomed, pruning out sparse flowering old wood.
  • Prune roses when the forsythia blooms. If the roses have only been in the ground for one year, do not prune, wait until October.

Do not remove the protective mulch from around the base of the roses. Wait until mid-May, and then apply a dressing of manure and fine bark mulch, about a foot away from the base of the rose.  

You may be asking, “Why wait until May to apply manure?” The answer is that the soil needs to warm up to 55 degrees, otherwise the nutrient benefits of the manure bacteria that work with plant roots and soil organisms are not activated. I suggest you invest in an inexpensive soil thermometer to check the soil temperature. When the soil temperature reaches 55 degrees, apply a 3- to 4-inch layer of composted manure. 

Tread carefully 

When you have cleared away the debris in April, treading carefully on the soil, make a clean edge to the borders with a sharp spade; this makes such a difference to the look of your garden. 

The best tool to use for this task is a sharpened lawn edger. The blade is a half-circle 9 inches wide and 4.5 inches deep with a flat top that creates a deep edge. Face the bed and thrust the edger down to its full depth and push the cut soil into the bed. Continue along the soil edge and then remove the spade and surplus clumps of soil and grass. 

Edging was one of the first lessons I was taught at our family nursery in England; my great grandfather was a strict taskmaster standing over me, until I got the edge done to his particularly proper standard.  

If you are contemplating locating a new planting bed or expanding an existing one, here are some tips:

  • Think about where you spend your leisure time outdoors, and where you may choose to sit, near to the new bed, enjoying the bloom, fragrance and structure of your plantings. 
  • From indoors are you able to view and enjoy the new border?
  • Is it an area where there will not be drainage problems, erosion concerns or water pooling?
  • Is it convenient to tend and enjoy where you place a bench or chair?
  • Will you be able to water it with relative ease?

For an informal garden I prefer a curved bed – a curved line gives grace and fluidity. Lay out a garden hose in the desired shape and size of bed, adjusting the hose until you are satisfied with the gentle curves. 

Manure
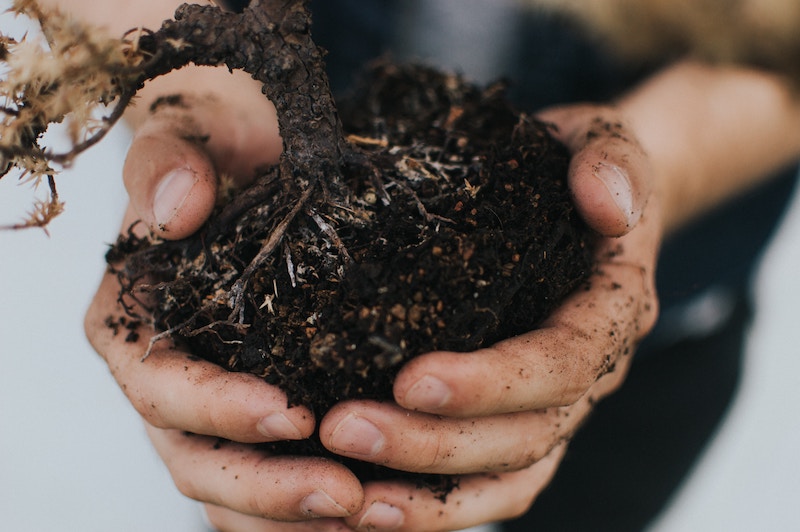
Rich manure works wonders for many plants and vegetables. Photo by Kyle Ellefson on Unsplash

When it comes to manure, many of you, who have been my radio listeners and lecture audiences, know how I feel about that wonderful natural product. Manure is not a fertilizer – it builds soil structure, aids in drainage and its bacteria encourage the millions of soil animals below the surface to come alive and work with the manure bacteria to produce nutrients for the roots of the plants.

Types of manure: 

Poultry manure – I know the odor can be rather objectionable; however, this manure contains about 2% nitrogen, one of the highest levels in any manure. If you have access to poultry manure, allow it to age for two months and by that time, the odor will have dissipated and then add it to the garden.

Horse manure is about 0.5% nitrogen. If you obtain horse manure from a stable, which has sawdust on its floors – it should be pretty weed free. What I have done in the past is obtain horse and cow manure from stables and farms in April.  When you get it home, spread manure out in a flat area (not in a planting bed) then cover it with a tarp for a month.  Using this method, the tarp will suffocate the weed seeds and the sun on the tarp encourages the manures to continue to decompose. A week before using the horse and cow manure remove the tarp to allow the sun to further decompose it. 

Cow manure is 0.25 % nitrogen and is the most available manure.  If you get horse and cow manure from the farm, ask the farmer to give you manure from the bottom of the pile so that it is already partially decomposed. 

Compost pile – If you do not have a compost pile, maybe it could go on your list for this season. Vegetable waste from the kitchen, plus grass clippings, and wood pruning can be added to the pile. The high temperature in the compost kills the weed seed and cooks all those other necessary ingredients.  The ratio of compost and manure for your garden is 1 part compost to 3 parts manure – but if you do not have compost – manure will do the trick. 

**DO NOT apply fresh manure to the garden, as it will burn the plants.  If you do not have a source of manure from a farm, purchase composted manure in bags from the garden center.

In order to produce the best-planting environment, resulting in a soil that is ‘black gold’, apply three inches of composted manure to all planted areas in May, July and October.    

Natural fine bark Mulch can be added later in May, the benefits of this mulch is that it helps to retain the beneficial moisture in the soil and aids to retard weeds. Regarding weeds, I also use a natural product, Bradfield Organics, which is a corn gluten weed pre-emergent, which keeps weeds sprouting  for a few weeks.  

Please do not use cocoa mulch, which is poisonous to dogs and cats, also do not use the chemically colored red mulch.  

The Humus Component

I know I have written about the importance of the humus component for the soil but I feel I must continue to stress this fact.

In your own garden you can build and retain a rich growing environment by building the humus component as outlined last month. We are all carbon-based creatures as is all life on earth. Not only humans but also our soil microbes need carbon to flourish. To attract carbon from the atmosphere into your soil you need to build the humus component when the soil has reached a temperature of 55 degrees.  If the soil has not reached that temperature, the soil organisms are not able to work with the bacteria in the manure to produce nutrients for the roots of the plants.  

This year, as we have not experienced deep frost, the soil temperature may therefore reach 55 degrees by the end of April or early May.  

Once again, I’m getting a little ahead of myself. So back to a cloudy day right now, when you may gradually begin to remove protective covering from shrubs and small trees. In exposed garden areas, where wind is a problem, leave the covering on until mid April. Cold wind is more damaging and drying to plants than extreme cold and frost.   

Frost Heave

If some perennials, trees and shrubs have heaved out of the ground, cover the roots with fresh topsoil or mulch until mid May when they can be settled back in place.   

I just walked around the corner of my house to check on my trellis on the chimney where I have roses and clematis planted together. Roses and clematis are a delightful combination in a companion planting. This planting method means that the rose and the clematis planted together have the same growing requirements, “feet in the shade and heads in the sun.” Beginning in May, add manure and mulch around the base of both. Discontinue feeding roses and clematis in mid-August; this enables both plants to go into a necessary slow dormancy. 

Raking and Aerating

When the lawn has dried out in April, rake lightly to remove excess debris such as leaves and dead twigs. Raking gently raises the mat of the lawn, which enables the emerging grass to breathe. Aerating machines are useful to develop a healthy lawn.  Puncture holes with the aerator which pulls out plugs of soil every four to six inches; following this treatment, root development takes off and thatch is reduced.  Do not use  large thatching machines, as these machines damage the grass.  

Grass

In April, apply organic fertilizer, lime and organic grub control before the grass begins to grow. Reseed bare or sparse spots after gently loosening the soil, liming and fertilizing, then cover the seed with salt hay to keep the seed warm and to prevent wind from blowing the seed away.  Water the seed for the first three weeks. Do not blast the area with water, which scatters the seeds. As with lilacs, grass enjoys alkaline soil which is why we use lime together with fertilizer and grub control.  

Moles

To keep the mole population to a minimum in your garden; apply organic grub control once a month from March for two months which results in less food for the moles. When you see signs of moles, find the mole holes and insert Exlax, which contains senna, an organic herb. The moles eat the Exlax and become dehydrated from defecation and die.  

Apply organic pre-emergent crabgrass killers in March and April.  

Voles 

Spread castor oil around the base of plants and keep mulch away from the base of the plants so that voles, which are canny creatures, are not able to hide there and gnaw on plants and roots. 

Deadhead

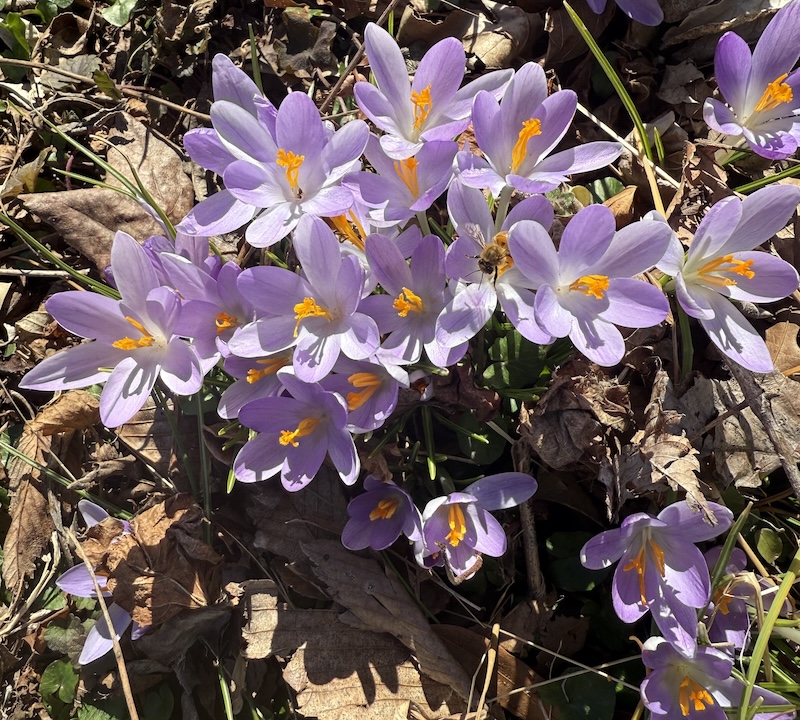
Do not cut off the leaves of the crocus as they bloom; the leaves make food for the bulbs for next season’s bloom.

Daffodils
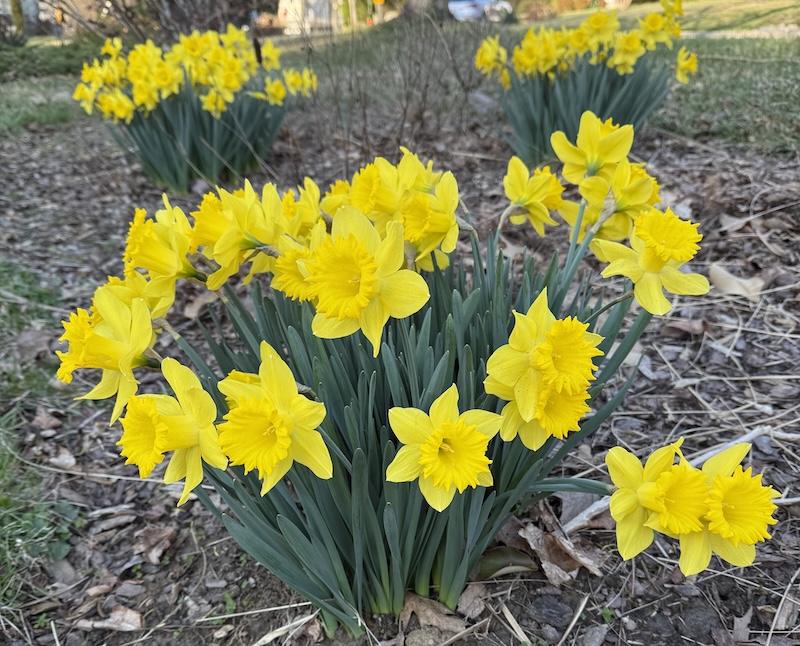
One of the joys of Spring—”A host of golden daffodils.”

When the green shoots emerge, spread composted manure around the plants.    

For daffodil displays indoors, cut the stems at an angle before adding daffodils to an arrangement, and leave them in a vase half filled with lukewarm water for a couple of hours. This is because the stems release a sap like “goop” that harms other flowers. Discard that water and add the daffodils to the other flowers.  If you recut the stems you will need to repeat the process. Change the water in the vase often.  

Perennials

In May when perennials are about four inches above soil level and when the soil is 55 degrees, apply composted manure around them to encourage healthy growth.    

Dividing Plants

At the end of April or beginning of May, you can divide late blooming perennials that have been in the ground for four years or more; these new divisions encourage stronger bloom.

Discard the older inner parts of the clumps and plant the new outside portions.  Do not plant the new divisions any deeper than they were originally in the ground. 

When dividing irises, barely cover the root system so they do not fall over. If irises are planted too deep in the soil, they will not bloom.   
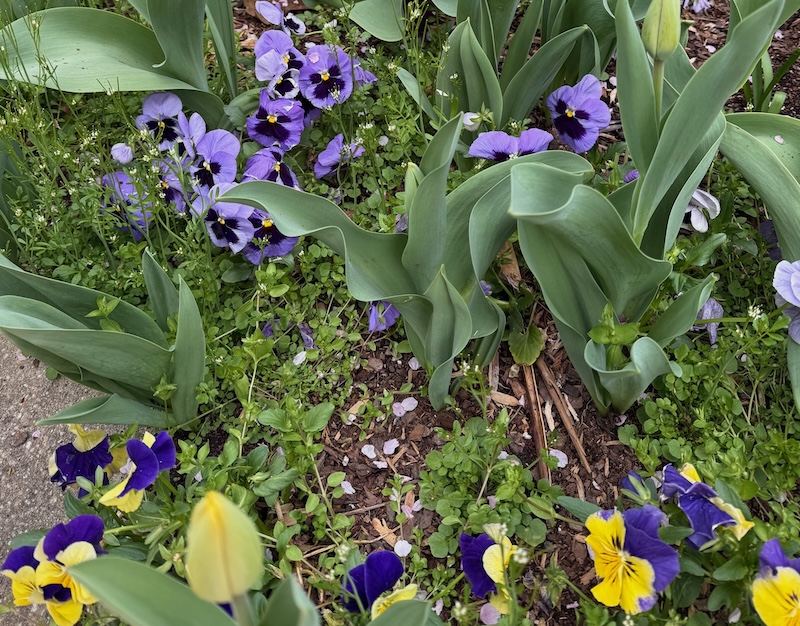
It is best to pick the flowers of pansies regularly to encourage more bloom.

March or early April are the time to plant the following seeds indoors: gaillardia, salvia, marigold, zinnia, petunia, snapdragon, stock and verbena. Before planting these seeds, soak them in warm water and plant them in sphagnum moss or coir. Coir is the outer shell or fiber of the Coconut, either of these two mediums prevents a disease called “damping off”, which can cause seeds to rot before germination.

Cover pots and seed trays loosely with plastic wrap, which creates a mini greenhouse, providing moisture which seeds require to germinate.  

NOTE: Remove the plastic once the seeds have germinated, as the soil needs to drain and needs air circulation around the emerging stems.  

If you are going away on business or on vacation, reapply the plastic wrap over the pots and trays and prop some sticks or skewers in the corners. While you are away the seedlings will stay moist, and the sticks or skewers ensure that the seedlings do not encounter the plastic. 

Dormant Spring Spraying

Spraying of fruit trees, flowering cherry, crabapples, hawthorn, mountain ash and lilac can be done before the leaf buds open. Call a professional company and request that they use only organic products.  

Houseplants
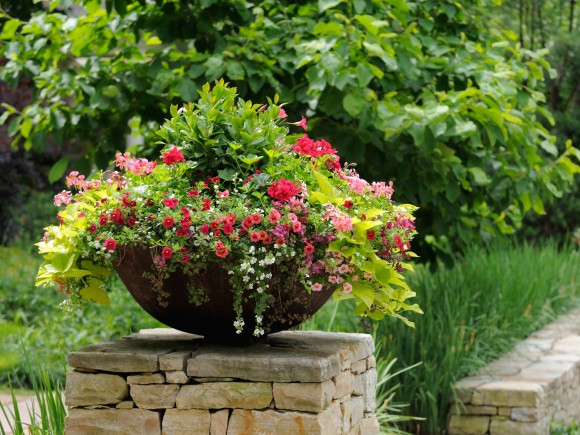
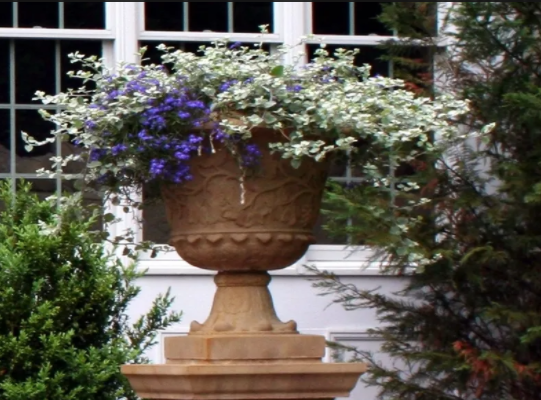
Prepare your geraniums that have spent the winter indoors for the move outside perhaps to add color to a pot like this.

Repot them if they need repotting in April.    

If you brought geraniums indoors at the end of last season, check them for new side shoots, then cut them back to four inches and repot them in clean pots about an inch and a half larger with fresh potting soil.   

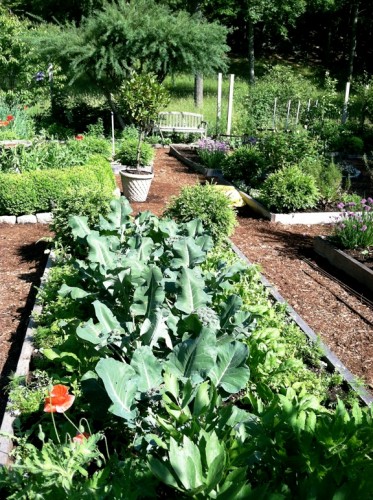
Well, fellow gardeners, I know you are getting excited to be in your gardens this season and I hope that these tips have given you plenty to think about to keep you busy for a while. Enjoy photos of lovely gardens that my son Ian has designed. If you wish, contact him for a consultation at landscapesbyian.com.

Enjoy being outdoors in spring sunshine and I look forward to seeing you in your garden in April.     

About the author: Maureen Haseley-Jones is a member of a family of renowned horticultural artisans, whose landscaping heritage dates back to the 17th century. She is one of the founders, together with her son Ian, of, The English Lady Landscape and Home Company. Maureen and Ian are landscape designers and garden experts, who believe that everyone deserves to live in an eco-conscious environment and enjoy the pleasure that it brings. Maureen learned her design skills from both her mother and grandmother, and honed her horticultural and construction skills while working in the family nursery and landscape business in the U.K. Her formal horticultural training was undertaken at the Royal Botanic Gardens at Kew in Surrey.
Gardening Tips for Early Spring from ‘The English Lady’

Signs of spring … crocuses will soon be flowering once again.
Maureen Haseley-Jones is ‘The English Lady’

This winter, as in other winters when I need a blossom boost, I enjoy the fragrance of the paper-white narcissi that I planted in tall glass vases. I surrounded the bulbs with seashells from White Sand Beach here in Old Lyme and kept them in a dark cool area, ensuring the shells and the bulbs were moist as the roots developed. 

When the bulb foliage reached about six inches, I moved the bulbs in their vases into indirect light, which encourages the blooms to open. Each morning on entering my lounge, I am met with the fragrance of these beautiful bulbs and, feeling refreshed, I am ready for my day. 

I keep extra bulbs in a brown paper bag in the vegetable keeper in the refrigerator. I plant these bulbs when the first blooms have gone by and with this method, I have a succession of blooms and fragrance permeating my home into spring. 

Before you know it, spring will be upon us together with the anticipation that resides in all of us gardeners, which is to get outdoors and plunge our hands into the soil. 

That being said, there is so much to look forward to and I feel I must once again stress the importance for all of us to garden organically. 

In this country and around the world, the results of pollution and chemicals are just some of the factors that are causing climate change. We are in a crisis, with invaders that have already battened down the gates and invaded our gardens. These invaders are destroying Mother Nature and your health in the form of poisonous pesticides and herbicides.

The main producers of these poisons are Monsanto, Bayer and other biological monsters, who have been decimating our planet, our soil, human health and committing all those egregious crimes purely for selfish profit.

Bees, for example, have been killed in the millions, because the EPA under the Trump administration allowed the spraying of over 14 million acres of land, with poisonous chemicals. Please note folks, that bees pollinate 70 percent of the world’s food and their demise is our demise. 

Last year was recorded as the hottest year on record. Drought in the west of this country, resulted in dry tinder conditions, causing devastating fires that brought death and destruction to people in California, Oregon and Colorado. This extreme weather pattern continues here, bringing tornadoes and extreme flooding, followed by even stronger hurricanes due to the rise of our oceans, which is the result of warming water.

Across the world, extreme weather patterns have also had a tragic effect on extreme drought in Africa causing famine and death to that region and terrible earthquakes as we have seen in Turkey, Northern Syria, Japan and China. I am glad that the government in this country had begun to seriously address the Climate Crisis, but much more needs to be done … Editor’s Note: Sadly, the current administration does not seem willing to address the Climate Crisis seriously.

As gardeners, it is our task to help counteract these negative changes by using only organic methods of gardening on our own plots of land; what we do in our own gardens contributes to healing the planet. Over the span of 25 years on my radio show WRCH 100.5 FM and through my Garden Earth lectures, I received a commitment from thousands of people to discard all poisonous herbicides and pesticides and to garden organically. The response had been tremendously positive in the production of organic gardens grown in healthy soil. 

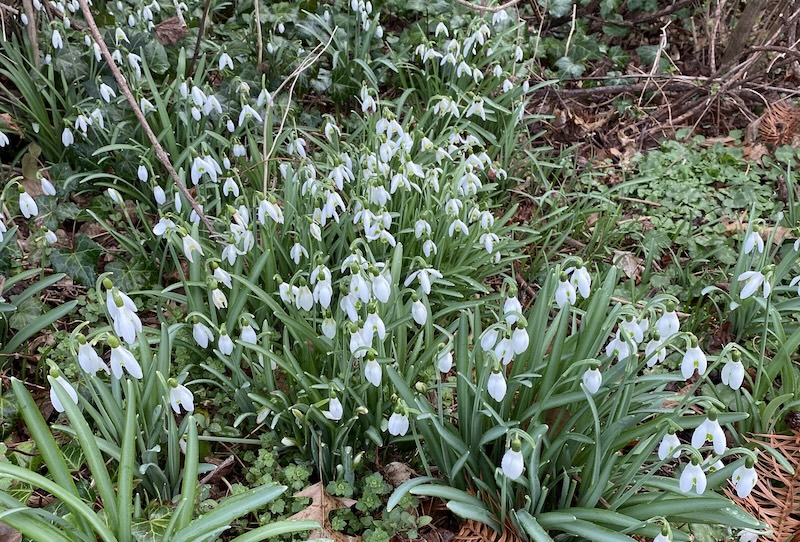
Wild snowdrops are welcome sign of the approaching Spring. File photo.

It begins with what you put into the soil for the growth of the plants, and this is accomplished by adding liberal doses of my favorite stuff–Aged Manure, which you may procure, either from the farm or in bags from the garden center.   

The following, is a paragraph from a book I am writing on gardening and the vital importance of the humus component to our gardens.

In 1937 Franklin D Roosevelt said that ‘the nation that destroys its soil destroys itself’

America has not heeded that warning. Precious soils in this country and around the world are being destroyed by dangerous practices in industrialized agriculture and poisonous chemicals, which completely disrupts our eco system and poisons all living things.

In your own garden you can build and retain a rich growing environment by building the Humus component. We are all carbon-based creatures as is all life on earth. Not only humans but also our soil microbes need carbon to flourish. And to attract carbon from the atmosphere into your soil you need to build the humus component. 

HOW TO BUILD THE HUMUS COMPONENT:

Do not till soil – tilling breaks up soil structure.

First step – Add composted manure three times each season –beginning in spring when the soil has reached a temperature of 50 degrees.  If the soil has not reached that temperature the soil organisms are not able to work with the bacteria in the manure to produce nutrients for the roots of the plants.  Purchase a soil thermometer to check the soil’s temperature. This year, following deep frosts, the soil temperature may reach 50 degrees by the end of April to early May. Add the manure again in July to continue to nourish your growing plants and again in October to protect and nourish the roots of your plants through the winter. Manure is not a fertilizer; it builds soil structure and works with all the soil animals to keep a healthy disease-free growing environment.  

Second step – Add wood chips in the form of brown fine bark mulch or wood chips that you produce from your garden of aged wood chips with a combo of leaves, twigs and branches. 

These two major steps build the humus component. If you do this in your garden – not only, will you help to heal the planet but also produce the healthiest of gardens. 

A question I am often asked is ‘Can I put manure over mulch, for example, on my mid-summer garden in July?’ The answer is ‘yes’ – the manure together with nature’s moisture and your own irrigation enables the manure to find its way easily into the soil and the roots of your plants.     

WHAT EXACTLY DOES HUMUS DO?

Humus acts like a sponge and can hold 90% of its weight in water.

Because of its negative charge – plant nutrients stick to humus for nitrogen, calcium, phosphorus and other elements, which prevents these from washing away and acts as nature’s slow- release fertilizer throughout the year.

Humus improves soil structure making it loose and friable, which helps plants root in the soil with better access to nutrients, water and oxygen.

Humus also helps to filter’ toxic chemicals from the soil, much like carbon-based water filtration systems that filter toxins from your water. 

We cannot control industrialized agricultural practices, however, in your own garden you can make a difference.   Feed the soil, and it will feed the plants. 

This week I spoke with my friend Ann, who lives in Cheshire, in England, which is next door to my home county of Shropshire. Ann is an avid gardener and she told me that her daffodils are well above the soil and last week she started to plant seeds in the greenhouse. I was so envious, when Ann told me of her garden bloom, but our time will soon come. 

PLANTING SEEDS:

It will soon be time for serious indoor seed-planting.

February 20 to March 20 is the time for serious indoor seed planting here. Check which garden centers are stocking organic seeds or go online for the organic varieties – one company that I use is “Botanical Interests”. Do not go overboard when buying packs of seeds as there are about 500 seeds in each packet.  If you do purchase too many – have a seed sharing party with gardening friends.  

Equipment to have on hand for seed planting are cheap envelopes (you probably have envelopes you discard from your mail) fresh sterilized potting soil mix, and sphagnum moss. Also seed trays, egg cartons and cardboard milk containers that are cut down also work well.  Make sure all containers are scrupulously clean. Sphagnum moss works well as a planting medium as the moss can prevent a soil born fungus that causes “damping off” which causes seeds to rot before germination.  I have, together with many gardening friends, used this method for years and have not lost  seeds  to “damping off”. 

For tiny seeds, I use the moss as the planting mix and for larger seeds, I install a topsoil base and a layer of the moss on top of the soil. I mix fine seeds with sand before I sow; this method helps to loosen them up. Soak the seeds overnight before planting and just before planting spray them with warm water, never cold as cold water can delay germination. When they have germinated, water gently. 

The best method of watering seedlings is to water from the bottom. But, if you feel you must top water, just mist with a fine sprayer, otherwise you will drown the delicate seeds, washing them out of the planting mix. Use new sterilized soil when seeding and do not use any leftover soil from last season, Leftover soil from the previous year can develop disease, which can ruin your seedling crops.  If you are growing seedlings on a windowsill, place them on a south or west-facing sill; seedlings need light, not heat to thrive. 

WINTER CARE OF HOUSEPLANTS

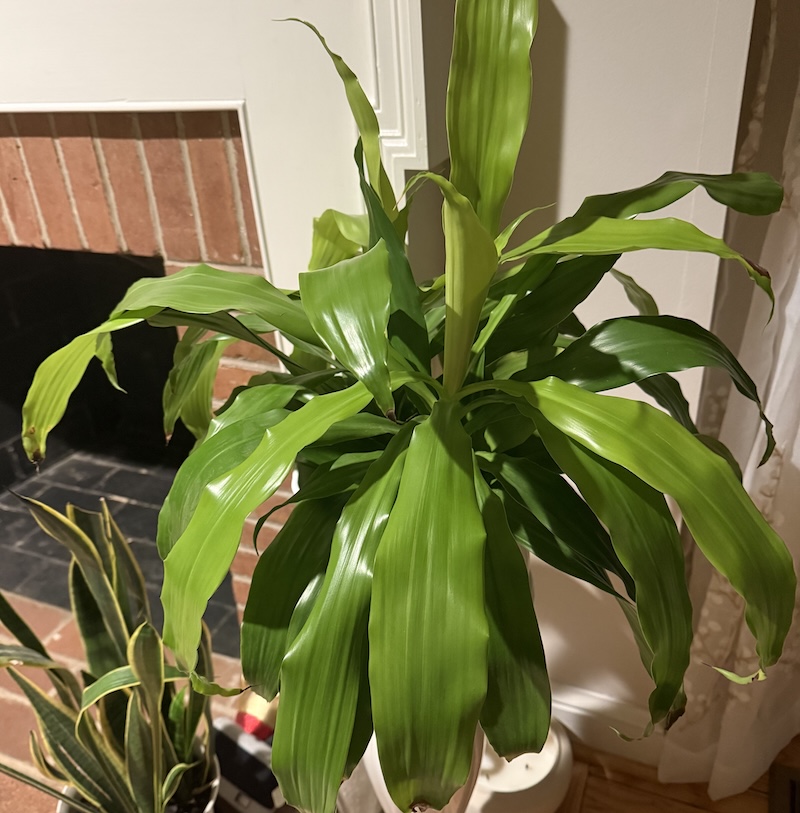
Houseplants can lift your spirits throughout the year. File photo.

I love my houseplants year round but in winter the blooming ones in particular lift my spirits.  I talk to my plants enjoying my cyclamen and my blooming cacti, and the different foliage on the ivy, philodendron and spaphyllum which also clean the air in a stuffy home environment. 

Keep your houseplants away from draughts and direct heat. If you are able, place humidifiers and air purifiers in the rooms of your home, which will benefit not only the plants but also your own health. Place pebble trays under the plants and keep the pebbles moist for additional humidity. 

Spray houseplants every few days with lukewarm water and once every couple of weeks, put the plants in a sink or bathtub and allow lukewarm water to run freely over the plant to remove dust from the leaves and clean salt residue from the soil. The exception to the spray or soak rule is African violets, as African violets do not do well with wet leaves. 

Aphids and white fly thrive indoors in winter and an organic sulphur solution called Safer works well to clean the soil of insect eggs and from the foliage. Perhaps you are fortunate like me to have Ladybugs in your home in winter; if so, allow these useful creatures to roam freely; the ladybug menu is aphids and white flies.  

The best time to repot houseplants is from April through June but if a plant has become root bound with no visible soil, then you can repot them in February. Water the plant to loosen the roots from the soil, turn it sideways on a newspaper and gently slide it from the pot.  

Cut away any dead roots and repot in fresh potting soil in a clean pot that is only two inches larger than the original.  With the plant firmly in place and the soil one inch from the rim, water it gently and do not fertilize with an organic fertilizer until April.  Plants need this dormant period to recharge. 

A few suggestions for trouble-free foliage plants in the home are Rubber Plants, Spider plants, Ivy, Philodendron, Monstera and Spaphyllum. If you have a sunny window Aloes, Succulents and Cacti do great and are a trouble- free variety.   

Blooming plants sitting side by side with foliage plants, enjoying one another’s company, give one an impression of a miniature garden.

A few suggestions of house plants that bloom are Cyclamen, African Violets, Kalanchoe, Primulas and Paper white narcissus. To prevent pets from chewing on the plants, add some cayenne pepper to the water when watering.  I also enjoy my herbal plants, which sit in a sunny window. My favorites are Rosemary, Basil and Parsley which are great additions to any recipe.             

POWER TOOLS:

Check any power tools that require maintenance or repair. February or March is the time to get them into the repair shop, because as soon as the weather breaks the shops get busy and you may not get your lawn mower back until August.  

Check all tools and implements in the garage or shed. If you did not clean them off at the end of last season, plunge the shovels and spades into a bucket of sand; sand is an abrasive and will clean off any leftover soil and manure residue.  Oil the wooden handles of tools with Linseed oil or some inexpensive vegetable oil; oil feeds the wood and keeps the handles splinter free. At the same time, check your hoses and fittings that may have sprung leaks since last year.

Make a shopping list of new tools that are needed – there are lots of sales in late winter for you to get a good deal.  However, I suggest that you buy only quality tools and hoses; as the saying goes, “you get what you pay for”. Also check that there is enough twine, bamboo rods, wire ties or nails and peat on hand. 

In March or early April when soil and manure are available purchase bags of composted manure from the garden center. On the other hand, if you have a farm close in your local area, that sells aged manure, acquire a small truck to acquire a load.  If you decide on that method, ask the farmer for manure from the bottom of the pile – aged stuff.  Manure needs to be at least six months old before applying to your soil, as fresh manure will burn your plants.    

Check the paintwork on your wooden fences, arbors, decks and any other outdoor wooden structures. Then, purchase paint supplies so that on a dry day in March for painting, everything will be on hand.  

Don’t forget to put paintbrushes on your list – I have a feeling you forgot to clean your old brushes last season, which means they are stiff as a poker, also remember sandpaper, brush cleaner and if  possible, buy eco conscious paint.  If you are painting benches and garden seats on a dry day, put them under cover before sundown. 

White walls in the greenhouse reflect light so any areas that need retouching, use white paint. It’s so rewarding to see how much lighter and brighter the greenhouse is after a touch of paint and the glass is cleaned.  However meticulously clean and tidy your greenhouse, you may find that white fly, greenfly and scale insects have found their way inside the greenhouse for warmth and so it may be necessary to spray with an organic spray. I mix an organic spray of orange peels in white vinegar and allow it to sit for two weeks before spraying – this works well and is very economical.   

Walking around a garden that looks good and feels good in mid-winter is a real pick me up. Patterns emerge created by paths, walls and hedges. As you walk, enjoy the shapes of shrubs, the shadows of evergreens and the strong silhouettes of tree trunks and enjoy their shape and bark without foliage.  

Keep the bird feeders full. I love to watch the birds in their quick flights across the garden to alight on the feeders, and their sudden bursts of song when the sun peaks through. It is so much fun to watch the “pecking” order and see the blue jays, who can be bullies and red cardinals, who like the blue jays can be rather territorial.  Bringing up the rear, come the finches and house sparrows. And sometimes a bird appears that I do not recognize and out comes my binoculars and Peterson bird book. 

If you notice squirrels swarming the bird feeders, add some cayenne pepper to the birdseed; if that occurs do not be concerned as the heat from the cayenne does not affect birds.  And you may, choose a spot away from the feeders to sprinkle cayenne free birdseed on the ground so the squirrels can also enjoy a meal. 

Winter has its own distinctive fragrance, the fog, in the morning when the air is very heavy, thick and damp – a damp even more bone chilling than rain.  I can deal with that for a while and know that in about six weeks I will be inhaling the healthy nose clearing fragrance of the soil, rich and brown, well manured or covered with wood mulch, shredded leaves or salt hay. Winter fragrances are a potpourri, one moment sharp and cold like the north wind, whereas spring’s flavors are light and sweet.

If you find you have spent year after year throwing good money after bad, then it may be time to get a professional design. If that is so, don’t hesitate; if you want work to begin in the spring, a design takes time to complete. You may want to contact my son Ian, whose company LlanscapesbyIan.com shows his lovely natural landscape creations and Ian will work with you and your budget. 

Have a great month and I’ll see you in your garden in late March. If you have any gardening questions, feel free to email me. MaureenHaseleyJones@gmail.com

About the author: Maureen Haseley-Jones is a member of a family of renowned horticultural artisans, whose landscaping heritage dates back to the 17th century. She is one of the founders, together with her son Ian, of, The English Lady Landscape and Home Company. Maureen and Ian are landscape designers and garden experts, who believe that everyone deserves to live in an eco-conscious environment and enjoy the pleasure that it brings. Maureen learned her design skills from both her mother and grandmother, and honed her horticultural and construction skills while working in the family nursery and landscape business in the U.K. Her formal horticultural training was undertaken at the Royal Botanic Gardens at Kew in Surrey.

Gardening Tips for Late October/Early November From ‘The English Lady’

“The thinnest yellow light of November is more warming and exhilarating than any wine they tell of.” Henry David Thoreau

‘The English Lady’ is Maureen Haseley-Jones

Over the next few weeks, with the soil remaining above 40 degrees, it is an ideal time to divide summer blooming perennials, which have been in the ground for three years or more. Dividing perennials gives them a new lease on life and encourages more prolific bloom next season and the rule on transplanting also covers dividing.  

Early spring blooming perennials such as Iris can be divided while the soil is still quite warm and, with adequate moisture, there will be enough root growth to anchor these divisions before frost heave becomes a problem. 

Welcome to Fall everyone! I love the cool breezes and soft sunshine and the soil is still warm for you to plant through mid-November. 

When dividing Iris cover the horizontal root divisions (the rhizomes) with just enough soil so they do not topple over, any deeper and they will not flower, and add composted manure around them when planted.

PLANTING AND TRANSPLANTING PLANTS

When planting a tree or shrub, dig a hole at least one and a half times as wide, not deep, as the root ball.  An important rule to remember when planting and transplanting is not to plant the tree or shrub any deeper than it is in the container or wrapped in burlap. Or when transplanting any plant, tree, shrub and perennial is not to plant any of these plants any deeper than it was originally in the soil; planting too deep can be the death of plants. 

If you are unable to dig to any depth for a plant in the case of ledge in your garden, berm up the soil on the ledge and plant so that part of the root ball is above the soil grade, mounding soil around it.  

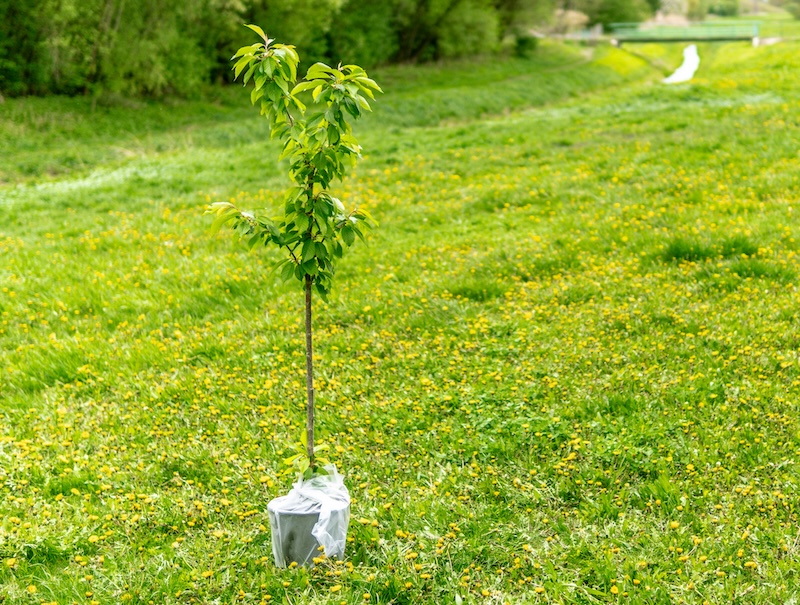
When you are planting a young tree, it is important to handle it with care. Photo by George Bakos on Unsplash.

Handle your tree or shrub by its root ball, not by the trunk or branches.  After planting and transplanting add composted manure with one part compost to three parts manure. If you do not have compost, manure is excellent.  Water deeply, slowly and thoroughly when planting and at least twice a week through the fall until the first hard frost, which in this area of New England is usually about the second week of November.

The following trees are not good candidates for fall planting: 
Birches, Larches, Gingko, Oaks, Magnolia, and all flowering fruit and flowering trees as well as the Eastern Red Cedar.  These trees have fleshy roots and their feeder roots are not large when young and therefore take time to establish and are susceptible to frost heave.

Perennials that do not like to be planted in fall are:
Artemisia, Lambs Ears, Foxglove, Penstemon, Anemone, Campanula, Kniphofia, Lupines, Scabiosa, Ferns and Grasses. 

Plant garlic this fall – garlic is the antibiotic of the garden. Plant it under fruit trees to avoid scab and root disease, near to ponds or standing water to control mosquito larvae or pour garlic water into ponds, bird baths and fountains to deter adult mosquitoes. 

WORDS OF WISDOM

At this point I want to reiterate what Franklin D Roosevelt said in 1937; ‘The nation that destroys its soil destroys itself’. America has not heeded that warning. Precious soils in this country and around the world are being destroyed by dangerous practices in industrialized agriculture and poisonous chemicals, which completely disrupts our ecosystem and poisons all living things.

HUMUS

The Humus component – good news for organic gardeners – in your own garden you can build and retain a rich, growing environment by building the Humus component. We are all carbon-based creatures as is all life on earth. Not only humans but also our soil microbes need carbon to flourish.  Attracting carbon from the atmosphere is necessary to build the humus component. 

To begin the process of humus – add composted manure three times through the year  – early May, July and now in October/November. Manure builds soil structure and provides a rich planting environment for the following season by encouraging the millions of soil animals down below to manufacture nutrients for the roots of the plants. 

Plus add mulch in the form of natural brown fine bark mulch or wood chips that you produce from your garden – aged wood chips with a combination of leaves, twigs and branches. 

With manure and fine bark mulch, you are building the humus component.  The manure and mulch attract carbon from the air, which builds the richest organic planting environment – the humus component. 

Mulching the garden and in particular any plants planted, divided or transplanted this fall with two inches of fine bark mulch, when the ground to cools in late October, will keep warmth and moisture in the soil and protect the roots of your plants through the winter.

Humus brings many benefits to the garden.

You are probably asking what are the benefits of humus? Here are the reasons:

  • Humus acts like a sponge and holds 90 percent of its weight in water.
  • Because of its negative charge – plant nutrients stick to humus with nitrogen, calcium, phosphorus and other elements, which prevents these from washing away, and acts as nature’s slow- release fertilizer.
  • Humus improves soil structure making it loose and friable, which helps plant roots in the soil and makes for better access to nutrients, water and oxygen.
  • Humus also helps filter’ toxic chemicals from the soil, much like carbon-based water filtration systems that filter toxins from your water. 

We cannot control industrialized agricultural practices – but in your own garden you can make a difference.   Grow the soil and the soil will grow the plants. 

Mulch and peat, which provides acidity, and is particularly important for any newly planted broadleaf evergreens installed in September. As mentioned previously, evergreens are shallow-rooted, and can heave above ground in hard frosts.  I suggest that you store a few bags of topsoil and mulch in the shed or garage.  When you see exposed roots after frost heave, cover them with the soil and mulch until the plant can be resettled next spring.       

Now let’s look at what should be done now in the vegetable garden focusing first on cover crops.  Last week I cut down the finished crops and dug them lightly into the soil. 

This year, my choice for a cover crop in one area of the vegetable garden, is Alfalfa, which has 3.4 percent nitrogen content, and on the opposite side of the garden I will plant Buckwheat, which has 1.4 percent nitrogen content, which provides nectar for beneficial insects. I will then cover the seeds with organic, composted manure. There are many cover crops to choose from; I use white clover and rye grass in alternate years.  In spring, when the earth is workable not too wet or cold, the cover crop is turned into the earth as ‘green manure’.  

There is nothing better than your own homegrown organic vegetables – good for you and for the environment. 

The less hectic pace of fall provides an opportunity to rethink your gardens. The garden’s pre-winter grooming can wait for a few weeks.  You may feel that you would like a professional design, having thrown good money after bad and nothing looks right. 

If that is so then contact someone that you trust to work with you to create a plan in the fall and winter, which can be phased in beginning next spring.  Engage someone who will listen to your wants and stays within your budget.  My son, Ian of Landscapes by Ian.com, always says, ‘It is not what you do in the garden, but how it makes you feel’. 

SPRING BULBS 

Early November is the time to plant spring bulbs. When purchasing Daffodils,  choose early, mid-season and late blooming Daffodils, by doing so you will have a succession of bloom.  Be adventurous this year and go for masses of a single color for the greatest impact. No matter how small your planting area, it is the intensity that counts, with two or three dozen red Tulips or a hundred Daffodils planted on your woodland edge. 

Buying daffodils in large numbers is less expensive, it’s true the bulbs are usually smaller but that is not a problem because daffodil bulbs grow larger each year they are in the ground. Even though many say that the bulbs should be spaced six inches apart, there is no reason they cannot touch. 

A sea of daffodils is always a joy to behold in a yard.

Apply some composted manure or bulb food on the soil where bulbs are planted.  Wear gloves when you plant bulbs as they contain a skin irritant, which may cause a rash. 

The general rule is to plant bulbs about three times as deep as the bulb is tall and with the pointed end up.  This method is appropriate for most bulbs, although tulips should be planted about 12 inches down if you want to produce bloom for a second year. Daffodils should be planted no less than nine inches down, which is below the frost line.  I suggest that you do not plant the bulbs singly for the most colorful impact, but plant in groups of odd numbers, 5,7 or 9 bulbs as odd numbers are harmonious in nature. 

Small bulbs like crocus, can be tossed gently into a shallow trench with composted manure on the bottom of the trench, about three inches deep and plant them where they land, pointed side up. For larger bulbs like tulips and daffodils dig a trench about nine inches deep and three or four feet long with  composted manure as the base and scatter these larger bulbs in the trench, also with the pointed end of the bulb faces up! 

Personally, I treat Tulips as annuals because their first year’s bloom is the best, after that first year the bloom is never as full and vibrant; the only exception to this is the parrot tulip, which I find, flourishes for years.  

 A word of caution -Tulips are the ‘caviar’ of the bulb family. The best method to prevent them from becoming a tasty item on the rodent’s menu is to soak them in an organic deer-repellent, which also repels rodents. Allow the tulip bulbs to dry before planting. 

If you are unable to plant your bulbs immediately when purchased, keep them in a cool, dry place in paper bags.  The best time to plant spring bulbs in the Northeast is in mid-November.

Observe Mother Nature; plants in nature do not grow in straight lines but in gentle curves that connect harmoniously with the earth.  

TREE WORK

Choose a licensed arborist. This work is much less expensive to have done in the fall after the foliage has fallen, then the arborist is able to see more clearly what needs to be done and the work goes faster – meaning less labor time and therefore, it is less expensive. 

If you have deep shade and want more sunlight in an area, ask the arborist to thin out the tree’s canopy and prune lower branches to make for a sunnier area, this will give you more choice of plants, that grow in dappled rather than deep shade.  

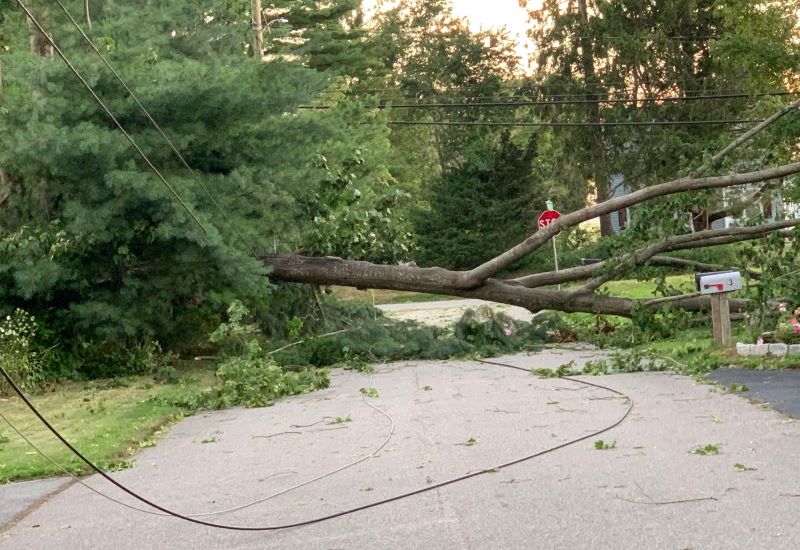
Badly-damaged trees, such as the one in the photo above, require removal. Photo by Jay Graves.

If you have a badly-damaged tree, meaning over 50 percent damaged or diseased, then have it removed, which may allow for a sun garden or perhaps the vegetable garden you have always wanted.  

I do not cut down my spent perennials in fall, leaving them up so that I am able to enjoy the browns, grays, and yellows and faded greens, which blend gently with winter’s muted landscape. The seed heads of the perennials are wonderful snacks for the birds and in the dead of winter, what better sight than a red cardinal on the Winterberry bush in the snow.  

Also wait until next April to cut down ornamental grasses; their graceful foliage is lovely to enjoy with the icicles on them shining in the pale winter sun. 

Any spent perennials that show disease should be cut down but if the plant is more than one third diseased it should be dug up and discarded. Then throw the diseased material in the garbage not in the compost. Clean up any fallen plant debris from the soil and ONLY if it is disease- and weed-free, can it be added to the compost pile.

PEONIES

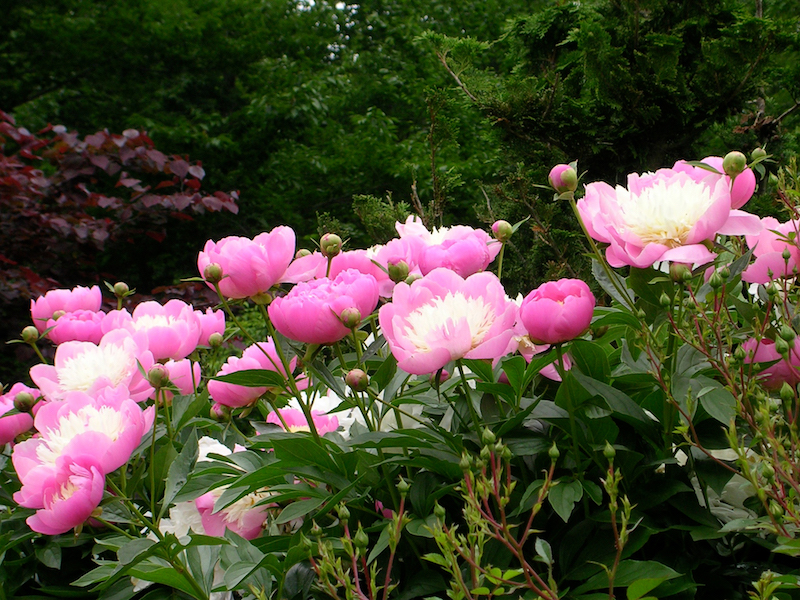
Peonies need careful attention at this time of year to create a display like this next year.

In November, after the first hard frost, cut down peonies to within six inches from the ground and add some composted manure around the base of the plant.

SIGNS OF FROST

You can foretell a hard frost when you notice the afternoon temperature falling fast under a clear sky.  Assess the wind by taking a long strip of plastic, like a shopping bag from the supermarket, and hang it from a tree branch. If the bag flutters about a foot in either direction, you do not have to worry about frost, but if it blows vigorously then frost is on the way.  If you still have plants in the garden that are of concern, cover them with salt hay, newspapers or light weight old quilts and put a brown paper bag from the grocery store over smaller plants like herbs, anchored down with rocks.      

Your houseplants should be indoors by now. After their summer sojourn outdoors, then wash the pots thoroughly and add fresh potting soil.  Then replant the plant at the same depth it was at originally and into the sink or shower and allow water to wash the foliage and water the plant well.  If the plant has outgrown its pot, transplant it to the next size clean pot, only one and a half inches larger.

Enjoy the pleasant Fall weather and if you have any gardening questions, feel free to email me at MaureenHaseleyJones@gmail.com  and I will see you in your garden in November. 

About the author: Maureen Haseley-Jones is a member of a family of renowned horticultural artisans, whose landscaping heritage dates back to the 17th century. She is one of the founders, together with her son Ian, of, The English Lady Landscape and Home Company. Maureen and Ian are landscape designers and garden experts, who believe that everyone deserves to live in an eco-conscious environment and enjoy the pleasure that it brings. Maureen learned her design skills from both her mother and grandmother, and honed her horticultural and construction skills while working in the family nursery and landscape business in the U.K. Her formal horticultural training was undertaken at the Royal Botanic Gardens at Kew in Surrey.
Gardening Tips for Late July/Early August from ‘The English Lady’—”Deep Summer is When Laziness Finds Respectability”

Summer phlox always offer a blaze of color. Photo by Steph Cruz on Unsplash.

Watering is so important during the heat of summer. If you planted trees or shrubs this spring, particularly evergreens, these plants require extra moisture to establish a strong root system. We have had an abundant amount of rain this spring and into the summer, however it is important to keep an eye on the weather.  

Here in New England, plants require at least an inch of water per week.  If you are using a regular hose, you lose 40 percent of moisture to evaporation. However, a hose is necessary for thorough watering when a plant goes into the ground and daily watering for containers.

A sprinkler can be an effective watering method. Photo by Anthony Lee on Unsplash.

Soaker hoses in your borders are the best method of watering, attached to a house spigot with a timer. By using this method of irrigation, moisture goes to the roots of plants where it is needed and not on the foliage, which can cause diseases such as black spot and powdery mildew. Soaker hoses attached to a timer can be used efficiently not only in the borders of the garden but also in the vegetable garden, where annual vegetables require a lot of water to produce a good crop. 

In addition, composted manure, when added to the containers together with copious amounts to the vegetable garden, helps to retain a good amount of moisture. Manure, used as mulch for the vegetable garden, adds more nutrition and manure used as mulch does not cap or form a hard crust, so water goes directly to the roots where it is needed. 

LAWNS

Water the lawn only when the green glow begins to fade.  An established lawn will bounce back following dry hot spells. 

I want to emphasize the importance of soil and soil health, which has been severely neglected and abused with poisonous chemicals for years. Soil is the most important element of plant growth; it is not an inert medium that merely holds the plants erect, it is a living organism that needs to be replenished with nutrients.

The nutrient is composted manure, manure builds soil structure and together with its bacteria joins the millions of microbes below the surface to produce nutrients for the roots of the plants. If you have not already done so, I strongly suggest that you carefully discard all chemical fertilizers, herbicides and pesticides.

The addition of composted manure to your soil in spring, early summer and in early fall, together with natural brown bark mulch, builds the carbon compound or humus component in the soil.  We are all carbon-based creatures, as is every living element; carbon is our lifeblood and the lifeblood of the soil in our gardens.

As we build the humus component by adding composted manure and fine-bark mulch, we are producing the healthiest possible growing environment and the strongest disease-resistant plants.  As we add the composted manure and natural fine bark mulch season after season, the humus component continues to build in the soil, continuously extracting carbon from the atmosphere into the soil. 

ROSES

These stunning bushes flourish beautifully with the addition of composted manure and mulch, which should be applied on the soil about two feet away from the base of the plant. Roses also require deep watering once a week. Now, in July add another light layer of composted manure around the roses. Manure is food for the roots of the roses and no other products are necessary for growth and bloom. Stop adding manure to the roses in mid-August, so that they can gradually move into a slow dormancy through late summer and early fall, which is a natural part of their growth cycle.    

If you are a first time rose-grower or adding to your rose collection, David Austin English roses are my personal preference.  The David Austin nursery is only 21 miles from my hometown in Shropshire in England. Visiting the rose nursery in June was a fragrant and exhilarating pleasure that overwhelmed my senses. 

An ‘Evelyn’ rose, the author’s favorite.

David Austin roses are more trouble-free than many other roses and with the fact that they are repeat bloomers, with beautiful colors and fragrances extends our enjoyment of this lovely shrub throughout the summer months.    

Some of my favorite David Austin roses are:

  • A Shropshire Lad, a peachy pink
  • Abraham Darby, soft shades of apricot and yellow
  • Evelyn (my favorite) produces giant apricot hued flowers
  • Fair Bianca, a pure white
  • Heritage, a soft blush pink
  • Carding Mill Valley begins as a peachy orange double flower, changing to an apricot-pink

A lovely combination is climbing roses and clematis planted together; both enjoy the same planting environment with their heads in the sun and their feet (roots) cool, with the added nutrition of manure and mulch. This combination looks great, climbing over a fence, wall or arbor. The combination I enjoyed on a trellis on the chimney breast on the west side of my farmhouse was a purple clematis and a pink climbing rose 

MULCH

Please do not use artificially-colored red mulch, rubber mulch or cocoa mulch; use only natural brown bark mulch.  Do not mulch right up to the base of the plants, as this invites rodents to nest and gnaw on the stems or trunks of the plants.

Note regarding why you should NOT use Cocoa mulch: Cocoa mulch, produced by Hershey,  has a Thorazine compound and other poisons, which are hazardous to pets who are attracted by the chocolate odor. Ingestion of this chocolate mulch can cause seizures and death within hours.  

HYDRANGEAS

Plant Hydrangeas in a sunny area if you live near the coast, which allows them to enjoy gentle seas breezes. Away from the coast, plant Hydrangeas in part-sun on the west or east aspect of the garden. Plant them in organically-rich soil with composted manure and add extra composted manure this month around the base. 

A deeper color can be encouraged in blue hydrangeas by increasing the acidity in the soil around their base.. Photo by Gaetano Cessati on Unsplash

If you have the blue macrophylla Hydrangea, add some peat or aged oak bark around the base—the acidity in the peat or oak bark encourages a deeper blue color.   Hydrangeas are a wetland plant and require plenty of water throughout the summer. We had a late spring and with all the spring and early summer rain and good sunshine, the foliage and bloom of the hydrangeas are performing well.

Watch out for powdery mildew and spray with the following powdery mildew recipe you can mix yourself:
Recipe for powdery mildew –Two tablespoons baking soda, one dessert spoon of vegetable oil, a squirt of dish soap with a gallon of water in a sprayer.  For any recipe spray you make at home, spray only in the morning when there is no wind and when the temperature and humidity added together do not go above 180. 

PRUNING HYDRANGEAS

Prune Hydrangeas immediately after they finish blooming in late August or early September but no later, as Hydrangeas set their buds for the next season by mid-September. If you prune after September, you will lose next season’s bloom.   When you prune, cut out some of the old wood and the weakest of the new shoots.  In October, put more composted manure and brown mulch around the base to nourish and protect the roots through the winter. 

GARLIC

Garlic is the antibiotic of the garden. Photo by Shelley Pauls on Unsplash.

(The following recipes are from a garden book I am writing):
Did you know that garlic is the antibiotic of the garden. I love using garlic in my recipes. Garlic is an important anti-fungal element to protect your plants and I suggest plant more garlic in early fall. 

To avoid fungal diseases plant garlic around strawberries, tomatoes and raspberries to avoid fungal diseases. 

Plant garlic around mildew-prone plants to prevent mildew on such plants as summer phlox and bee balm.

Plant garlic under fruit trees to avoid scab and root disease.

Plant garlic next to ponds or standing water to control mosquito larvae or pour garlic water into the water to deter adult mosquitoes. 

Where you notice marauders have been munching, like insects or animals make a garlic spray to apply on the plants including vegetables. 

GARLIC SPRAY RECIPE

4 large, crushed garlic cloves, unpeeled
2 teaspoons of vegetable oil
1 squirt of mild dish detergent

Put all ingredients in 2 cups of hot water in the blender, blend, then leave overnight, then put in a gallon sprayer with cold water and spray in the early morning when there is no wind, observing the rule of 180.  Observing the rule of 180 is when the temperature and humidity when added together do not go above 180.

HOT PEPPER SPRAY

To deter squirrels and chipmunks, try a hot pepper spray using either 4 hot chilies or one cup of cayenne pepper in 2 cups of hot water, in the blender, blend and leave overnight then put in a gallon sprayer with cold water and spray the problem areas in the early morning.

This pepper spray works well to deter squirrels, chipmunks, deer as well as dogs and cats that may be leaving their deposits in the garden. 

HANDS

Gardener’s hands are their tools of the trade so it’s important to take care of them. My hands remain healthy by indulging in a hot cream treatment once a week before bed. 

 HAND CREAM RECIPE

Combine Calendula cream with honey and essential oil of lavender heated in the microwave, apply generously and put on white cotton gloves for sleep. When I wake up my hands are soft and smooth as a baby’s bottom. Wear gloves, when working in soil that contains manure or when spreading manure. Manure is an organic product that contains bacteria; bacteria is great for the soil but like many bacteria not healthy for you. The garden gloves I prefer are the soft leather farmer’s gloves that are washable.  

FLAVORED OILS

Many herbs are at their peak right now and are ideal for using in flavored oils.  The oil I use as a base is organic olive oil. I harvest basil, parsley, sage, tarragon and oregano in the morning, rinse them well, pat them dry with a paper towel and then make the recipe. Then choose an herb you are using that day, and add to two cups of organic oil.  

For thyme and lavender, I use only the flowers with one cup of oil to a handful of blossoms.  

Puree the herb mixture in a blender and store covered in a wide mouthed jar for three days, shake at least three times a day for the first two days and on the third day let the mixture settle to the bottom, then strain it through a paper coffee filter or cheese cloth into a clean jar.  You will now have a tinted but clear mixture.  

Refrigerate each mixture and use within two to three weeks.  The herb oils I choose to make are rosemary, lavender, lemon, garlic, shallots and basil with olive oil as the base – these are my favorites and are great brushed on vegetables and meats for grilling.  The Lavender oil is great with desserts. Rosemary and lemon oil taste excellent on salads. 

MOLES

I know I have given you a few mole remedies in the past; but I have not given you the Exlax method for a while. I can attest to the fact that I have used this method as have many of my fellow gardeners for years, as it works so well.  Buy Exlax, the main ingredient of Exlax is Senna, a natural herb. Insert Exlax into the mole holes, the moles and voles eat it, then die of dehydration.  

If you have dogs and cats, do not use the chocolate Exlax but rather only the plain Exlax as chocolate is dangerous to pets.  

In early April of next year, apply organic grub control, which means less grubs for the moles to feed on, and without their supply of grubs, the moles will go elsewhere for food. In addition, the white grubs of Japanese beetles are largely diminished with the grub control.  

Japanese beetles love our plants and here is a method to deal with them naturally. In the early morning, the Japanese beetles are drowsy and can be captured.  Lay a drop cloth under the plant or plants where you see them and gently shake the plant; the drowsy beetles will drop onto the cloth, which should be gathered up and then drop them in a garbage bag and discard.   

Many of us are committed to organic gardening without chemicals, which has enabled the earthworm population to once again increase; earthworms are a great boon to the garden soil as their castings add 50 percent nutrition to the soil together with eleven trace minerals.  

SUMMER PHLOX

I just love my summer phlox and to keep the mildew problems at bay I use the natural baking soda mix I mentioned above. 

I have found that white Phlox Miss Lingard or white Phlox David are more resistant to mildew than other summer phlox.  

Monarda, commonly known, as Bee Balm and Hydrangeas are also prone to the problem of powdery mildew, and this is where the baking soda recipe once again can be used to excellent effect.  

For a second bloom on the Summer Phlox, prune off ten to twenty inches of the flower stems after the first bloom has gone by and within a few weeks you will experience a new bloom. 

KEEP YOUR GARDEN CLEAN

A healthy garden is a clean garden. Do not put any diseased items into your compost. 

Deadhead all annuals and perennials for a second bloom and clean up all spend blossoms.  

When Coreopsis and Spirea have bloomed, use garden shears to shear off dead flowers and they too will rebloom.

CONTAINERS

Make sure you have composted manure and fine bark mulch applied on top of the soil in your containers and water them daily. In hot weather the containers will need to be watered twice daily, morning and evening watering is the best. If you do not have time in the morning before you leave for work or errands, empty your ice cube trays on the containers; this provides slow -release watering until you can get to them later.  

Photo by LandscapesbyIanLLC.com.

Enjoy being in the garden, stay hydrated, continue to stretch and take time to ‘smell the Roses’.

If you have any gardening questions, please email me at MaureenHaseleyJones@gmail.com and I’ll see you in your garden later in August. If you would like a garden consult, let me give my son Ian a plug—he has a brilliant gardening mind. Contact him at LandscapesbyIan.com.

Maureen Haseley-Jones

About the author: Maureen Haseley-Jones is a member of a family of renowned horticultural artisans, whose landscaping heritage dates back to the 17th century. She is one of the founders, together with her son Ian, of, The English Lady Landscape and Home Company. Maureen and Ian are landscape designers and garden experts, who believe that everyone deserves to live in an eco-conscious environment and enjoy the pleasure that it brings.

Maureen learned her design skills from both her mother and grandmother, and honed her horticultural and construction skills while working in the family nursery and landscape business in the U.K. Her formal horticultural training was undertaken at the Royal Botanic Gardens at Kew in Surrey.
Gardening Tips from ‘The English Lady’ for May: ‘The Month of Expectation, Wishes and Hope’

Maureen Haseley-Jones is “The English Lady.”

“The darling buds of May” is such an apt phrase for one of the most enchanting months with bloom on spring bulbs and flowering trees, the Amelanchier, the Dogwood and the Cherry to name a few and the new awakening red foliage of Maples winking in the sun.  

By now, you have probably removed most of the winter debris, pruned broken branches and re-edged borders. Do not apply composted manure before the soil warms up to 60 degrees. The reason why, you may ask, is that the soil at this temperature awakens soil organisms, which work with the bacteria of the manure to produce nutrients for the roots of the plants.  I suggest therefore, when shopping for garden supplies, pick up a soil thermometer to check soil temperature which I feel will reach 60 degrees in a few weeks. 

As I walk around the garden, I am seeing my old nemesis, weeds, emerging everywhere.  Pull these marauders up by hand, without breaking the weeds and the roots.  If you use a tool, this will break the weeds and the broken weed pieces will take root and then you will be facing hundreds of these unwanted visitors more to dispose of yet again.  

After weeding, lightly spread on the clean area, an organic corn gluten- based weed pre-emergent by Bradfield Organics; this organic product will keep weeds at bay for quite a few weeks.   

In early May, apply composted manure around daffodils and other spring bulbs so that the manure and soil organisms can produce nutrients to feed the bulbs for next year’s bloom. Also, I am asking that you do not cut down the Daffodil foliage as the nutrition from the foliage is absorbed into the bulb for bloom next spring. 

In mid -May, with warmed-up soil, apply composted manure and a light layer of fine bark mulch to all maintained areas of the garden, repeat this procedure again in July and finally in October before putting the garden to bed. By giving this attention to the garden, the manure and mulch will begin to build the important humus component. 

Types of mulch:

Only use the natural brown wood mulch and please do not use the colored mulches and rubber mulch, which contain poisonous chemicals. 

A word of caution on Cocoa Mulch. This product is highly toxic to dogs and cats.  This product is manufactured by Hershey and sold in many large garden centers.  It is made from the residue of chocolate products and other ingredients and contains a lethal ingredient that has resulted in the reported deaths of cats and dogs that are attracted by the chocolate odor. This mulch contains Theobromine, which is a Xanthine compound with caffeine and theophylline, a dangerous combination.  When animals eat this product; it causes seizures and death within hours.   

At this point once again, I need to emphasize the importance of the humus component for your soil continuing to build it as part of your garden regimen. 

All living things including us humans, are all carbon-based creatures. The Humus you are building in your soil encourages carbon from the air to enter and blend with the soil.

Humus acts like a sponge and holds 90 percent of its weight in water. Because of its negative charge, plant nutrients stick to humus bringing nitrogen, calcium, phosphorus and other important elements to the plants, which prevents these nutrients from washing away and acts like nature’s slow- release fertilizer.

Humus improves soil structure making it loose and friable, which helps plants to root in this environment with easier access to nutrients, water and oxygen. Humus also helps to filter toxic chemicals from soil, much like carbon-based water filtration systems filter toxins from your water.

Roundup

I recommend, when you have a few moments after gardening, that you go online to Scientific American.com/article/Weed-Whacking Herbicide to check out the dangers of Round up. This is the most dangerous herbicide not only because of Glyphosate, which is on the list by the WHO as a chelating agent that causes cancer together with its inert ingredients. I ask that you are not swayed by the word ‘inert’ as the ingredients are anything but inert and those ingredients combined with Glyphosate are deadly to human cells. 

Forsythia brings its own version of sunshine into the world!

Forsythia is in bloom with lovely fresh yellow blossoms.  If the bloom on your shrub is not as prolific as it was in previous years, prune out the old sparse wood after bloom ends.  

A favorite native tree of mine is the Amelanchier (common name is Shadblow Serviceberry, named for the Shad fish that run in the rivers at this time to swim upstream to spawn). This early spring blooming tree has creamy panicle blooms, followed by small green leaves and within weeks, produces red fruit, which is a delicious treat for our feathered friends. Before the birds eat all the fruit, you may want to pick some of the fruit as it makes a delicious jelly for your morning toast.  

Here in my town of Old Lyme, the Magnolias, Cherries and Eastern Redbud are vying with one another to show off their finery together with the buds and foliage of the graceful Dogwoods beginning to emerge.  Following the recent rains many of these trees are blooming at the same time or within a few weeks of one another. Their bloom will soon be over but then we can look forward to Rhododendrons, Azaleas, which are followed by Mountain Laurel in early June. 

A special favorite of mine is a shrub; the Carlesii viburnum (also known as Korean Spice) with its pink buds, opening to white flowers and their delightful fragrance fills the air outside my kitchen door. This viburnum grows to about five feet and can be tucked into many a border particularly in an area where you often walk by to inhale the fragrance. 

Blue climbing hydrangeas make a stunning display. Photo by Gemma Evans on Unsplash.

Covering the barn wall and scrambling up to the barn roof is my climbing hydrangea – bright green leaves are emerging with hundreds of buds, which indicates that this beautiful climber will be laden with blossoms in summer. 

Tulips, creeping phlox, forget-me-nots, primroses and candytuft are bringing much needed color to borders and rock gardens. 

If you have not had the opportunity yet, for another couple of weeks, you can still prune your roses.  Pull back the old mulch from around the base of the roses and in two to three weeks apply manure about six inches from the trunk of the plant. Then a week later reapply a layer of the brown natural mulch on top of the composted manure. As well as building the humus component, these layers keep the roots cool, keep weeds at bay and help retain moisture. Do not mulch right up against the base of any plants as this encourages rodents to nest and gnaw on the plants. 

Beware of fungi that look like weird mushrooms in your mulch; this is   Artillery fungus, which can adhere to the walls of your home and cause problems.  If you notice this fungus, you will need to remove all the mulch and get it off your property. 

Apply a small amount of lime and about three inches of manure around the lilacs which like sweeter alkaline soil, indicating the use of the lime. By now, you may have already applied lime to the grass, which also enjoys sweeter soil and spread organic grub control which eliminates the Japanese beetle 

larvae therefore reducing the chance of moles as you are cutting off some of their food source.  

If you are making an organic vegetable garden this year; a garden measuring 16 x 24 can feed a family of four for a year; but keep the size within your needs and capability.  

Don’t dig soil if it is too wet or too dry.  

Double digging the vegetable garden takes time but is always worth the effort.

Double digging for the vegetable garden is the best method although this takes time and effort but its well worth it – dig down about one foot and remove the topsoil, put the soil to one side, then dig down and loosen the next six inches of soil and add about three inches of composted manure then put back the topsoil and add another three to four inches of manure.  

Do not rototill the vegetable garden, as this destroys soil structure. Gently loosening the top few inches of the soil to aerate it, makes it friable and results in an excellent yield of fruits and vegetables. 

I prefer 6 x 4ft beds rather than rows; beds produce a larger yield of crops. In addition, beds make for ease of weeding and harvesting by having narrow compacted soil or grass paths (having removed lawn from the area) in-between the beds. 

The vegetable garden should be situated on the south or southwest side of the property for maximum sun exposure. 

You need a water source close by as vegetables require lots of water, particularly annual fruiting vegetables like tomatoes, which are hydroponic which means they consist of a large amount of water. 

Crop Rotation, by that I mean, do not plant the same vegetables in the same place as the previous year.  Using this method helps to prevent any soil- born diseases occurring.     

In the loosened soil, plant the vegetables plants so that they are touching, this forms a natural canopy, shading out weeds and helps retain moisture. 

I prefer to mulch the vegetable garden with composted manure, the reason being that manure, as mulch, does not cap. Capping is when mulch forms a crust, which does not allow water or air to penetrate to the roots of the plants.

Fence in the vegetable garden with a tall fence to keep animals out. At the base of the fence install eight inches of fine mesh chicken wire above ground and eight inches below ground to keep out the digging and burrowing animals. 

Organic insect control

Insects do not like fragrance so plant fragrant plants like marigolds, nasturtium, lavender, nepeta, honeysuckle and roses to name a few.  

Encourage lacewings, which feed on aphids by planting marigolds and sunflowers,

Attract ground beetles by laying a log or a rock on the earth, under which the beetles can hide. These useful insects are nocturnal and eat slug and snail eggs, cabbage maggots, cutworms and even climb trees to feed on armyworms and tent caterpillars.  

Following all the rain, your grass is hopefully a vibrant shade of green; when mowing keep the blades of grass at about three inches tall; the taller blades attracts sunlight, promoting a healthier lawn. The taller blades also shade out weeds and help to retain moisture in the grass.   

When mowing, leave grass clippings on the lawn, the clippings are a natural source of nitrogen. If you have clover in the grass, clover is an added benefit as clover takes nitrogen from the air and fixes it in the soil, which is an additional nutrient for plant growth.

After flowering is over, prune flowering shrubs by 25 percent – do this task immediately before new buds set for next year. 

On a rainy day go shopping for any garden supplies that may be needed, then when the weather is dry you can be outdoors doing what you love and not indoors shopping.  Buy good hoses, cheap ones will bend and crack.  

Peonies are a wonderful addition to any yard. Photo by Jaroslava Petrášová on Unsplash.

Peonies need plenty of water to produce flower buds.  I had a thirty-foot long stand of Peonies in my field. The Peonies have been in the ground for over fifty years and are a sight to behold when in bloom.  I gave them lots of loving care with a light dressing of aged manure in early May.  In a few weeks, I  pinch off the side buds while they are still small, leaving the terminal flower bud on each stalk, which develops into a large main bloom.

Hydrangeas are a wetland plant and require plenty of water during the season, with the addition of manure and mulch around the base. If you have blue Hydrangeas and want a deeper color of blue, also add some peat around the base of the plant, the acidity in the peat produces the bright blue color.   

If you need to prune a Hydrangea, which has become too large then prune it immediately after flowering, in EARLY SEPTEMBER, prune about 1/3 of the old wood and the weakest shoots. DO NOT WAIT, as Hydrangeas begin to develop bloom buds for next year later in September.  If you wait to prune it is likely that you will not have bloom for next year. 

The much-beloved Lily of the Valley has a delightful fragrance.

My maternal grandmother’s favorite plant, the Lily of the Valley will bloom in another couple of weeks. These lovely flowers are tucked on the small rise on the west side of my apartment, and I am so looking forward to gathering a few fragrant blooms to enjoy indoors.   

When the lilacs have finished blooming, pinch off the withered flower clusters, and do the same on the mountain laurel and rhododendrons in late June to ensure good blossoms next year. 

In mid May apply composted manure, a light application of peat and fine bark mulch around all evergreens and rhododendrons, mountain laurel and azaleas; these plants are shallow- rooted and the mulch will keep the roots nourished, protected, warm and moist. 

Some annual seeds that may be planted outside in mid May are: Calendula, Coreopsis, Marigold, Nasturtium, Nicotiana and Zinnia.  

FROST, FOLKS TAKE NOTE – If you purchase annuals, on Mother’s Day weekend, place them in a sheltered spot on the south side of your home. Plant them no earlier than Memorial weekend as we can still get a late frost. 

Tuberous-rooted begonias, caladiums, cannas and elephant ears can be moved from porch or cold frame to a part shade area as the weather becomes warmer and there is no sign of frost in the forecast.   

If you staked trees, when they were planted last year, cut the stakes off at ground level, do not pull them out otherwise the roots of the trees could break and be damaged.

Aphid tip: squish a few in your hand; dead aphids release a chemical that causes other aphids to drop off the plants. 

Another ants and aphids tip – if you drink mint tea, any leftover tea sprinkle on the bugs, as they do not like the smell of mint.  

Mint spreads vigorously in the yard.

A WORD OF CAUTION ON MINT – plant mint only in containers, mint is tremendously invasive and can take over your garden.

When planting annuals, perennials, vegetables, trees, shrubs or evergreens keep them watered.   

Houseplants can be moved outdoors for their summer sojourn at the end of May.  However, do not put your African violets outdoors as they will burn, move the violets to a porch that is covered and shaded, or keep them indoors in a window that does not receive direct rays from the sun.

Wait until the soil warms up at the end of May to set out Dahlia tubers.  

ROSES –  I like to plant David Austin roses; these shrub roses are repeat bloomers with lovely fragrances.  

Roses need at least five hours of sun per day, good air circulation, and excellent drainage.  During their growing period from the beginning of June to mid August; add a little extra composted manure each month; it may be applied over the mulch.  Stop adding the manure in August so that the roses can go into a slow dormancy. 

Roses like the same growing conditions as Clematis and can be planted together in a ‘companion planting’, which means they grow well together, with feet in the shade and head in the sun. I planted a climbing pink Rose and purple Clematis on a trellis on the chimney breast on the west side of my house, which was a lovely combination. Before you top up the soil around the roses, when planting add water and check if the soil drains, roses need good drainage.  Deep watering is recommended at least once a week. 

Plenty of stuff to keep you hopping folks and remember to keep your eye out for any pest trouble and when you spot it get on the ball immediately to avoid further problems.   Carefully discard all herbicides and pesticides; these poisons have the same effect on your health as second- hand smoke.  

Your garden offers an anchor for peace and quiet enjoyment.  Enjoy the warmth, the gentle breeze, the earth’s fragrance and bloom and please remember to breathe and stretch before any garden labor.  Enjoy and I will see you in your garden next month. 

If you would like my son Ian of LandscapesbyIan to visit your home for a consultation, feel free to contact him.. As the old saying goes, ‘the apple does not fall far from the tree’ and you will not be disappointed in his work!

About the author: Maureen Haseley-Jones is a member of a family of renowned horticultural artisans, whose landscaping heritage dates back to the 17th century. She is one of the founders, together with her son Ian, of, The English Lady Landscape and Home Company. Maureen and Ian are landscape designers and garden experts, who believe that everyone deserves to live in an eco-conscious environment and enjoy the pleasure that it brings. Maureen learned her design skills from both her mother and grandmother, and honed her horticultural and construction skills while working in the family nursery and landscape business in the U.K. Her formal horticultural training was undertaken at the Royal Botanic Gardens at Kew in Surrey.