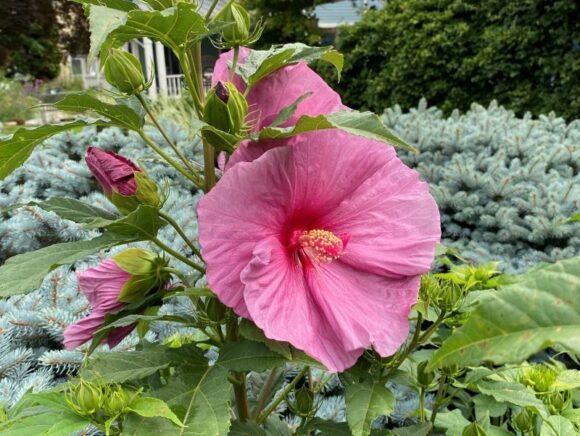
Hibiscus flowers make a stunning display throughout July.
“A perfect July day is when the sun is shining, the breeze is blowing, the birds are singing … and the lawnmower is broken!” – James Dent

Maureen Haseley-Jones is “The English Lady.”
Watering is so important during the heat of summer.
If you planted trees or shrubs this spring, particularly evergreens, these plants require extra moisture to establish a strong root system. We have had an abundant amount of rain this spring and into the summer, however it is always important to keep an eye on the weather.
WATER:

A sprinkler can be an effective watering method. Photo by Anthony Lee on Unsplash.
Here in New England, plants require at least an inch of water per week. If you are using a regular hose, you lose 40% of moisture to evaporation. However, a hose is necessary for a deep first-watering when a plant goes into the ground and for containers.
Soaker hoses in your borders are the best method of watering, attached to a house spigot with a timer. By using this method of irrigation, moisture goes to the roots of plants where it is needed and not on the foliage, which can cause disease such as black spot and powdery mildew. Soaker hoses attached to a timer can be used efficiently not only in the borders of the garden but also in the vegetable garden, where annual vegetables, require a lot of water to produce a good crop.
In addition, composted manure added to the containers and copious amounts to the vegetable garden, helping to retain a good amount of moisture. Manure used as mulch for the vegetable garden adds more nutrition, manure as mulch does not cap or form a hard crust, so water goes directly to the roots where it is needed.
LAWNS & HUMUS:

Photo by Chris Zhang on Unsplash.
Water the lawn only when the green glow begins to fade. An established lawn will bounce back following dry hot spells.
I want to emphasize the importance of soil and soil health, which has been severely neglected and abused with poisonous chemicals for years. Soil is the most important element of plant growth; it is not an inert medium that merely holds the plants erect, it is a living organism that needs to be replenished with nutrients.
The nutrient is composted manure — manure builds soils structure and its bacteria partners with the millions of microbes below the surface to produce nutrients for the roots of the plants. If you have not already done so, I strongly suggest that you carefully discard all chemical fertilizers, herbicides and pesticides.
The addition of composted manure to your soil in spring, early summer and in early fall, together with the addition of natural brown bark mulch, will build the carbon compound or humus component in the soil. We are all carbon-based creatures, as is every living element, and so this is our lifeblood and the lifeblood of the soil in our gardens.
As we build the humus component by adding composted manure and fine-bark mulch we are producing the healthiest possible growing environment and the strongest disease resistant plants. As we add the composted manure and natural fine bark mulch season after season, the humus component continues to build in the soil, continuously extracting carbon from the atmosphere into the soil.
ROSES:

Photo by Summer Quinn on Unsplash.
These flourish beautifully with the addition of composted manure and mulch applied on the soil about two feet away from the base of the plant. Roses also require deep watering at least once a week. Now, in July add another light layer of composted manure around the roses.
Manure is food for the roots of the roses and no other products are necessary for growth and bloom. Stop adding manure to the roses in mid-August, so that the roses can move into a slow dormancy through late summer and early fall, a natural part of their growth cycle.
If you are a first time rose-grower or adding to your rose collection,
David Austin English roses are my personal preference. The David Austin nursery is only 21 miles from my hometown in Shropshire in England; it was a fragrant pleasure to visit the nursery in June.
David Austin roses are more trouble-free than many other roses and are repeat bloomers, with beautiful colors that enhance our senses with delicious fragrances.
Some of my favorite David Austin roses are:
A Shropshire Lad (my home country in England):- a peachy pink
Abraham Darby:- shades of apricot and yellow
Evelyn (my favorite):- with giant apricot hued flowers
Fair Bianca:- a pure white rose
Heritage:- a soft blush pink
Carding Mill Valley:- begins as a peachy orange double flower before becoming an apricot-pink
A lovely combination is climbing roses and clematis planted together as both enjoy the same planting environment with their heads in the sun and their feet (roots) cool, with manure and mulch. This combination looks great, climbing over a fence, wall or arbor.
MULCH:
Do not use the artificially-colored red mulch, rubber mulch or cocoa mulch; use only natural brown bark mulch. Do not mulch right up to the base of the plants, as this invites rodents to nest and gnaw on the stems or trunks of the plants.
Note: Do not use Cocoa mulch, produced by Hershey, this mulch has a Thorazine compound and other poisons which are hazardous to pets who are attracted by the chocolate odor. Ingestion of this chocolate mulch can cause seizures and death within hours.
HYDRANGEAS:

Photo by Summer Quinn on Unsplash.
Plant Hydrangeas in a sunny area if you live near the coast for them to enjoy gentle seas breezes. Plant them in part-sun away from the coast on the west or east aspect of the garden. Plant them in organically rich soil with composted manure and add extra composted manure around the base now in July.
If you have the blue macrophylla Hydrangea add some peat or aged oak bark around the base, the acidity in the peat or oak bark encourages a deeper blue hue. Hydrangeas are a wetland plant and require plenty of water throughout the summer. We had a late spring and with all the spring and early summer rain and good sunshine, the foliage and bloom of the hydrangeas are performing well.
Watch out for powdery mildew and spray with the following powdery mildew recipe you can mix yourself:
Two tablespoons baking soda, one dessert spoon of vegetable oil, a squirt of dish soap with a gallon of water in a sprayer.
For any recipe spray you make at home, spray only in the morning when there is no wind and when the temperature and humidity added together do not go above 180.
PRUNING HYDRANGEAS:
Prune Hydrangeas immediately after they finish blooming in late August or early September but no later, as Hydrangeas set their buds for the next season by mid September.
If you prune after September, you will lose next season’s bloom. When you prune, cut out some of the old wood and the weakest of the new shoots.
In October put more composted manure and brown mulch around the base to nourish and protect the roots through the winter.
GARLIC:

Photo by Lobo Studio on Unsplash.
Did you know that garlic is the antibiotic of the garden? I just love garlic to use in my recipes and it is an important anti-fungal element to protect your plants. I always suggest in early fall, plant more garlic.
To avoid fungal diseases plant garlic around strawberries, tomatoes and raspberries to avoid fungal diseases.
Plant garlic:-
- around mildew-prone plants to prevent mildew on such plants as summer phlox and bee balm.
- under fruit trees to avoid scab and root disease.
- next to ponds or standing water to control mosquito larvae or pour garlic water into the water to deter adult mosquitoes.
Where you notice marauders, where either insects or animals have been munching, make a garlic spray to apply on the plants including vegetables.
Garlic spray recipe
4 large, crushed garlic cloves, unpeeled
2 teaspoons of vegetable oil
1 squirt of mild dish detergent
Put all ingredients in 2 cups of hot water in the blender, blend, then leave overnight, then put in a gallon sprayer with cold water and spray in the early morning when there is no wind, observing the rule of 180. Observing the rule of 180 is when the temperature and humidity when added together do not go above 180.
Hot pepper spray:
To deter squirrels and chipmunks try a hot pepper spray using either 4 hot chilies or one cup of cayenne pepper in 2 cups of hot water, in the blender, blend and leave overnight, then put in a gallon sprayer with cold water and spray the problem areas in the early morning.
This pepper spray works well to deter squirrels, chipmunks, and deer as well as dogs and cats that may be leaving their deposits in the garden.
HANDS:
Gardener’s hands are their tools of the trade so it’s important to take care of them. My hands remain healthy by indulging in a hot cream treatment once a week before bed.
Recipe: Combine Calendula cream with honey and essential oil of lavender heated in the microwave, apply generously and put on white cotton gloves for sleep. When I wake up my hands are soft and smooth as a baby’s bottom. Wear gloves, when working in soil that contains manure or when spreading manure. Manure is an organic product that contains bacteria; bacteria is great for the soil but like many bacteria not healthy for you. The garden gloves I prefer are the soft leather farmer’s gloves that are washable.
FLAVORED OILS:
Many herbs are at their peak right now and are ideal for using in flavored oils. The oil I use as a base is organic olive oil. I harvest basil, parsley, sage, tarragon and oregano in a morning, rinse them well, pat them dry with a paper towel and then make the recipe.
Chose an herb and add to two cups of oil.
For thyme and lavender, I use only the flowers with one cup of oil to a handful of blossoms.
Puree the herb mixture in a blender and store covered in a wide mouthed jar for three days, shake at least three times a day for the first two days and on the third day let the mixture settle to the bottom, then strain it through a paper coffee filter or cheese cloth into a clean jar. You will now have a tinted but clear mixture.
Refrigerate each mixture and use within two to three weeks. The herb oils I make are lavender, lemon, garlic, shallots and basil with olive oil as the base – these are my favorites and are great brushed on vegetables and meats for grilling. The lavender oil is great with desserts. Rosemary and lemon oil taste excellent on salads.
MOLES:
I know I have given you a few mole remedies in the past; but I have not given you the exlax method for a while. I can attest to the fact that I have used this method as have many fellow gardeners for years, as it works. Buy Exlax , in which the main ingredient is Senna, a natural herb. Insert Exlax into the mole holes, the moles and voles eat it then die of dehydration.
If you have dogs and cats do not use the chocolate Exlax, use only the plain Exlax as chocolate is dangerous to pets.
In early April of next year, apply organic grub control, which means less grubs for the moles to feed on, and without their supply of grubs, the moles will go elsewhere for food. In addition, the white grubs of Japanese beetles can be diminished with the grub control.
JAPANESE BEETLES:
These insects love our plants and here is a method to deal with them naturally. In the early morning, the Japanese beetles are drowsy and can be captured. Lay a drop cloth under the plant or plants where you see them and gently shake the plant; the drowsy beetles will drop onto the cloth, which you gather up and drop them in a garbage bag and discard.
Many of us are committed to organic gardening without chemicals, which has enabled the earthworm population to once again increase; earthworms are a great boon to the garden soil as their castings add 50% nutrition to the soil together with eleven trace minerals.
SUMMER PHLOX
I just love my summer phlox and to keep the mildew problems at bay I use the natural baking soda mix I mentioned above. I have found that white Phlox Miss Lingard or white Phlox David are more resistant to mildew that other summer phlox. Monarda commonly known, as Bee Balm and Hydrangeas are also prone to be affected by powdery mildew, and this is where the baking soda recipe once again can be used.
For a second bloom on the Summer Phlox, prune off ten to twenty inches from the flower stems after the first bloom has gone by and within a few weeks you will experience new bloom.
KEEP YOUR GARDEN CLEAN – a healthy garden is a clean garden. Do not put any diseased items into your compost.
Deadhead all annuals and perennials for a second bloom and clean up all spend blossoms.
When Coreopsis and Spirea have bloomed, with garden shears, shear off dead flowers and they too will rebloom.
CONTAINERS:
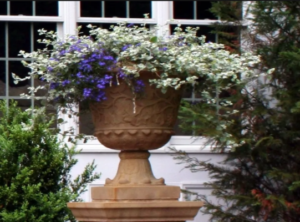
Photo by LandscapesbyIanLLC.com.
Make sure you have composted manure and fine bark mulch applied on top of the soil in your containers and keep them watered as containers dry out quicker than garden soil. In hot weather the containers will need to be watered daily, morning and evening watering is the best. If you do not have time in a morning before you leave for work or errands, empty your ice cube trays on the containers; this provides slow -release watering until you can get to them later.
Enjoy being in the garden, stay hydrated, continue to stretch and take time to ‘smell the Roses’.
If you have any gardening questions, please email me at MaureenHaseleyJones@gmail.com and I’ll see you in your garden in August.
Also if you would like a garden consult, contact my son Ian at LandscapesbyIan.com – he is a brilliant gardening mind and as one says ‘the apple does not fall far from the tree!’
About the author: Maureen Haseley-Jones is a member of a family of renowned horticultural artisans, whose landscaping heritage dates back to the 17th century. She is one of the founders, together with her son Ian, of, The English Lady Landscape and Home Company. Maureen and Ian are landscape designers and garden experts, who believe that everyone deserves to live in an eco-conscious environment and enjoy the pleasure that it brings. Maureen learned her design skills from both her mother and grandmother, and honed her horticultural and construction skills while working in the family nursery and landscape business in the U.K. Her formal horticultural training was undertaken at the Royal Botanic Gardens at Kew in Surrey.








 It’s common for first-time homebuyers to make mistakes. However, with the real estate market so competitive right now, you can’t afford to learn on the job. If you’re interested in buying a home in the future, you should start preparing today.