Gardening Tips for July from ‘The English Lady’; The Month of ‘Hollyhocks and Hammocks’

Photo by meriç tuna on Unsplash.

If I had my way, I’d remove January from the calendar altogether and have an extra July instead. (Roald Dahl)

Watering is so important during the heat of summer. If you planted trees or shrubs this spring, particularly evergreens, these plants require extra moisture to establish a strong root system. We have had an abundant amount of rain this spring and into the summer, but it is still important to keep an eye on the weather.

Here in New England, plants require at least an inch of water per week.  If you are using a regular hose, you lose 40 percent of moisture to evaporation. However, a hose is necessary for a deep first-watering when a plant goes into the ground and for containers.

Watering is so important in July. Photo by Irene Dávila on Unsplash.

Soaker hoses in your borders are the best method of watering, attached to a house spigot with a timer. By using this method of irrigation, moisture goes to the roots of plants where it is needed and not on the foliage, which can cause disease such as black spot and powdery mildew. These hoses attached to a timer can be used efficiently not only in the borders of the garden but also in the vegetable garden, where annual vegetables, in particular, require a lot of water to produce a good crop.

In addition, composted manure added to the containers and copious amounts to the vegetable garden, help to retain a good amount of moisture. Manure used as mulch for the vegetable garden adds more nutrition, manure as mulch does not cap or form a hard crust, as do other mulches, so that water goes directly to the roots.

LAWNS & SOIL

Water the lawn only when the green glow begins to fade.  An established lawn will bounce back following dry hot spells.

I want to emphasize the importance of soil and soil health, which has been severely neglected and abused with poisonous chemicals for years. Soil is the most important element of plant growth; it is not an inert medium that merely holds the plants erect, it is a living organism that needs to be replenished with nutrients.

The nutrient is composted manure, manure builds soils structure and its bacteria partners with the millions of microbes below the surface to produce nutrients for the roots of the plants. If you have not already done so, I strongly suggest that you carefully discard all chemical fertilizers, herbicides and pesticides.

The addition of composted manure to your soil in spring, early summer and in early fall together with the addition of natural brown bark mulch, builds the carbon compound or humus component in the soil.  We are all carbon-based creatures, as is every living element, this is our lifeblood and the lifeblood of the soil in our gardens.

As we build the humus component by adding composted manure and fine bark mulch, we produce the healthiest possible growing environment and the strongest disease-resistant plants.  As we add the composted manure and natural fine bark mulch season after season, the humus component continues to build in the soil, continuously extracting carbon from the atmosphere into the soil.

ROSES 

These flourish beautifully with the addition of composted manure and mulch applied on the soil about two feet away from the base of the plant and require deep watering at least once a week. Now, in July add another light layer of composted manure around the roses. Manure is food for the roots of the roses and no other products are necessary for growth and bloom.

Stop adding manure to the roses in mid-August, so that the roses can into a slow dormancy through late summer and early fall, a natural part of their growth cycle.

If you are a first-time rose grower or adding to your rose collection, consider David Austin English roses — they are my personal preference.  The David Austin nursery is only 21 miles from my hometown in Shropshire in England; it was a fragrant pleasure to visit the nursery in June. David Austin roses are more trouble-free than many other roses and are repeat bloomers, with beautiful colors that enhance our senses with delicious fragrances.

Some of my favorite David Austin roses are:

  • A Shropshire Lad (my home country in England) a peachy pink
  • Abraham Darby, shades of apricot and yellow
  • Evelyn (my favorite) with giant apricot hued flowers
  • Fair Bianca a pure white rose
  • Heritage a soft blush pink
  • Carding Mill Valley begins as a peachy orange double flower, becoming an apricot-pink

A lovely combination to enjoy are climbing roses and clematis planted together as both enjoy the same planting environment with their heads in the sun and their feet (roots) cool, with manure and mulch. This combination looks great, climbing over a fence, wall or arbor.

MULCH 

Do not use the artificially-colored red mulch, rubber mulch or cocoa mulch; use only natural brown bark mulch.  Do not mulch right up to the base of the plants, as this invites rodents to nest and gnaw on the stems or trunks of the plants.

Note: Do not use Cocoa mulch, produced by Hershey, this mulch has a Thorazine compound and other poisons which are hazardous to pets who are attracted by the chocolate odor. Ingestion of this chocolate mulch can cause seizures and death within hours.

HYDRANGEAS

Blue hydrangeas. Photo by Gemma Evans on Unsplash.

Plant Hydrangeas in a sunny area if you live near the coast enjoying seas breezes and in part-sun away from the coast on the west or east aspect of the garden. Plant them in organically rich soil with composted manure and add extra composted manure around the base now in July.

If you have the blue Hydrangea, add some peat or aged oak bark around the base because the acidity in the peat or oak bark encourages a deeper blue hue.  Hydrangeas are a wetland plant and require plenty of water throughout the summer. We had a late spring and with all the spring and early summer rain and good sunshine, the foliage and bloom of the hydrangeas are performing well. Watch out for powdery mildew and spray with the following powdery mildew recipe you can mix yourself:

*Two tablespoons baking soda, one tablespoon of vegetable oil, a squirt of dish soap with a gallon of water in a sprayer.  For any recipe spray you make at home, spray only in the morning when there is no wind and when the temperature and humidity added together do not go above 180.

Prune Hydrangeas immediately after they finish blooming in late August or early September but no later, as Hydrangeas set their buds for the next season by mid-September. If you prune after September, you will lose next season’s bloom.  When you prune, cut out some of the old wood and the weakest of the new shoots.  In October put more composted manure and brown mulch around the base to nourish and protect the roots through the winter.

GARDEN ANTIBIOTICS: Garlic & Hot Pepper

Did you know that garlic is the antibiotic of the garden I just love garlic to use in my recipes and it is an important anti-fungal element to protect your plants.  I suggest in early fall, plant plenty of garlic, if you do not already have some in the garden.

Garlic plants after harvest. Photo by Shelley Pauls on Unsplash.

Plant garlic:

  • around mildew-prone plants to prevent mildew on  such plants as summer phlox and bee balm
  • around strawberries, tomatoes and raspberries to avoid fungal diseases
  • under fruit trees to avoid scab and root disease
  • next to ponds or standing water to control mosquito larvae or pour garlic water into the water to deter adult mosquitoes.

When you notice marauders where either insects or animals have been munching, make a garlic spray to apply on the plants including vegetables.

Garlic spray recipe

4 large crushed garlic cloves, unpeeled
2 teaspoons of vegetable oil
1 squirt of mild dish detergent

Put all ingredients in 2 cups of hot water in the blender, blend, then leave overnight. Then put the mixture in a gallon sprayer with cold water and spray in the early morning when there is no wind, observing the rule of 180.  Observing the rule of 180  is when the temperature and humidity added together do not go above 180.

Hot Pepper spray

To deter squirrels and chipmunks, try a hot pepper spray using either 4 hot chilies or one cup of cayenne pepper in 2 cups of hot water, in the blender, blend and leave overnight then put in a gallon sprayer with cold water and spray the problem areas in the early morning.

This pepper spray works well on squirrels, chipmunks, deer as well as dogs and cats that may be leaving their deposits in the garden.

HANDS:

Gardener’s hands are their tools of the trade so it’s important to take care of them. My hands remain healthy by indulging them in a hot cream treatment once a week before bed. 

Combine Calendula cream with honey and essential oil of lavender heated in the microwave, apply generously and put on white cotton gloves for sleep. When I wake up my hands are soft and smooth as can be.

Wear gloves, when working in soil that contains manure or when spreading manure. Manure is an organic product that contains bacteria; bacteria is great for the soil but like many bacteria not healthy for you. The garden gloves I prefer are the soft leather farmer’s gloves that are washable.  

FLAVORED OILS 

Many herbs are at their peak right now and are ideal for using in flavored oils.  The oil I use as a base is organic olive oil. I harvest basil, parsley, sage, tarragon and oregano in a morning, rinse them well, pat them dry with a paper towel and then make this recipe.

Choose an herb and add to two cups of oil.

For thyme and lavender, I use only the flowers with one cup of oil to a handful of blossoms.

Puree the herb mixture in a blender and store covered in a wide-mouthed jar for three days, shake at least three times a day for the first two days and on the third day let the mixture settle to the bottom, then strain it through a paper coffee filter or cheese cloth into a clean jar.  You will now have a tinted but clear mixture.

Refrigerate each mixture and use within two to three weeks.  The herb oils I make are lavender, lemon, garlic, shallots and basil with olive oil as the base – these are my favorites and are great brushed on vegetables and meats for grilling.  The lavender oil is great with desserts. Rosemary and lemon oil taste excellent on salads.

MOLES

I know I have given you a few mole remedies in the past; but I have not given you the Exlax method for a while. I can attest to the fact that I have used this method as have many garden colleagues for years, as it works.  Buy Exlax, whose main ingredient is Senna, a natural herb. Insert Exlax into the mole holes, the moles and voles eat it then die of dehydration.

If you have dogs and cats, do not use the chocolate Exlax — use only the plain Exlax as chocolate is dangerous to pets.

In early April of next year, apply organic grub control, which means less grubs for the moles to feed on, and without their supply of grubs, the moles will go elsewhere for food. In addition, the white grubs of Japanese beetles can be diminished with the grub control.

Japanese beetles love our plants and there is a method to deal with them naturally. In the early morning, the Japanese beetles are drowsy and can be captured.  Lay a drop cloth under the plant or plants where you see them and gently shake the plant; the drowsy beetles will drop onto the cloth, which you gather up and drop them in a garbage bag and discard.

Many of us are committed to organic gardening without chemicals, which has enabled the earthworm population to once again increase; earthworms are a great boon to the garden soil as their castings add 50 percent nutrition to the soil together with 11 trace minerals.

SUMMER PHLOX 

Summer phlox always put on a show. Photo by Steph Cruz on Unsplash.

I just love my summer phlox and to keep the mildew problems at bay I use the natural baking soda mix* I mentioned above.  I have found that white Phlox Miss Lingard or white Phlox David are more resistant to mildew that other summer phlox.  Monarda commonly known, as Bee Balm and Hydrangea, are also prone to be affected by powdery mildew, and this is where the baking soda once again can be used.

For a second bloom on the Summer Phlox, prune off 10 to 20 inches from the flower stems just after the flowers have gone by and within a few weeks you will experience new growth.

KEEP YOUR GARDEN CLEAN 

A healthy garden is a clean garden. Do not put any diseased items into your compost.

Deadhead all annuals and perennials for a second bloom and clean up all spend blossoms.

When Coreopsis and Spirea have bloomed, shear off dead flowers and they too will rebloom.

CONTAINERS
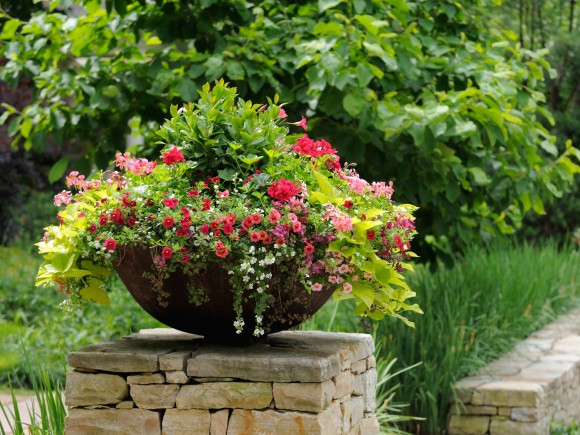
Containers need watering daily during hot summer months.

Make sure you have composted manure and fine bark mulch applied on top of the soil in your containers and keep them watered as containers dry out quicker than garden soil. In hot weather the containers will need to be watered daily, morning and evening watering is the best.

If you do not have time in a morning before you leave for work or errands, empty your ice cube trays on the containers; this provides slow-release watering until you can get to them later.

Finally, enjoy being in the garden, stay hydrated, continue to stretch and take time to ‘smell the Roses’ and I’ll see you in your garden in August.

Contact Maureen at maureenhaseleyjones@gmail.com

About the author: Maureen Haseley-Jones, pictured left, is a member of a family of renowned horticultural artisans, whose landscaping heritage dates back to the 17th century. She is one of the founders, together with her son Ian, of, The English Lady Landscape and Home Company. Maureen and Ian are landscape designers and garden experts, who believe that everyone deserves to live in an eco-conscious environment and enjoy the pleasure that it brings. Maureen learned her design skills from both her mother and grandmother, and honed her horticultural and construction skills while working in the family nursery and landscape business in the U.K. Her formal horticultural training was undertaken at the Royal Botanic Gardens at Kew in Surrey.

Gardening Tips from ‘The English Lady’ for June, Which ‘God Invented [Because] Spring is a Tough Act to Follow’

“Cast ne’er a clout till May is out” is the medieval English saying means do not put away your long johns until May is over; well, we certainly have had a few very cool nights recently, which is just wonderful … allowing sleeping with the windows open.

I cannot remember the last time we had a real spring like the one we are experiencing this year, with plenty of rain. May is typically a dry month, although with the effects of global warming, no weather is typical these days. However, this beneficial rain is wonderful for all the spring plant growth happening in the beginning of the growing season.

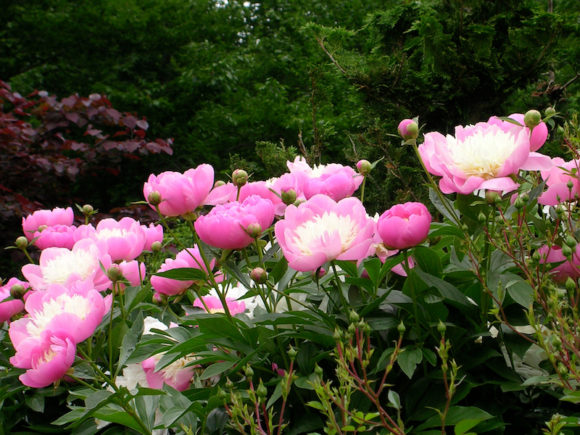
Peonies by Jessica Fadel on Unsplash.

I am so in awe of the miracle of Mother Nature; the symbiotic relationship between plants and others of God’s creatures. As I look out of my window into my field, I can see the buds opening on my long stand of peonies, which brings to mind just one of those symbiotic relationships — the friendly partnership between ants and peonies.  

I am often asked “Maureen, should I worry about ants on my peonies?” The answer is “That’s not a problem, lots of ants on the peonies just demonstrate that you have healthy plants with big buds producing more nectar and therefore attract the ants”.

Make sure Peonies get plenty of water and after blooming, apply a light dose of organic 5-10-5 fertilizer and check the soils PH it should be between 6.5 and 7.0.  It is hard to ruin a good peony border but you can err in the fertilizing process, so go easy on the organic aged manure (never thought I would say that) and apply just the light dose of fertilizer — to reiterate apply the fertilizer after blooming.  

Now, in June, I pinch off the side-buds on my large stand of peonies, thus ensuring big blooms on the rest of the plant.  

On the subject of ants; if you see them “let them live,” because often their presence indicates that we have aphids around and ants feed off aphids; they are very useful creatures.

Another very useful creature in the pest wars; is the lowly toad so I always put out some toad houses (which you can purchase from the garden center) around and about in your borders.  You can also use an old clay pot that is cracked and make sure that the crack is two to three inches wide for the door so the toad can enter. Also put a small saucer as a floor under the pot with some rocks, which you keep damp, so that your friendly bad-bug-eater has his or her ideal home environment.

MULCH:

Mulch your gardens in June; when the ground has warmed up to about 45 or 50 degrees. When you mulch, be careful mulching around trees; do not get the mulch any closer than four inches from the trunk, as any closer it can promote rot and disease in the tree itself. Also trees that are mulched too deeply near the trunk invite mice and other rodents to come nest and then gnaw on the trunk.  

The garden as a whole can be mulched to a depth of between two and three inches. I prefer fine hardwood mulch in the dark brown color but no dyed red mulch please … keep the garden looking natural and not like a Disney theme park.

ROSES:

An ‘Evelyn’ rose by David Austin, the author’s favorite.

June is the month when Roses begin to bloom. I prefer David Austin roses that I find are the most trouble free roses, are repeat bloomers and have wonderful fragrances. Some of my favorites are A Shropshire Lad, a soft peachy pink, Abraham Darby with blooms in apricot to yellow, Fair Bianca a pure white, Heritage, a soft clear pink. My absolute favorite is Evelyn, pictured at right, which has giant apricot flowers in a saucer shape and the fragrance is second to none with a luscious fruity tone, reminding me of fresh peaches and apricots.  

Feed your roses with an organic rose food called Roses Alive, which you can obtain from “Gardens Alive” on the internet, feed them once a month until mid August, then stop feeding so they can go into a slow dormancy.

Japanese beetles are very attracted to roses, so any Japanese beetle traps should be placed far away from your borders on the perimeter of the property. Or check TheEnglishLady.com on the Organic Products page for other solutions to the beetles and other unwanted pests.    

A tip for keeping cut roses fresh: cut the roses in the morning before 10 am, just above a five leaf cluster and place stems in a container of lukewarm water.  Inside the house recut the stems under warm running water, forming a one and a half inch angular cut, then place in a vase filled with warm water.  Do not remove the thorns on cut roses, I have found this practice reduces their indoor life by as much as three days.  

HYDRANGEAS:

These need plenty of water, (in the fields they were originally found close to water being a wetland plant before they were introduced into our gardens), also organic aged manure, good ventilation, organic fertilizer and full sun.

Wisteria in full bloom is always a sight to behold. Photo by Alyssa Strohman on Unsplash.

WISTERIA:

Regular pruning through spring and summer is the main factor to help this arrogant vine to flower — and by that I mean several times during the season. Prune every two weeks at least six inches on each stem.  

CLEMATIS:

If you have a wilt problem with clematis, you notice it early because the shoots wilt and die. Unfortunately this disease is impossible to cure, as it is soil-borne. Therefore you cannot plant another clematis of that species in that area but you can plant the Viticella clematis selection; these are vigorous, free flowering blooms and are not susceptible to wilt.  Some good choices in this variety are Blue Belle, Etoile Violette (both are purple) and Huldine, which is a white,  

CONTAINER GARDENS:

If you have room for one pot, you have room for a number — placed close together in different shapes and sizes, they can create your own miniature garden. Apart from regular pots, the most unexpected objects make really interesting containers. A friend, who cut down trees this past winter, left the stumps and hollowed them out to make containers — one large and two smaller stumps together — a really interesting combo.  

At the same time look in your basement, shed or barn to see if you have an old wheelbarrow, which, even if it has a wheel missing, will present an unusual angle as a planter. Or you may come across a large chipped ceramic jar — I, in fact, have an old two foot tall ceramic vinegar container, replete with a hole where the vinegar tap was inserted, ideal for drainage, which will look great on my newly-painted blue bench next to my red milk shed.  

LAWN CARE:

Do not forget to add organic grub control through July, so that you keep down the mole infestation; remember no grubs, less food for the moles.  

POWDERY MILDEW:

Keep an eye open for powdery mildew, especially after a rain and the humidity returns.  In a sprayer, mix two tablespoons of baking soda, two tablespoons of vegetable or horticultural oil in a gallon of water and spray the mildew.  Summer phlox is particularly prone to this affliction; I recommend Phlox Miss Lingard or Phlox David, white ones of the species, these are the most mildew resistant.  

Monarda, commonly known as Bee Balm, is also affected by the mildew; the one I have found to be the most resistant is Cambridge Scarlet. Do be careful when introducing Monarda into the garden; they, like Purple Loosestrife and Evening Primrose are extremely invasive and can take over your entire border.  

On the subject of invasive plants, if you plant mint, plant it only in containers, otherwise mint will spread throughout your borders.  

I hope these tips are useful to you in this busy time of year in the garden and I’ll see you in the garden or on my website next month.

Contact Maureen at maureenhaseleyjones@gmail.com

About the author: Maureen Haseley-Jones, pictured left, is a member of a family of renowned horticultural artisans, whose landscaping heritage dates back to the 17th century. She is one of the founders, together with her son Ian, of, The English Lady Landscape and Home Company. Maureen and Ian are landscape designers and garden experts, who believe that everyone deserves to live in an eco-conscious environment and enjoy the pleasure that it brings. Maureen learned her design skills from both her mother and grandmother, and honed her horticultural and construction skills while working in the family nursery and landscape business in the U.K. Her formal horticultural training was undertaken at the Royal Botanic Gardens at Kew in Surrey.

Gardening Tips for May from ‘The English Lady’: A Feast of Color Highlights the Merry Month of May

May brings ‘darling buds’ and ‘blooms on bulbs and trees.’“ 

OLD LYME — The darling buds of May” is such an apt phrase for one of the most enchanting months, bloom on bulbs and trees and the fresh foliage on trees winking in the sun. 

By now, you have probably removed most of the winter debris, pruned broken branches and re-edged borders. Do not however, apply that spring layer of composted manure as the soil needs to warm up to 60 degrees for the soil organisms to accept the bacteria of the manure in order to produce nutrients for the roots of the plants. 

When shopping for garden supplies, pick up a soil thermometer to check soil temperature and I am sure the right temperature will be reached in about two to three weeks. 

I am seeing our old nemesis, weeds springing up everywhere.  Pull them up by hand and try to get weeds complete with roots.  I say by hand, as using a tool breaks up the weeds, the result being hundreds more weeds from the broken pieces. 

Follow on the weeding with the organic corn gluten based weed pre-emergent by Bradfield Organics; this product will keep weeds away for quite a few weeks.   

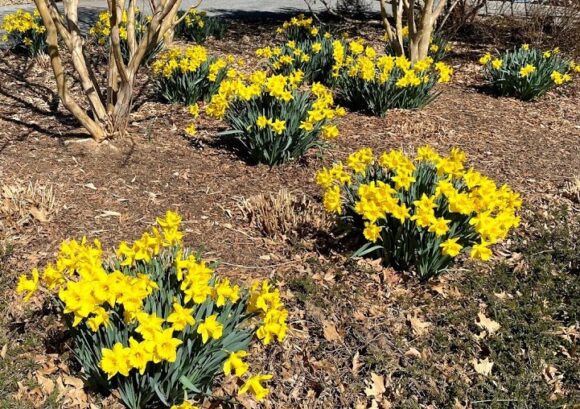
When the soil warms to 60 degrees, apply composted manure around daffodils and other spring bulbs so that soil organisms will produce nutrients to feed the bulbs for next year’s bloom. Also do not cut down the daffodil foliage as the nutrition from the foliage goes into the bulb for bloom next spring. 

In a few weeks apply composted manure and a light layer of fine bark mulch on all maintained areas of the garden now, then again in July and before putting the garden to bed in October.  The manure and mulch will begin to build the humus component.  

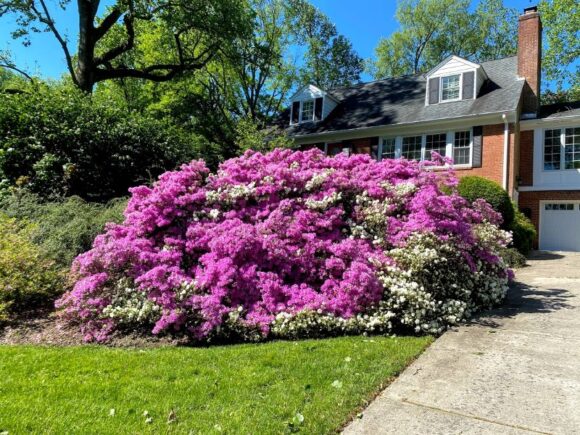
Rhododendrons create a blaze of color.

A note on mulch  – only use the natural brown mulch of natural non-colored wood; do not use the colored mulches, which contain chemicals, and do not use rubber mulch. 

A special word of caution on cocoa mulch. This product is highly toxic to dogs and cats — it is manufactured by Hershey and sold in many large garden centers.

It is made from the residue of chocolate products and others ingredients and contains a lethal ingredient that has resulted in the reported deaths of a number of cats and dogs that are attracted by the chocolate odor. It contains Theobromine, which is a Xanthine compound similar to the effects of caffeine and theophyliline. The symptoms for the animals are seizures and death within hours.   

I wrote about the carbon component in my April tips but wanted to emphasize its importance by stating it again. 

All living things including us are all carbon-based creatures. Humus brings carbon from the air into the soil.

Humus acts like a sponge and holds 90 percent of its weight in water. Because of its negative charge, plant nutrients stick to humus bringing nitrogen, calcium, phosphorus and other important elements to the plant, preventing these nutrients from washing away, acting like nature’s slow-release fertilizer.

Humus improves soil structure making it loose and friable, which helps plants to root in this environment with better access to nutrients, water and oxygen. Humus also helps to filter toxic chemicals from soil, much like carbon-based water filtration systems filter toxins from your water.

I recommend that you go online to Scientific American.com/article/Weed-Whacking Herbicide to check out the dangers of Round-Up. This is the most dangerous herbicide not only because of glyphosate, which is on the list by the World Health Organization as a chelating agent that causes cancer, but also because of the inert ingredients.

I ask that you are not swayed by the word ‘inert’ as the ingredients are anything but inert and those ingredients combined with Glyphosate are deadly to human cells. 

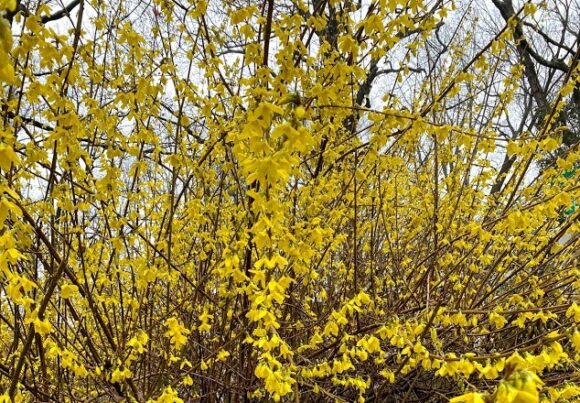
A yellow burst of color is offered by Forsythia in May.

Forsythia is in bloom with lovely fresh yellow blossoms.  If the bloom on your shrub is not as prolific as in previous years, prune out the old sparse wood after bloom ends.  

A favorite native tree is the Serviceberry tree, with its creamy panicle blooms, followed by small green leaves and within weeks, red fruit, and a delicious menu for our feathered friends. Before the birds eat all the fruit, pick some to make a delicious jelly for your morning toast.  

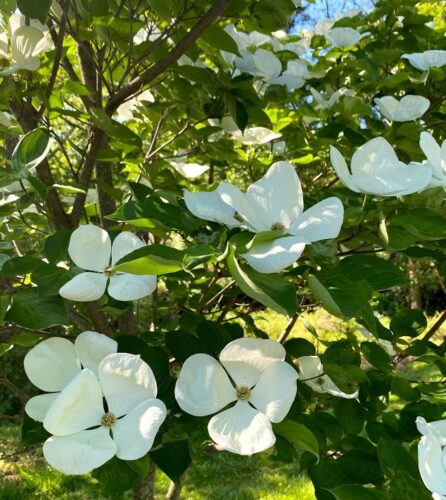
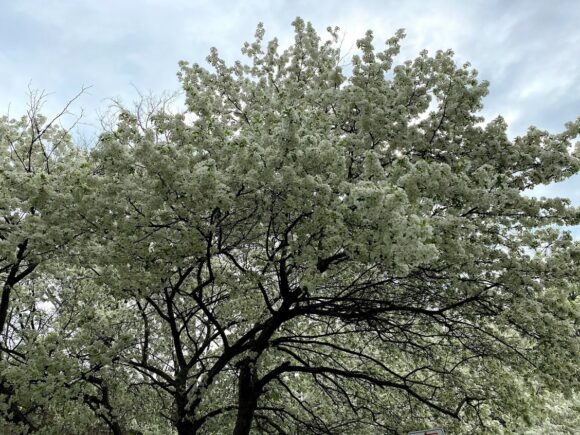
Here in my town of Old Lyme, the Magnolias, Cherries and Eastern Redbud are vying with one another to show their finery together with the graceful Dogwoods. Following the recent rains many of these trees are blooming at the same time or within a few weeks of one another. Their bloom will soon be over then we can look forward to rhododendrons, azaleas and mountain laurel into June. 

The graceful dogwood can be enjoyed in many locations this month.


The Carlesii Viburnum (also known as Korean Spice) is showing pink buds, opening to white flowers and their delightful fragrance fills the air outside my kitchen door. 

Covering the barn wall and scrambling up to the barn roof is my climbing hydrangea – bright green leaves emerging with hundreds of buds indicating that this beautiful climber will be laden with blossoms in summer. 

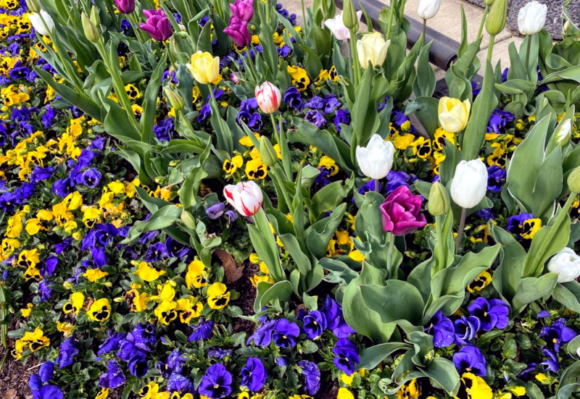
Tulips, creeping phlox, forget-me-nots, primroses and candytuft are bringing much-needed color to borders and rock gardens. 

May borders are often a delight to behold.

If you have not had time yet, for another week or two you can still prune your roses. Pull back the old mulch from around the base of the roses and in two weeks apply manure about six inches from the trunk of the plant. Then a week later reapply a layer of the brown natural mulch on top of the composted manure.

As well as building the humus component, these layers keep the roots cool, keep weeds at bay and help retain moisture. Do not mulch right up against the base of any plants as this encourages rodents to nest and gnaw on the plants. 

Beware of fungi that look like weird mushrooms in your mulch; this is a sign of Artillery fungus and can stick and invade the walls of your home and cause problems.  If you notice this fungus, you will need to remove all the mulch and get it off your property. 

Apply lime and manure around the lilacs, they like sweeter alkaline soil, thus the lime. By now, you may have already applied lime to the grass, which also enjoys sweeter soil and organic grub control to kill the Japanese beetle larvae – less food for moles. 

If you are making an organic vegetable garden this year, a garden measuring 16 ft. x 24 ft. can feed a family of four for a year, but keep the size within your needs and capability. Don’t work the soil if it is too wet or too dry.  

Double-digging is the best way to go; it takes time and effort but its well worth it – dig down about one foot and remove the top soil, put to one side, then dig down and loosen the next six inches of soil and add about three inches of composted manure then put back the top soil and add another three to four inches of manure.  

Do not rototill, as this will destroy soil structure. The gently loosened, aerated, fertile soil will give an excellent yield of fruits and vegetables in the garden. 

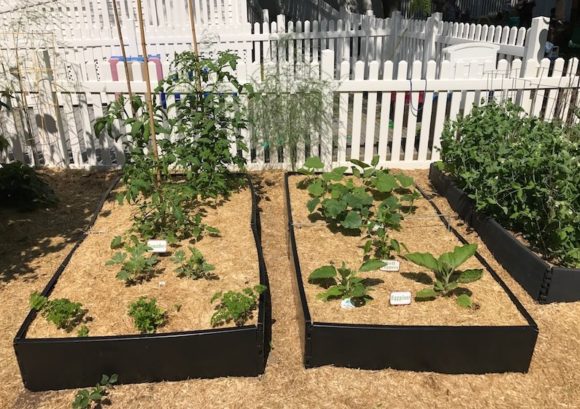
These vegetable beds are a work in progress.

I prefer 6 ft. x 4 ft. beds rather than rows; beds produce a larger yield of crops. In addition, beds make for ease of weeding and harvesting by having narrow, compacted soil or grass paths (having removed lawn from the area) in-between the beds. 

The vegetable garden should be situated on the south or southwest side of the property for maximum sun exposure. 

Make sure you remove as many weeds as possible by hand, before you even begin digging.  

You need a water source close by as vegetables require lots of water, particularly annual fruiting vegetables like tomatoes, which are hydroponics which means they are (mostly water). 

Rotate crops, by that I mean, do not plant the same vegetables in the same place as the previous year.  With this method you are preventing any soil-borne diseases from occurring.     

In the loosened soil, plant the vegetables plants so that they are touching, this forms a natural canopy, shading out weeds and helps retain moisture. 

I prefer to mulch the vegetable garden with composted manure, the reason being that manure, as mulch, does not cap. Capping is when mulch forms a crust, which does not allow water or air to penetrate to the roots of the plants.

Fence in the vegetable garden with a tall fence to keep animals out. At the base of the fence install eight inches of fine mesh chicken wire above ground and eight inches below ground to keep out the digging and burrowing animals. 

Organic insect control:

Insects do not like fragrance so plant fragrant plants like marigolds, nasturtium, lavender, nepeta and honeysuckle and roses to name a few.  

Encourage lacewings, which feed on aphids by planting marigolds and sunflowers,

Attract ground beetles by laying a log or a rock on the earth, under which the beetles can hide. These useful insects are nocturnal and eat slug and snail eggs, cabbage maggots, cutworms and even climb trees to feed on armyworms and tent caterpillars.  

Grass is now a vibrant shade of green, therefore when mowing, keep the blades of grass at about three inches; the taller blades attracts sunlight, promoting a healthier lawn. The taller blades also shade out weeds and help to retain moisture in the grass.   

When mowing, leave grass clippings on the lawn, the clippings are a natural source of nitrogen. If you have clover in the grass, clover is an added benefit as clover takes nitrogen from the air and fixes it in the soil providing additional nutrients for plant growth.

After flowering is over, prune flowering shrubs by 25 percent – do this task immediately before new buds set for next year. 

On a rainy day go shopping for any garden supplies that may be needed, then when the weather is dry you can be outdoors doing what you love and not indoors shopping. Buy good hoses — cheap ones will bend and crack.  

Peonies are becoming increasingly popular and are often, “a sight to behold.”

Peonies need plenty of water to produce flower buds. I have a 30 ft. long stand of Peonies in my field. The Peonies have been in the ground for over 40 years and are a sight to behold when in bloom. I give them lots of loving care with a light dressing of aged manure in early May. In a few weeks, I will pinch off the side buds while they are still small, leaving the terminal flower bud on each stalk, which will develop into a large main bloom.

Hydrangeas are a wetland plant and require plenty of water during the season, also applying manure and mulch around the base. If you have blue Hydrangeas and want a deeper color of blue, add some peat around the base of the plant — the acidity in the peat produces the color.   

If you need to prune a Hydrangea, which has become too large, then prune it immediately after flowering, in early September by about one third of the old wood and the weakest shoots. Do not wait, as Hydrangeas begin to develop bloom buds for next year later in September. 

If you wait to prune, you will not have bloom for next year. 

Blue hydrangeas start to develop their blooms for the following year in September of the current year. Photo by Gemma Evans on Unsplash.

My maternal grandmother’s favorite plant, the Lily of the Valley, soon will bloom tucked under the boxwood hedge on the north east side of the farmhouse near the front door. I love the delicate white flowers and fresh unique fragrance.  

When the lilacs have finished blooming, pinch off the withered flower clusters, do the same on the mountain laurel and rhododendrons in late June to ensure good blossoms next year. 

In mid-May apply composted manure, a light application of peat and fine bark mulch around all evergreens and rhododendrons, mountain laurel and azaleas; these plants are shallow-rooted and the mulch will keep the roots nourished, protected, warm and moist. 

Some annual seeds that may be planted outside in mid May are: Calendula, Coreopsis, Marigold, Nasturtium, Nicotiana and Zinnia.  

If you purchase annuals, on Mother’s Day weekend, place them in a sheltered spot on the south side of your home. Plant them no earlier than Memorial weekend as we can still get a late frost. 

Tuberous-rooted begonias, caladiums, cannas and elephant ears can be moved from porch or cold frame to a part shade area as the weather becomes warmer and there is no sign of frost in the forecast.   

If you staked trees, when they were planted last year, cut the stakes off at ground level. Do not pull them out of the roots as you could tear and therefore damage the root system.

Aphid tip: squish a few in your hand; dead aphids release a chemical that causes other aphids to drop off the plants. 

Another ants and aphids tip – if you drink mint tea, sprinkle an y left-over tea on the bugs, as they do not like the smell of mint.  

Mint spreads vigorously if left to its own devices so always plant this herb in a container. Photo by Eleanor Chen on Unsplash.

A word of caution on mint – plant mint only in containers, mint is tremendously invasive and can take over your garden.

When planting annuals, perennials, vegetables, trees, shrubs or evergreen, keep them watered but not drowned.   

Houseplants can be moved outdoors for their summer sojourn at the end of May.  However, do not put your African Violets outdoors as they will burn, but rather move them to a porch that is covered and shaded, or keep them indoors in a window that does not receive direct rays from the sun.

Wait until the soil warms up at the end of May to set out Dahlia tubers.  

Roses are not the troublesome creatures you have been led to believe. I prefer to plant David Austin roses; these shrub roses are repeat bloomers with lovely fragrances. Roses need at least four hours of sun per day, good air circulation, and excellent drainage. 

During their growing period from the beginning of June to mid August; add a little extra composted manure each month; it may be applied over the mulch.  Stop adding the manure in August so that the roses can go into a slow dormancy. 

Roses like the same growing conditions as Clematis and planted together in companionship planting, they flourish well together, with feet in the shade and head in the sun. Before you top up the soil around the roses, add water and check if the soil drains, roses need good drainage. Deep watering is recommended at least once a week. 

Plenty of stuff to keep you hopping, folks, and remember to keep your eye out for any pest trouble and when you spot it get on the ball immediately to avoid further problems. Carefully discard all herbicides and pesticides; these poisons have the same effect on your health as second-hand smoke.  

Your garden offers an anchor for peace and quiet enjoyment.  Enjoy the warmth, the gentle breeze, the earth’s fragrance and bloom and please remember to breathe. 

Contact Maureen at maureenhaseleyjones@gmail.com

About the author: Maureen Haseley-Jones, pictured left, is a member of a family of renowned horticultural artisans, whose landscaping heritage dates back to the 17th century. She is one of the founders, together with her son Ian, of, ‘The English Lady Landscape and Home Company.’ Maureen and Ian are landscape designers and garden experts, who believe that everyone deserves to live in an eco-conscious environment and enjoy the pleasure that it brings. Maureen learned her design skills from both her mother and grandmother, and honed her horticultural and construction skills while working in the family nursery and landscape business in the U.K. Her formal horticultural training was undertaken at the Royal Botanic Gardens at Kew in Surrey.
Gardening Tips for April from The English Lady:

You may consider the dandelion (pictured above) a weed but, in fact, its young foliage is delicious in salads Photo by Jan Ledermann on Unsplash.

Those April showers that come our way
They bring the flowers that bloom in May
And when it’s raining, lets not forget,
It isn’t raining rain at all, its raining violets

April is the month of activity in the garden, and our old nemesis, the weeds, are beginning to rear their heads, so before we actually begin to extract the little devils before they get too large or strong, I feel that I must point out the benefits of many weeds.

Nettle, for example, are food for butterflies, clover extracts nitrogen from the air and fixes it in the soil and oil from jewel weed soothes poison ivy rash. Whilst the young foliage of dandelions is great in salads and when cooked tastes like spinach and is healthy as it contains many nutrients.  Not to forget to mention that our songbirds and other wildlife depend on weed seeds as a food source.

But let us return to the actual weed-pulling, weeds must be pulled gently so the weed and roots do not break for when this happens thousands of weed seeds will reseed and you will find yourself with an endless cycle of unnecessary weeding. When careful weeding has been accomplished I suggest applying an organic weed pre-emergent, with a corn gluten base by Bradfield organics.

ROSES

Photo by Bailey Chenevey on Unsplash.

Plant bare root roses at the end of April and container roses in mid May.  Add manure with a fine bark mulch about one foot from the base of the roses not now but in the middle of May. Check my March tips to refresh yourself on pruning roses.

Be careful clearing winter debris from around rhododendrons, mountain laurel and azaleas, these evergreens have shallow roots and you do not want to chance the roots being exposed. If the winter weather did indeed erode soil around any roots, add a few inches of soil to cover the exposed roots, at the same time resettle the plant in place and apply manure and fine bark mulch as well as some peat, which evergreens enjoy at the beginning of May.

In late April, plant gladioli corms at two-week intervals so that you will get a succession of bloom.  Planting the corms eight inches down; the extra depth helps keep the heavy blooms erect.

The Red Lily beetle is rearing its ugly head therefore I suggest applying organic Neem oil on the Lilies when they are about four inches above ground to help prevent and deal with this infestation.

SOIL SOLARIZATION

This is an effective way to control many soil borne problems, specifically the tomato blight that causes fruit rot. Covering the soil with clear plastic at the end of April, for one to two months can generate high enough temperatures in the top six to 12 inches of soil to kill pests, nematodes, weed seeds and many disease organisms like the tomato blight.  This process has proved invaluable for home gardeners and the beneficial effects seem to last for several seasons.

To solarize, dig a trench several inches deep around the bed, and spread a thin, clear plastic film (1-4mils) over the bed.  Press the plastic into close contact with the soil and seal the edges by filling the trench with soil.

MAINTAINING AN ORGANIC GARDEN

I urge you to throw away any pesticides and herbicides; they have the same effect as second hand smoke on you, your children and pets.  I am covering the state with my lecture on Garden Earth to reconnect people’s hearts, hands and minds with the nourishing energy of Mother Nature’s Life giving gardens. 

I am teaching people how to create a beautiful landscape but more important how to maintain it organically. That has always been the philosophy of my family’s heritage in landscaping and the same modus operandii is carried through in our company. Check ‘what to use in the garden ‘ on this website for all organic product sources.  

Manure all the borders with composted manure in bags from the garden center or aged manure from the bottom of the farmer’s pile. Mulch with a fine brown hardwood mulch, and in the vegetable garden when it comes time to mulch, mulch with manure which will not ‘cap’, meaning it does not form a crust like other mulches and therefore air and water can get through to the roots of the plants where it is needed.      

If you did not apply an organic grub control on the grass in March, apply now to keep the grubs down and cut down on the mole population.    

The soil is the most important component of the growing business; compost, organic manure and peat amend the soil to rebuild its structure. The ratio is one part compost to three parts manure and applies peat to the planting mix in the ratio of one part peat to three parts manure when planting evergreens. 

Good soil structure assists with drainage, prevents compaction, and the rich nutrients that is the result as these amendments break down encourage the soil animals beneath the surface to work at full capacity. In a light soil such as sand, humus binds the sand particles together and in heavy soil such as clay it keeps the clay particles apart making room for air and drainage.  Other humus forming materials are leaves and seaweed tea which we will have for sale in the two few weeks has a root growth hormone, which assists plants to form a strong root system.   

Conditions in April are very favorable for new plant-root development, so with this in mind, transplant evergreen shrubs and new evergreens can be planted at the end of April.  With the organic manure and peat with the topsoil in the planting hole in the ratios I mentioned above. Give the roots a work out before planting to release them and open them up so the roots will reach into the surrounding soil for nutrients and water and will not dry out in the heat of summer.    

Organic fertilizer contains blood meal, bone meal, seaweed, poultry litter and natural grains. The bulky organic amendments mentioned above must be incorporated into the soil to improve soil texture and structure and many of the necessary nutrients to plants. 

Before and a month after you have applied the bulky amendments of manure and compost, test the soil to see if there are still some nutrient deficiencies, particularly in clay soil and correct these with some organic fertilizers. Its always better to under fertilize so go sparingly but do not be cheap with the bulk amendments.

When I moved into my farmhouse on the shore 14 years ago, I found soil that was sandy, which is good for drainage but without nutrients.  I began adding a few inches of manure to all planted borders in April, July and October and today when I put a spade in the ground to check the color of the soil in spring, it’s ‘black gold’. 

If you have used chemical fertilizers in the past, many of the soil organisms that play such an important role in maintaining natural fertility will have died off.        

The major plant nutrients are nitrogen (N), which promotes healthy leaf growth, phosphorus (P) for healthy root growth, and potassium for flower development and ripening wood. Other important nutrients are required such as sulphur, magnesium, calcium, boron and iron, but in lesser amounts.  The organic fertilizer provides all the important nutrients listed above.  When buying the products read the labels — if there is a word you cannot pronounce; it’s a chemical so do not buy it.  

The amendments and organic fertilizers are of plant and animal origin so gloves should be worn when using them as bacteria is present in them.  These bacteria are great for the plants and the soil but not good for your health.  These products tend to be slow acting; gradually making the nutrients available to the plant and the rewards are infinite.

Organic fertilizers are applied in spring around mid to late May when the plant has about six inches of growth; this allows for the fertilizer to become active when the plant is growing most rapidly.  Avoid applying fertilizers after the end of July as new growth may not go dormant before winter and the plant could suffer damage.  

As well as the amendments of organic aged manure, peat and/or compost you can incorporate an organic root development enhancer like the seaweed tea by soaking the top four inches of the soil around the base of the trunk when planting trees and shrubs.  Top dressing organic fertilizers are scattered over the soil surface and around the base of the plant, avoiding the foliage. 

Organic soil enhancers like manure and seaweed tea, when applied to the soil, are most quickly absorbed by plants and are especially useful for container planting and these teas are excellent for feeding throughout the growing season. Foliar (aka leaf) feeds with the teas are a quick-acting tonic and are useful in supplying nutrients to plants especially in the heat and humidity of mid summer.  

April is the time to tackle a new lawn or patch seed, use only good quality seed and organic fertilizers.   

DAFFODILS

The daffodils will soon be in bloom and when the bloom has past, do not cut the leaves of any of your spring flowering bulbs, the leaves send down energy into the bulbs to store for next season’s nutrition. 

WHEN TO PLANT ANNUALS

Do not be lulled into complacency with a few back-to-back warm days; we can still get a frost and I caution you not to plant annuals until Memorial weekend.  Do not cultivate around the perennials in the borders until mid May. Do not panic if you were not able to get the April tasks done until May, your garden will wait for you and the constancy that is Mother Nature will continue to keep your patch of earth flourishing. 

Enjoy the pleasure of being outdoors in warmer temperatures, inhaling the pungency of awakening soil and experience the connection with growing things. Do not overdo it; warm up the body before the garden labor and stay well hydrated with lots of water. We are inexorably entwined with the earth and know that even the smallest gesture of a garden has positive rewards and the effects not only on you but our planet. 

I’ll see you in your garden in May.

Contact Maureen at maureenhaseleyjones@gmail.com

About the author: Maureen Haseley-Jones, pictured left, is a member of a family of renowned horticultural artisans, whose landscaping heritage dates back to the 17th century. She is one of the founders, together with her son Ian, of, ‘The English Lady Landscape and Home Company.’ Maureen and Ian are landscape designers and garden experts, who believe that everyone deserves to live in an eco-conscious environment and enjoy the pleasure that it brings. Maureen learned her design skills from both her mother and grandmother, and honed her horticultural and construction skills while working in the family nursery and landscape business in the U.K. Her formal horticultural training was undertaken at the Royal Botanic Gardens at Kew in Surrey.
Gardening Tips for March from The English Lady: Spring is in the Air, Making it a Busy Month in the Garden

Spring has sprung! Let Maureen Haseley-Jones guide you through your many tasks in the garden during March.

March is a month of ‘wait and see’ as we anticipate walking around our gardens. This morning I walked outside, into a southwesterly breeze and a pleasantly warm sun. I took a deep breath and as I did, I caught the rich fragrance of the soil beginning to awaken.

All of us are itching to get into the garden and I believe that foray will be earlier than last year owing to our mild winter and the fact that frost did not penetrate deep into the ground.

The sodden soil will dry out in the next few weeks however, I urge you to tread gently as you tend our precious commodity of Mother Nature – soil. In that regard I am asking that you do not till the soil as tilling damages soil structure and can break friable root systems.

I am asking you to be patient right now and I know it’s not easy after being house-bound for so long with the pandemic. However, patience is what is necessary for ‘dyed in the wool’ gardeners for the next few weeks as all of us are chafing at the bit to get hands into the soil.

In the meantime, I suggest you go full steam ahead with planning for the upcoming season. Planning means organizing, which prevents gardening mistakes that can occur later in the season if you do not plan.

TREES

For example, let’s look at your trees – check the trees in your garden to evaluate any work that needs to be accomplished. It is less expensive for arborists to do tree work before the foliage appears and when the branches and the overall shape of the trees can be seen more clearly, the labor goes quickly and is less expensive with less strain on your budget.

What to look for:

  • Are there broken or dead limbs?
  • What branches require cabling?
  • If a tree appears to be 50% dead or unhealthy looking then it should be removed.

Also, think about whether

  • To change a medium shade area into a dappled shade area, allowing more sunlight in by thinning out the upper tree branches or tree canopy.
  • To remove a tree to transform a shade area into a sunny spot, which allows for a larger choice of plants available to you.

I always hesitate to remove a healthy tree but sometimes a tree may have been planted too close to the house and consequently the roots have undermined your home’s foundation and the shading over the roof has resulted in mold and mildew. If you need any of the above work to be done, please contact a licensed arborist.

There is an art to tree work knowing how, when and why to cut. Tree work  should to be carried out by a professional so that at the completion of the work, the effect is both practical and aesthetically pleasing.

An experienced arborist will also take into consideration the health of the trees. Having the work done by an arborist also avoids injury to yourself from falling from ladders or perhaps tree branches or trees falling on you.

PRUNING TASKS THAT YOU CAN ACCOMPLISH NOW

March is the month to prune evergreens before the new growth appears.

Hedges can be sheared for shape, so that any stubby ends will be concealed by new spring growth.  Please keep to the natural shape of the shrub – no round balls.

Prune Spirea to six inches from the ground.

In April, prune Lavender to three inches.

In late March, prune Sweet Pepper Bush (Clethra), cutting out the oldest branches.

Lilac – Prune back all old branches to various lengths before leaf growth begins, from two to five feet, retaining a natural shape. Sprinkle lime around the base of the Lilac and add manure in May.  Lilacs enjoy alkaline soil benefitting from lime.

Prune Butterfly Bush to two feet from the ground and in May apply composted manure around the base.

Prune Forsythia (pictured above) after it has bloomed, pruning out sparse flowering old wood.

Prune roses when the forsythia blooms.  If the roses have only been in the ground for one year, do not prune, wait until October.

Do not remove the protective mulch from around the base of the roses, wait until mid May, and then apply a dressing of manure and fine bark mulch.

You may be asking, ‘Why wait until May to apply manure’ The answer is that the soil needs to warm up to 55 degrees otherwise the nutrient benefits of the manure bacteria working with plant roots and soil organisms are not activated. I suggest you invest in an inexpensive soil thermometer to check the soil temperature. At soil temperature of 55 degrees apply a three- to four- inch layer of composted manure.

When April arrives, carefully begin to clear away winter debris, treading carefully on the soil to avoid damaging soil structure and friable root systems. When you have carefully cleared away the debris, make a clean edge to the borders with a sharp spade; this makes a pleasing effect on the look of your garden.

The best tool to use is a sharpened lawn edger, the blade is a half circle 9 inches wide and 4.5 inches deep with a flat top – this tool creates a deep edge. Face the bed and thrust the edger down to its full depth and push the cut soil into the bed. Continue along and then remove the spade and surplus clumps of soil and grass.

Edging was one of the first lessons I was taught at our family nursery in England; my great- grandfather was a strict taskmaster standing over me for quite a few days until I got the edging correct.

If you are contemplating the location of a new planting bed or expanding an existing one, here are some tips:

  • Think in terms of where you spend your leisure time outdoors where you can sit in close proximity to the new bed in order to enjoy the bloom, fragrance and structure of your plantings.
  • From indoors are you able to view and enjoy the new border?
  • Is it an area where there will not be drainage problems, erosion concerns or water pooling?
  • Is it convenient to tend and enjoy where you can place a bench or chair?
  • Will you be abler to water it with relative ease?

For an informal garden I prefer a curved bed – a curved line gives grace and fluidity. I lay out a garden hose in the desired shape and size of bed, adjust the hose until you are satisfied with the gentle curves.

As previously mentioned, the best tool to use to edge or cut out a new bed is a sharpened lawn edger, the blade is a half circle 9 inches wide and 4.5 inches deep with a flat top – this tool creates a deep edge. Face the bed and thrust the edger down to its full depth and push the cut soil into the bed. Continue along and then remove the hose and surplus clumps of soil and grass.

Manure – do not apply manure until the soil temperature has reached 55 degrees which is usually in May, but with a soil thermometer you can check earlier. Many of you who have been my radio listeners and lecture audiences know how I feel about that wonderful natural product.

Manure is not a fertilizer – it builds soil structure, aids in drainage and its bacteria encourages the millions of soil animals below the surface to come alive and work with the manure bacteria to produce nutrients for the roots of the plants.

TYPES OF MANURE:

Poultry manure – I know the odor can be rather objectionable, however, this manure contains about 2% nitrogen, one of the highest levels in any manure. If you have access to poultry manure, allow it to age for two months and then add it to the garden.

Horse manure is about 0.5 % nitrogen. If you obtain horse manure from a stable, which has sawdust on its floors – it should be pretty weed free. What I have done in the past is obtain horse and cow manure from stables and farms in April.  When you get it home, spread manure out in a flat area (not in a planting bed) then cover it with a tarp for a month.  This method will suffocate the weed seeds and encourage the manures to continue to decompose. A week before using horse and cow manure remove the tarp to allow the sun to further decompose it.

Cow manure is 0.25 % nitrogen and is the most available manure.  If you get horse and cow manure from the farm, ask the farmer to give you manure from the bottom of the pile so that it is already partially decomposed.

Compost pile:

If you do not have a compost pile, maybe it could go on your list for this season. Vegetable waste from the kitchen plus grass clippings, and wood pruning can be added to the pile. The high temperature in the compost kills the weed seed and cooks all those other necessary ingredients.  The ratio of compost and manure for your garden is 1 part compost to 3 parts manure – but if you do not have compost – manure will do the trick

**DO NOT apply fresh manure to the garden, as it will burn the plants.  If you do not have a source of manures from a farm, purchase composted manure in bags from the garden center.

To produce the best-planting environment, resulting in a soil that is ‘black gold’ apply 3 inches of composted manure to all planted areas in May, July and October.

Natural fine bark Mulch can be added later in May. Do not use buckwheat mulch as it flies everywhere. Do not, I repeat do no use cocoa mulch, which is poisonous to dogs and cats and please do not use the chemically colored red mulch.  The benefits of natural fine bark mulch is that mulch helps to retain the beneficial moisture in the soil and also aids to retard weeds as does Bradfield organics, a corn gluten based weed pre emergent.

THE HUMUS COMPONENT:

I know I have written about the importance of the Humus component for the soil but I feel I must continue to stress this fact.

In 1937 Franklin D Roosevelt told us ‘that the nation that destroys its soil destroys itself.’

Unfortunately, America has not heeded that warning. Precious soils in this country and around the world are being destroyed by dangerous practices used in industrialized agriculture as well as poisonous chemicals, which completely disrupts our eco system and poisons all living things.

In your own garden you can build and retain a rich growing environment by building the Humus component -We are all carbon-based creatures as is all life on earth. Not only humans but also our soil microbes need carbon to flourish. To attract carbon from the atmosphere into your soil you need to build the humus component.

HOW TO BUILD THE HUMUS COMPONENT:

Do not till soil – tilling breaks up soil structure.

First step – Add composted manure three times – in spring when the soil has reached a temperature of 55 degrees.  If the soil has not reached that temperature, the soil organisms are not able to work with the bacteria in the manure to produce nutrients for the roots of the plants.

This year, as we have not experienced deep frost therefore, the soil temperature may reach 55 degrees by the end of April or early May.  Add the manure again in July to continue to nourish your growing plants and again in October to protect and nourish your plants and roots through winter.    Manure is not a fertilizer; it builds soil structure and works with all the soil animals to keep a healthy disease- free growing environment.

Second step – Add wood chips in the form of brown fine bark mulch or wood chips that you produce from your garden;  these are aged wood chips combined with leaves, twigs and branches.

These two major steps build the humus component. If you do this in your own garden – not only will you be  helping to heal the planet but also produce the healthiest of gardens.

A question I am often asked is ‘can I put manure over mulch for example in my July garden’? The answer is ‘yes’ – the manure together with nature’s moisture and your own irrigation enables the manure to find its way easily into the soil and the roots of your plants.

WHAT EXACTLY DOES HUMUS DO?

Humus acts like a sponge and can hold 90% of its weight in water.

Because of its negative charge – plant nutrients stick to humus for nitrogen, calcium, phosphorus and minerals, which prevents these from washing away and acts as nature’s slow release fertilizer throughout the year.

Humus improves soil structure making it loose and friable, which helps plants to root in this soil to get better access to nutrients, water and oxygen.

Humus also helps’ filter’ toxic chemicals from the soil, mulch like carbon-based water filtration systems filter toxins from your water.

We are not able to control industrialized agricultural practices – but in your own garden you can make a difference. Feed the soil and it will feed the plants.

Once again, I’m getting a little ahead of myself. So back to a cloudy day at the end of March, at this time you can gradually begin to remove protective covering from shrubs and small trees. In exposed garden areas, where wind is a problem, leave the covering on until mid April. Cold wind is more damaging and drying to plants than extreme cold and frost.

FROST HEAVE:
If some perennials, trees and shrubs have heaved out of the ground, cover the roots with fresh topsoil or mulch until mid May when they can be settled back in place.

I just walked around the corner of my house to check on my trellis on the chimney where I have roses and clematis planted together. Roses and clematis are a delightful combination in a companion planting.

A companion  planting means the rose and the clematis planted together have the same growing needs, ‘feet in the shade and heads in the sun’. Each month beginning in May, add manure and mulch around the base of both. Discontinue feeding roses and clematis in mid August; this enables both plants to go into a necessary slow dormancy.

BACKSCRATCH:

When the lawn has dried out in April, rake lightly and remove excess debris such as leaves and dead twigs.  Raking gently raises the mat of the lawn, which enables the emerging grass to breathe again.

Aerating machines are useful to develop a healthy lawn.  Puncture holes with the aerator and pull out plugs of soil every four to six inches; following this treatment, root development takes off and thatch is reduced.  Do not use the large thatching machines, as these machines damage the grass.

GRASS FERTILIZER:

In April apply an organic fertilizer and organic grub control before the grass begins to grow.

Reseed bare or sparse spots after gently loosening the soil, liming and fertilizing, then cover the seed with salt hay to keep the seed warm and to prevent wind from blowing the seed away.  Water the seed for the first three weeks. Do not blast the area with water, which will scatter the seeds. As with lilacs, grass enjoys alkaline soil which is why we use lime for this purpose.

MOLES:
To keep the mole population at a minimum in your garden; apply organic grub control once a month from March for two months; less grubs, less food for the moles. When you see signs of moles, find the mole holes and insert Exlax which contains Senna, an organic herb. The moles eat the exlax, become dehydrated from defecation and die.  Apply organic Pre-emergent crabgrass killers in March and April.

VOLES:
Spread castor oil around the base of plants and keep mulch away from the base of the plants so that voles, which are canny little creatures are not able to hide there and gnaw on plants and roots.

DEADHEADING:
Do not cut off the leaves of the crocus as they bloom; the leaves make food for the bulbs for next season’s bloom.

DAFFODILS:
When the green shoots emerge; spread composted manure around the plants.

‘A host of golden daffodils.’ Photo by Sarah Mitchell-Baker on Unsplash.

CUTTING  DAFFODILS FOR DISPLAY INDOORS:
The stems release a sap like “goop” that harms other flowers.  Before adding Daffodils to an arrangement, cut the stems at an angle, and leave them in a vase half filled with lukewarm water for a couple of hours.  Discard that water and add the Daffodils to the other flowers.  If you recut the stems you will need to repeat the process. Change the water in the vase often.

PERENNIALS:
When perennials are about four inches above soil level, in May when soil is 55 degrees, apply composted manure around them to further encourage healthy growth.

DIVIDING PLANTS:
At the end of April or beginning of May, you can divide late blooming perennials that have been in the ground for four years or more; these divisions encourage stronger bloom.

Discard the older, inner parts of the clumps and plant the new outside portions.  Do not plant the new divisions any deeper than they were originally in the ground.

When dividing irises, barely cover the root system so they do not fall over – if Irises are planted too deep they will not bloom.

Pansies: pick the flowers regularly to encourage more bloom.

March is the time to plant the following seeds indoors: gaillardia, salvia, marigold, zinnia, petunia, snapdragon, stock and verbena. Before planting these seeds, soak seeds in warm water and plant them in sphagnum moss or coir. Coir is the outer shell or fiber of the Coconut, either of these two mediums prevents a disease called “damping off”, which can cause seeds to rot before germination.

Cover pots and seed trays with plastic wrap, which creates a mini-greenhouse, which provides moisture that seeds need to germinate.

Note: Remove the plastic once the seeds have germinated, as the soil needs to drain and needs air circulation around the emerging stems.

If you are going away on business, or on vacation reapply the plastic wrap over the pots and trays and prop some sticks or skewers in the corners. While you are away the seedlings will stay moist, make sure the seedlings do not come in contact with the plastic.

Start tuberous begonias, and caladiums indoors.

DORMANT SPRING SPRAYING of fruit trees, flowering cherry, crabapple, hawthorn, mountain ash and lilac can be done before the leaf buds open.

Call in a professional company and request that they use only organic products.

Houseplants – repot them if they need repotting in April.

GERANIUMS:

The plants that you brought indoors at the end of last season check them and when the new side shoots appear, cut them back to four inches and repot them in clean pots about and inch and a half larger with fresh potting soil.

Well, fellow gardeners I know you are getting excited to be in your gardens this season and I hope that these tips have given you plenty to think about to keep you busy for a while. Enjoy photo of lovely gardens that my son Ian and I have designed on Facebook and if you wish I suggest you contact Ian for a consultation and enjoy the photos on his website LlandscapesbyIan.co.

Enjoy being outdoors in spring sunshine and I look forward to seeing  you in your garden in April!

Contact Maureen at maureenhaseleyjones@gmail.com

About the author: Maureen Haseley-Jones, pictured left, is a member of a family of renowned horticultural artisans, whose landscaping heritage dates back to the 17th century. She is one of the founders, together with her son Ian, of, ‘The English Lady Landscape and Home Company.’ Maureen and Ian are landscape designers and garden experts, who believe that everyone deserves to live in an eco-conscious environment and enjoy the pleasure that it brings. Maureen learned her design skills from both her mother and grandmother, and honed her horticultural and construction skills while working in the family nursery and landscape business in the U.K. Her formal horticultural training was undertaken at the Royal Botanic Gardens at Kew in Surrey.